Dota 2 Vision Guide: Ward Placement, Dewarding, Map Control
Dota 2 Vision Guide 2026: Ward Placement, De-warding Strategies, and Map Control Basics
Vision wins Dota 2 games. Not because wards are “support chores,” but because information changes what every hero can safely do: where cores farm, when you can take a fight, how you set up pickoffs, and whether your team gets surprised by a smoke gank. This guide is built to stay useful beyond any single patch by focusing on timeless principles, repeatable warding frameworks, and practical dewarding habits that scale from beginner to high MMR.
By the end, you will know how to: (1) place wards that answer the right questions, (2) protect and replace vision on a schedule, (3) deward systematically instead of guessing, and (4) translate vision into map control, objectives, and wins.
Table of Contents
- 1. The Vision Mindset: What Wards Are For
- 2. Vision Mechanics You Must Understand
- 3. Vision Tools: Wards, True Sight, and Information Sources
- 4. A Repeatable Ward Placement Framework
- 5. Laning Phase Wards: Stability, Runes, and Gank Routes
- 6. Midgame Wards: Farming Safety and Rotation Control
- 7. Warding When Ahead vs When Behind
- 8. Objective Vision: Towers, Roshan, and Chokepoints
- 9. Dewarding: How to Remove Enemy Vision Consistently
- 10. Advanced Map Control: Layered Vision and Information Traps
- 11. Role Playbooks: Who Wards, When, and Why
- 12. Training Plan: Improve Vision Skills Faster
- 13. Common Vision Mistakes (and Fixes)
- 14. Practical Checklists for Real Matches
- 15. FAQ
- 16. Get Help Climbing Faster
1. The Vision Mindset: What Wards Are For
Most players think “warding” means placing an observer on a cliff because it feels standard. High-level vision control is different: you place vision to answer specific questions, then you act on the answers. If a ward doesn’t change decisions, it is rarely worth the time and risk used to place it.
1.1 The three questions every good ward answers
- Where can we farm safely right now? Wards should protect the next two minutes of farming patterns for your cores and enable efficient stacking, pushing, and rotations.
- Where can the enemy move to hurt us? This includes gank paths, smoke entry points, and the areas where enemy supports want to play to enable a core.
- Where can we force the next advantage? Vision is the setup for a kill, a tower, a rune control play, a Roshan attempt, or a map takeover.
1.2 Vision is not “ward spots.” It is a cycle.
Vision control is a loop that repeats all game:
- Predict where both teams want to play next (farm lanes, jungle, objective side).
- Place wards that reveal movement and protect your play.
- Deny enemy vision with sentries and smart deward routes.
- Exploit the information by taking fights and objectives where you have advantage.
- Replace wards as the map state changes (towers fall, lanes shift, cores move).
If you only place wards and do not deny or exploit, you are paying for information your team does not use. If you only deward and never replace, you are blind while the enemy adapts. Strong supports do both.
2. Vision Mechanics You Must Understand
You do not need to memorize every number to be effective. You do need to understand what creates visibility, what blocks it, and how elevation and terrain shape fights. If you routinely die “out of nowhere,” that is usually a vision problem before it is a mechanical problem.
2.1 Fog of war: what it really means
Dota 2 is an information game. If no allied unit (hero, creep, summon, ward, building) provides line of sight into an area, that area is hidden. The enemy can be standing there, casting spells, preparing a smoke break, or setting a trap. This is why the same “strong hero” can look unstoppable in one match and useless in another: the invisible team controls when and where fights happen.
2.2 Elevation and line of sight: why high ground is sacred
High ground vision matters because it changes who sees whom first. The side that sees first chooses: engage, disengage, or reposition. Many kills come from a simple sequence: ward on high ground, see enemy first, open with the correct disable, and chain the fight while the enemy scrambles.
Conversely, walking up blind high ground is one of the most consistent ways to lose teamfights. If your team must walk into an area, you should first create information: a ward, a summon, an illusion, a scouting spell, or a safe hero checking from range.
2.3 Day/night and vision denial as a concept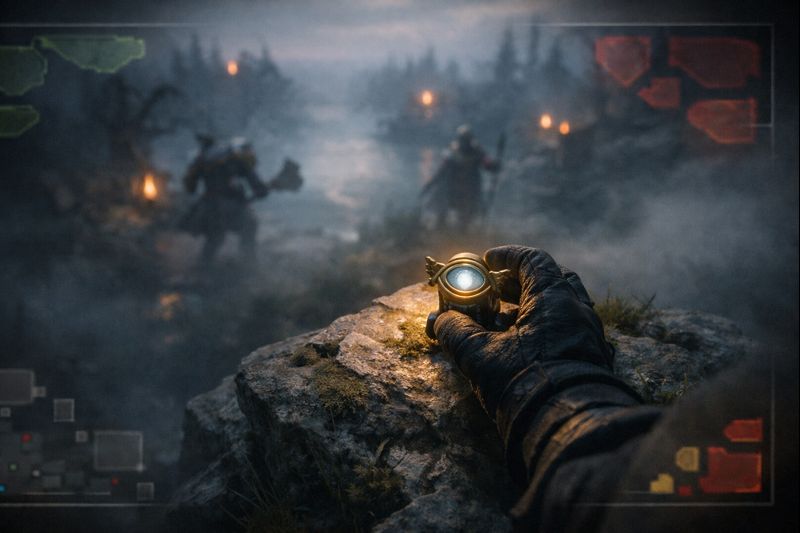
Dota has shifting vision conditions over time. You do not have to optimize for every timing window; you simply need to remember that some ganks become more reliable when vision is reduced, and some defensive positions become weaker. Treat “limited vision” moments as higher risk: you ward deeper only with protection, and you invest more into scouting before committing.
2.4 What “map control” actually is
Map control is not owning territory by standing there. It is owning territory because you have information + threat:
- Information: vision that tells you when enemies enter, rotate, or attempt objectives.
- Threat: heroes positioned to punish those movements (smoke, initiation, wave clear, tower pressure).
If you have vision but no threat, enemies ignore it. If you have threat but no vision, you guess and feed. The best teams align both.
3. Vision Tools: Wards, True Sight, and Information Sources
Wards are the obvious tool. But consistent vision control comes from combining multiple information sources so you are not dependent on a single observer surviving for its entire duration.
3.1 Observer wards: information that creates options
Observers are most valuable when they reveal movement, not just “an area.” A ward that shows a choke point, a ramp, or a common rotation path often gives more decision value than a ward that sees a large empty zone.
Good observer characteristics:
- Shows a likely enemy entry path.
- Protects a current farming triangle/jungle pattern.
- Connects to an objective plan (tower pressure, rune control, Roshan zone).
- Has a realistic replacement plan (where your next ward goes when the map shifts).
3.2 Sentry wards: true sight and the art of denial
Sentries do two jobs: they reveal invisible units and they enable dewarding. Many players waste sentries by placing them “just in case.” Strong players place sentries with a reason: to protect a lane from an invis hero, to secure an objective area, or to remove enemy vision so a move becomes safe.
Mindset shift: A sentry is rarely “defensive.” It is often offensive because it changes who can move first without being seen.
3.3 Other information sources most teams underuse
- Illusions and summons: cheap scouting that can check high ground and choke points without risking a real hero.
- Lane creeps: the simplest vision tool in the game. If you push waves, you gain information automatically.
- Buildings: towers and outposts provide vision; playing near them can reduce how many wards you need defensively.
- Smoke movement patterns: smoke does not replace wards; it changes how you use them. You ward to see smoke entry routes and you deward to prevent your own smoke from being read.
- Scan and scouting spells: use them to confirm suspicion, protect dangerous areas, and set up safe dewards.
- Data tools for review: match analysis sites can show where wards tend to be placed so you can learn patterns, then break them.
If you want to study vision habits, you can use public match analysis tools like OpenDota and Dotabuff to review ward maps and identify repeated “auto-ward” behaviors (then punish them in your own games).
4. A Repeatable Ward Placement Framework
When players ask “Where should I ward?”, they usually want a single spot. But the correct answer is a process. Use this framework in real matches and you will consistently place better wards without memorizing a library of locations.
4.1 Step 1: Identify the next two-minute objective
Good wards serve the next decision window. Ask:
- Are we trying to protect farming while our team hits key items?
- Are we preparing a smoke gank?
- Are we defending a tower or setting up a push?
- Are we controlling runes or the Roshan side of the map?
If you cannot name the next objective, your ward will often be generic, predictable, and low impact.
4.2 Step 2: Place vision on paths, not just zones
Most meaningful movement happens through chokepoints: ramps, jungle entrances, river crossings, and tight turns between camps. A ward that sees the “door” to an area often tells you more than a ward that sees the middle of the room.
4.3 Step 3: Plan your entry and exit before you walk in
Many supports die because they decide the ward location first and the route second. Reverse that. Before you place a deep ward, decide:
- Which teammate can stand nearby to protect you?
- Which spell or item helps you escape if you are spotted?
- Which lane is pushed so you have “natural” vision while you move?
- Do you need smoke to get in safely?
4.4 Step 4: Make the ward harder to deward
Predictability is the enemy of vision. If the enemy can guess your ward, they can remove it with one sentry and a few seconds of time. To reduce dewards:
- Offset from obvious spots: instead of the center of a cliff, consider a nearby angle that still shows the path you care about.
- Vary height and distance: sometimes a low-ground ward that sees a ramp approach is safer than a high-ground ward that gets instantly checked.
- Think in pairs: place a main ward for critical information and a secondary ward to catch the deward attempt or flank route.
- Time it: wards placed right before your team moves have immediate value even if removed later.
4.5 Step 5: Schedule replacement
Vision expires conceptually before it expires in-game. If your team changes sides of the map, your ward may become irrelevant even while it is alive. Train yourself to replace vision when:
- A tower falls (yours or theirs).
- Your carry changes farm pattern (jungle to lane, lane to triangle, triangle to enemy jungle).
- Your team gains or loses the ability to fight (big item timing, ultimate cooldowns).
- Roshan becomes a likely objective for either team.
5. Laning Phase Wards: Stability, Runes, and Gank Routes
Laning wards are about survival and lane efficiency. A perfect midgame ward does not matter if your lanes collapse early and your team spends the next ten minutes recovering.
5.1 The laning priorities that vision supports
- Protect your core’s first waves so they can secure early farm and level timing.
- Track support rotations so you can back off before a 3v2 happens.
- Control runes to prevent mid from getting surprised by a power spike.
- Enable pulls and denies by preventing enemy supports from blocking or contesting your small camp.
5.2 Warding to see ganks before they happen
In lane, you rarely need “deep” vision. You need early warning. The best laning wards often see:
- A river crossing or ramp approach (rotation from mid).
- A path between jungle and lane (support wraparound).
- The edge of the jungle that leads to a tower dive.
If you can see the enemy five seconds earlier, your core can reposition, you can prepare a counterplay, and ganks become wasted time for the enemy.
5.3 Rune and mid-lane vision basics
Mid is a high-leverage lane because levels and runes create fast rotations. A simple ward that reveals one side approach can reduce surprise ganks and help your mid decide whether to play aggressively or safely.
When possible, align your rune vision with your team’s plan: if your mid wants to rotate to one side lane, ensure you have information on that river path and a safe retreat route.
5.4 The first deward battle: protecting your lane ward
In many matches, the first sentry placements happen early. Do not treat early dewarding as random. Instead:
- Watch enemy support inventory timing. If they return to lane with sentries, assume your ward is being checked.
- Notice walking patterns. Supports often walk directly to “standard” ward cliffs without thinking.
- Use body language. If the enemy suddenly plays aggressively as they approach a spot, they may have removed your vision.
If your ward is dewarded, do not panic. Replace it with a slightly different angle that answers the same question but is less predictable. Repeat this and you will slowly win the vision war even in lane.
6. Midgame Wards: Farming Safety and Rotation Control
Midgame begins when towers start falling and heroes begin rotating in groups. This is where vision becomes the difference between a clean, efficient match and a chaotic sequence of random deaths.
6.1 The core midgame problem: “Where are they?”
In midgame, you are not warding to see five heroes at once. You are warding to detect movement patterns: who is showing on lanes, who is missing, and which side of the map is becoming dangerous.
A strong midgame ward often reveals one of these:
- Enemy entry into your farming jungle.
- Enemy support rotation toward mid for a smoke play.
- Enemy core shifting from lane to jungle (indicating farm pattern changes).
- Approach to a key objective area.
6.2 Protect the farm pattern, not the map
Many teams waste wards trying to “cover everything.” That is impossible. Instead, identify where your carry and mid want to farm for the next few minutes and place vision to protect that route.
Example approach:
- Your carry wants to farm two jungle camps and then show on a safe lane wave.
- Ward the most likely enemy entry point into that jungle.
- Ward the lane approach so you see rotations toward your carry when they show on the wave.
- Place a sentry in the same region if an invis threat exists or if you expect enemy observers there.
6.3 Rotation control: vision that enables kills
Midgame kills often happen when you catch a support moving alone or a core farming without backup. Wards that see chokepoints and ramps enable this by giving you time to set up a smoke or a wraparound.
When you want to fight, prioritize vision that:
- Shows a likely “next wave” location for the enemy core.
- Reveals the support path that protects that core.
- Creates a reliable initiation angle for your team.
6.4 Defensive midgame vision: preventing the collapse
If your team is under pressure, your goal is to reduce deaths while you recover. Defensive wards should:
- Reveal smoke entry ramps and jungle entrances.
- Protect the high ground approach to your key farming areas.
- Enable safe wave clear: you see them coming, you clear, you retreat.
Do not overextend to place “one more deep ward” while behind. The value of information is not worth the guaranteed death if you cannot protect the area.
7. Warding When Ahead vs When Behind
This is one of the most important concepts in the entire guide. Many players ward the same way regardless of game state, which is why their wards either feed gold or fail to prevent ganks.
7.1 When ahead: close the map and make the enemy guess
When you are ahead, you want to shrink the enemy’s safe space. Your wards should move forward, and your sentries should remove their ability to see you coming.
Goals when ahead:
- Ward on the enemy side to see their farming exits.
- Deward the lanes and jungle entrances that let them read your rotations.
- Hold vision near objectives so any attempt to defend becomes punishable.
- Maintain a “safety chain” so your team’s aggressive positions are not counterganked.
Key rule: aggressive wards require protection. If your team is ahead but split across the map with no ability to respond, deep wards still get removed and you still get picked off.
7.2 When behind: stabilize lanes and protect high-value areas
When behind, you do not “take map control” with a single ward. You earn it back step-by-step by preventing deaths and collecting safe farm.
Goals when behind:
- Ward near your remaining towers and high ground approaches.
- Prioritize the area your carry can safely farm without being forced into the open.
- Use sentries to remove enemy aggressive wards that enable dives.
- Use smoke defensively: not only to gank, but to place vision safely or escape pressure.
When behind, your best vision often comes from pushing waves. Even one additional lane pushed out creates natural information and buys time to place wards safely.
8. Objective Vision: Towers, Roshan, and Chokepoints
Objectives convert information into a win condition. You do not ward “because wards are good.” You ward to take something: towers, control of a side of the map, or a decisive fight around a major neutral objective.
8.1 Tower vision: siege is a vision problem
Tower pressure becomes much easier when you can see:
- Where the enemy will approach from to defend.
- Whether key defensive ultimates are positioned behind the tower.
- Which flank route can punish their defense if they commit.
When your team groups to hit a tower, place vision behind and to the sides of the tower area, not directly in front of it. The goal is to prevent the classic defense: five heroes wrapping through fog while you are tunnel-visioned on the tower.
8.2 Roshan vision: control the “permission to walk in”
Roshan is a predictable objective and therefore one of the most contested vision zones. You do not need to permanently ward the pit. You need to control when the enemy is allowed to enter the surrounding area without being seen.
Practical Roshan vision plan:
- Place one ward to see the most common approach path.
- Place one ward (or alternative scouting source) to see the flank that leads to a surprise initiation.
- Use sentries to remove enemy wards that would reveal your attempt.
- If you cannot hold the area, do not force Roshan blind. Instead, push waves and reset until your team can contest vision again.
8.3 Chokepoints and ramps: the “fight selection” wards
The best fight-selection wards do not just show a hero. They show the moment an enemy commits to a path. This gives your team time to choose whether to take the fight, dodge, or collapse with a numbers advantage.
Whenever you are unsure where to ward next, default to a ramp or jungle entrance that intersects two lanes of movement. Those locations tend to stay valuable even when the game state shifts.
9. Dewarding: How to Remove Enemy Vision Consistently
Dewarding is the difference between “we have wards” and “we control the map.” If the enemy can see your supports moving, your smoke breaks, and your tower setups, your plays become predictable. Removing that information is often worth more than placing an additional observer.
9.1 The dewarding mindset: you are hunting patterns
Players do not place wards randomly. They place them based on:
- Common ward habits (cliffs, rune vision, jungle entrances).
- Recent events (a fight happened here, a gank happened there).
- Current objectives (they want to farm this area, defend that tower).
If you learn to read what the enemy wants to do next, you will know where their wards likely are. Dewarding becomes predictable in a good way: you are not guessing; you are solving a map puzzle.
9.2 The “event-based deward” rule
After any major event, assume vision changed. Major events include:
- A tower falls.
- A big teamfight happens.
- Multiple heroes rotate to one side of the map.
- An invis hero becomes active (or a gem appears).
Right after these moments, supports often refresh vision in the new priority area. That is your window to punish: smoke to deward, bring backup, and remove their new wards before they get value.
9.3 How to deward safely without feeding
The most common deward mistake is walking alone to place a sentry on an obvious cliff. Good dewarding is a team action, even if only one teammate is nearby.
Safe dewarding procedure:
- Push a wave first if possible. It gives natural vision and forces enemies to show.
- Bring one teammate or position a core nearby who can react.
- Approach from a safe angle, not the obvious straight-line path.
- Use a scouting tool if you expect a trap (illusion, summon, spell, scan).
- Place the sentry, deward quickly, then leave. Do not linger “just in case.”
9.4 Sentry placement: coverage vs intention
Newer players place sentries to cover maximum area. Better players place sentries to answer a question:
- Do they have vision on the ramp we must walk up?
- Did they ward behind the tower we want to push?
- Is this the invis hero’s path into our carry’s farm pattern?
Sometimes the correct sentry is not centered on the cliff. Sometimes it is offset to catch a less obvious observer that still sees the movement you care about. Train yourself to think in “lines of sight,” not circles.
9.5 Baiting dewards and winning the vision war
High-level vision play includes baiting the enemy into predictable deward routes:
- Place a ward that is “tempting” to deward.
- Wait for the support to walk to the cliff.
- Kill them or force a defensive reaction.
- Then place your real ward deeper while the enemy is dead or distracted.
This is especially powerful when you are ahead and want to choke the map. Every support death is not just gold; it is also a window where the enemy cannot re-establish vision.
10. Advanced Map Control: Layered Vision and Information Traps
Once you understand basic warding and dewarding, you can start building “vision systems” that make your team’s moves safer and your enemy’s moves riskier.
10.1 Layered vision: the two-ward concept
Instead of one “perfect” ward, use two complementary wards:
- Contact ward: shows first contact with the enemy (entry ramp, river crossing).
- Follow-up ward: shows the continuation path (jungle corridor, retreat route).
This creates a time advantage. You see them enter, you predict where they go, and you respond earlier. It also makes dewarding harder because removing one ward does not fully blind you.
10.2 Vision denial by wave control
One of the most overlooked concepts: when you push lanes, the enemy must respond, and that response often reveals heroes on the map. This “soft vision” reduces how many observers you need. Conversely, if you never push waves, you are forced to rely on wards, and the enemy can win by dewarding you repeatedly.
Practical habit: before placing deep vision, coordinate with your team to shove a lane. It creates a safer entry and more reliable information.
10.3 “Empty map” reading: how to infer enemy location
Even with wards, you will not see every hero. Learn to read what is missing:
- If two lanes are pushed and no one shows, the enemy is likely grouped to smoke.
- If supports disappear right after a tower falls, they are likely warding the new defensive line.
- If a core stops showing on waves, they are farming jungle or preparing a fight with teammates.
This reading skill is what turns a ward from “nice information” into “we know what they’re doing.”
10.4 Modern maps and neutral vision objectives
Dota’s map and neutral elements evolve over time. When the map includes neutral vision sources (for example, captureable vision points), treat them as part of your warding plan: they provide predictable information, but also create predictable fights. If your team can hold them, you reduce ward burden. If the enemy holds them, you must either contest or route around their information advantage.
11. Role Playbooks: Who Wards, When, and Why
The biggest misunderstanding in pubs is “support wards, cores farm.” In winning teams, everyone contributes to vision in some way. Supports lead the process, but cores enable it by positioning, pushing waves, and occasionally carrying a ward when it is strategically correct.
11.1 Position 5: stability and defensive structure
As the hard support, your primary vision job is to protect the carry’s early game and maintain a safe fallback area as the match progresses. You often:
- Place the first laning wards and replace them as rotations begin.
- Invest in sentries to protect farming patterns and remove aggressive wards.
- Play behind cores and provide “safe” vision that prevents ambushes.
When behind, position 5 vision is about minimizing deaths. When ahead, it becomes about locking down the enemy’s exits and protecting your team’s siege setups.
11.2 Position 4: aggressive scouting and tempo vision
Position 4 often plays the map more actively: rotating, invading, and starting fights. Your vision should match that:
- Place aggressive wards that enable pickoffs.
- Coordinate dewards with smokes and rotations.
- Provide “contact” vision so initiators can start fights confidently.
If you are the tempo support, think of wards as the “permission slip” for your next move. Without vision, your rotations become coin flips.
11.3 Mid and offlane cores: enabling vision with wave pressure
Core contribution is often indirect. The fastest way a core helps vision control is by pushing lanes at the right times, forcing enemy heroes to show, and making it safer for supports to ward and deward.
In practical terms:
- If your support says “I need one hero near me to deward,” respond when possible. That one presence prevents support deaths.
- If your team wants to ward deep, push the nearest lane first. It reduces the risk dramatically.
- If you are split pushing, consider carrying a spare observer for the lane you are pressuring, especially in late game where a single pickoff decides the match.
11.4 Late game: everyone buys into vision
Late game fights are too decisive to be blind. It becomes normal for multiple heroes to carry detection or an extra ward because:
- One deward can open an objective window.
- One ward can prevent a smoke backstab.
- One fight can end the game.
In late game, treat vision like buyback: not glamorous, but essential.
12. Training Plan: Improve Vision Skills Faster
You can improve vision habits quickly if you train deliberately. Mechanical skill takes time; vision skill improves rapidly with structured review because it is largely decision-making and pattern recognition.
12.1 The 10-minute warding walk (practice lobby drill)
- Load a practice lobby alone.
- Walk from your base to common objective areas using “safe” routes and “dangerous” routes.
- Identify where you feel exposed and where you feel protected by terrain.
- Place hypothetical wards (mentally) that would make the dangerous route safe.
Do this on both sides of the map. Your goal is not memorization; it is understanding how ramps, entrances, and trees create ambush points.
12.2 The “why did I die?” replay review
After any match where you died repeatedly, review just your deaths and answer:
- Did we have vision of the approach path?
- Was a ward expired or irrelevant because the map shifted?
- Did we ignore information (enemy missing) and farmed anyway?
- Could a single ward on a choke point have prevented this?
This turns vague frustration into a specific fix. If you do this for five matches, you will start predicting ganks in real time.
12.3 The deward prediction habit
In your next ten matches, build one simple habit: whenever a tower falls, immediately ask “Where would I ward if I were them?” Then place a sentry on one likely spot with a teammate nearby. Even if you only succeed half the time at first, your success rate will rise as you learn patterns.
13. Common Vision Mistakes (and Fixes)
13.1 Placing wards too late
Problem: you ward after your carry already died twice in the same area.
Fix: ward proactively based on where your team wants to play next, not where you just died.
13.2 Warding “the whole map”
Problem: observers are scattered and do not protect any real farm pattern.
Fix: commit vision to the side your carry is using, then shift together when the team rotates.
13.3 Predictable cliff wards every time
Problem: your wards get dewarded instantly.
Fix: offset placements, vary angles, and prioritize chokepoint vision over “big circle” vision.
13.4 Dewarding alone
Problem: you feed while trying to remove enemy wards.
Fix: align dewards with wave push, smoke timing, or at least one nearby teammate.
13.5 Not using information
Problem: you see three heroes on a ward, but your team still farms forward and dies.
Fix: communicate clearly: ping, type short calls, and move your team’s farm pattern away from danger.
14. Practical Checklists for Real Matches
14.1 Quick warding checklist (before you place)
| Objective | What are we doing in the next 2 minutes? |
| Paths | Which ramp/entrance will enemies use to contest or gank? |
| Protection | Can a teammate cover me while I ward? |
| Exit | How do I leave if I get spotted? |
| Replacement | Where does our next ward go if we rotate or a tower falls? |
14.2 Quick dewarding checklist (before you commit)
| Trigger | Did a tower fall, fight happen, or smoke likely occur? |
| Buddy | Is one teammate close enough to punish a trap? |
| Confirm | Do we have wave pressure or scan to reduce risk? |
| Speed | Place sentry, deward, leave. Do not linger. |
| Replace | After dewarding, place your own ward to exploit the blind spot. |
14.3 Simple match plan: “Three wards that win games”
- Farm protection ward for your carry’s current pattern.
- Contact ward on a key entry ramp/chokepoint.
- Objective ward for the next tower or Roshan area.
If you maintain these three categories throughout the match (and remove enemy equivalents), you will feel the map become calmer and more controllable.
15. FAQ
Should I always ward high ground?
No. High ground wards can be powerful, but they are also predictable. Ward high ground when it answers a critical question and your team can protect or exploit it. Otherwise, low-ground chokepoint wards often survive longer and still give early-warning value.
How many sentries should I buy?
Buy sentries when you have a reason: invis threat, objective setup, deward window, or protecting a farm pattern. If you are guessing, you will overspend. If you are never buying, you will lose the information war.
What if my team ignores wards?
Use vision to protect the players who do listen (often the carry) and to create obvious, easy calls: “3 heroes top, play bottom,” or “they entered our jungle, back.” Simple, repeated communication often changes behavior over time.
How do I ward deep without dying?
Push a wave, bring one teammate, approach from a safe angle, and time it with your team’s movement. Deep warding is not a solo activity in most matches.
16. Get Help Climbing Faster
Vision control is one of the highest-return fundamentals in Dota 2 because it improves every other skill: farming efficiency, teamfighting, objective taking, and survivability. If you want faster progress with structured guidance, you can combine practice with high-level coaching and support play refinement.
Explore Boosteria’s Dota 2 services here: Dota 2 Boosting Prices.
For additional reading and reference, these community resources can help you deepen your understanding of vision mechanics and ward behavior: Liquipedia (Vision), Liquipedia (Observer Ward), Liquipedia (Sentry Ward), OpenDota, Dotabuff.