LoL Teamfight Fundamentals: Front-to-Back, Flanks & Focus
League Teamfight Fundamentals: Front-to-Back, Flanks, and Target Priority
Teamfights in LoL can look chaotic, but the best teams aren’t “winning chaos” — they’re executing a repeatable plan. When you consistently win teamfights, you convert them into objectives, towers, and eventually the Nexus. This guide is built to be timeless: instead of patch-specific tricks or champion-by-champion advice, you’ll learn durable principles that apply across ranks, metas, and team comps.
You’ll master three core teamfight frameworks:
- Front-to-back: the most reliable way to win fights when you have a real frontline and scaling damage.
- Flanks: how to create unfair angles, force the enemy to split attention, and delete key targets.
- Target priority: who to hit, when to swap, and how to avoid the #1 teamfight mistake: hitting the “best” target instead of the available target.
We’ll also cover positioning, engage timing, peel plans, vision setup, objective fights, and practical drills so you can improve quickly in solo queue.
Table of Contents
- 1) The Teamfight Mental Model (Timeless)
- 2) Roles in a Fight: Frontline, Backline, Divers, Peel
- 3) Win Conditions: The 10-Second Plan
- 4) Front-to-Back Fundamentals
- 5) Flanks: Timing, Angles, and Vision
- 6) Target Priority: “Hit What’s in Range” (With Rules)
- 7) Engage Timing: Cooldowns, Summoners, and Go Windows
- 8) Positioning & Spacing: Threat Ranges and Tethering
- 9) Vision Setup: Turning Fights into Free Wins
- 10) Objective Teamfights: Dragon/Baron/Towers
- 11) Common Team Comps and How to Fight Them
- 12) Shotcalling Templates for Solo Queue
- 13) Practice Drills & VOD Review Checklist
- 14) Common Mistakes (And the Fix)
- 15) Faster Improvement: Coaching, Duo, and Elo Goals
- 16) FAQ
1) The Teamfight Mental Model (Timeless)
Before mechanics, you need a clear mental model. In LoL, a teamfight is usually decided by three forces:
- Access: Who can reach the enemy damage dealers?
- Protection: Who can keep their own damage dealers alive?
- Time: Who wins if the fight lasts longer?
Most fights don’t end because someone “played better” in every way. They end because one side achieved one of these:
- Access advantage: a diver/assassin reaches a carry uncontested.
- Protection advantage: peel and frontline prevent access, letting carries free-hit.
- Time advantage: cooldown cycles and sustained damage outlast the enemy’s burst.
So your job is to identify which force your comp is built around, then play the fight to express it.
The simplest teamfight sentence: “We win if we keep our backline alive while hitting what’s in range; don’t chase, don’t split.”
Or: “We win if our flank arrives before the fight starts; we collapse when their peel is used.”
If you can say the sentence clearly, you can execute under pressure.
For official game basics and terminology, Riot’s learning resources are a helpful reference: LoL How to Play and Riot Support.
2) Roles in a Fight: Frontline, Backline, Divers, Peel
Champion names change, metas shift, but teamfight jobs stay consistent. Think in archetypes:
Frontline
Goal: occupy space, absorb first contact, and create a safe “line” for your backline. Frontline isn’t just about tankiness — it’s about positioning where the enemy must go through you to reach your carries.
- Good frontline stands between threats and carries, contesting angles.
- Bad frontline runs past enemies, leaving carries exposed and forcing panic kiting.
Backline (Primary DPS)
Goal: deal consistent damage while staying on a safe line. Backline players often lose fights by stepping forward too early (before enemy engage tools are used) or by kiting too far (leaving their frontline alone).
Divers / Engage
Goal: start the fight on your terms or break enemy formation. Divers win fights by forcing the enemy backline to stop DPS and spend tools defensively.
Assassins / Backline Threats
Goal: create lethal threat on priority targets. Even when assassins don’t kill, they can win by zoning (the carry can’t walk up, so damage disappears).
Peel / Anti-dive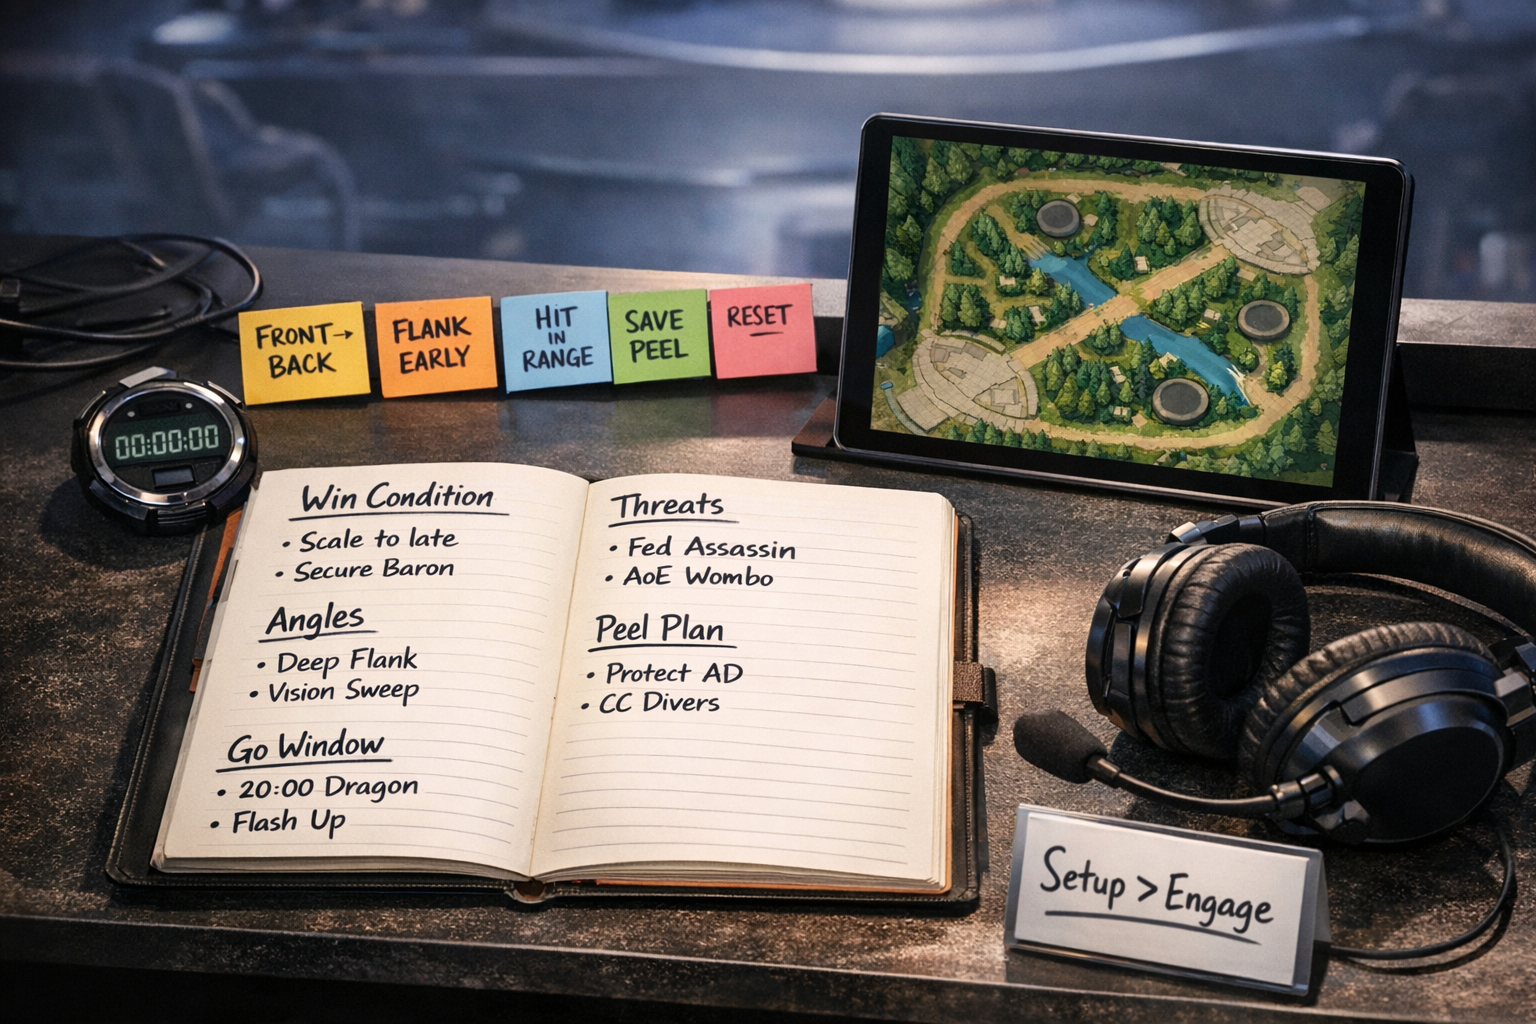
Goal: deny access. Peel is anything that prevents a diver from sticking: CC, shields, heals, knockbacks, slows, body-blocking, and even threatening counter-kill.
Key idea: You don’t need everyone to do everything. Teamfights become clean when each player understands their job.
3) Win Conditions: The 10-Second Plan
Before a fight starts, you have a small window to decide how you win. A win condition is not “kill their carry.” That’s the result. A real win condition is how your comp reliably creates winning damage, access, or time.
The 10-Second Win Condition Checklist
- Who wins long fights? (Do we outscale in sustained DPS or healing?)
- Who has better engage? (Do we start fights, or do we counter-engage?)
- Who is the biggest threat? (Which enemy role deletes our carries or frontline?)
- What is our safest damage path? (Front-to-back? poke first? flank?)
- What terrain helps us? (Chokes, open space, jungle corridors, objective pits.)
Examples of timeless win conditions
- Front-to-back: “Peel our carry, kite back, melt their frontline, then clean up.”
- Dive: “Stack engage tools, hit backline together, don’t split targets.”
- Pick: “Control vision, catch one target before the fight, then force objective.”
- Poke: “Chunk them before they can engage; fight only when they’re low.”
If your team can agree on one sentence in chat or pings, your win rate skyrockets because your fight becomes coordinated by default.
4) Front-to-Back Fundamentals
Front-to-back is the most consistent teamfight style in LoL because it reduces randomness. Instead of gambling on a perfect flank or a quick pick, you build a stable formation: frontline absorbs and controls space, backline deals safe damage, supports peel and sustain, and you win by staying organized longer than the enemy.
4.1 The front-to-back formation
Imagine two “lines”:
- Your frontline line: tanks/bruisers/support bodies that occupy the closest safe space.
- Your backline line: damage dealers positioned behind the frontline, close enough to hit, far enough to be safe.
The key is distance discipline. If your backline is too far, your frontline dies alone. If your backline is too close, they get engaged on first. You want a tether: close enough to help, far enough to live.
4.2 “Hit what’s in range” is not lazy — it’s correct
Front-to-back usually means you start by hitting the enemy frontline, because that’s what is safely reachable. The enemy frontline’s job is to be hittable. If they walk into your range, punish it.
What good front-to-back looks like:
- Your frontline does not abandon the carry to chase a kill.
- Your carry does not walk past the frontline to “reach their carry.”
- Your support saves at least one key peel tool for the first diver.
- Your team focuses the closest threat first, then swaps only when a better target becomes safely available.
4.3 Peel plans: decide before the fight
Peel fails when everyone peels “a little,” too late. Peel succeeds when you assign priorities:
- Primary peel tools are reserved for the biggest backline threat.
- Secondary tools are used to slow the second wave or prevent re-engage.
Even in solo queue, you can do this with simple communication:
- “Peel me” (carry)
- “Hold CC for diver” (support)
- “Don’t chase, front-to-back” (anyone)
4.4 Kiting patterns that win front-to-back
Kiting is not running away. It’s moving while preserving damage uptime. A simple pattern:
- Step to maintain safe spacing from threats.
- Hit the closest valid target.
- Reset to a new safe point (often behind your frontline’s next position).
When you kite, avoid the two extremes:
- Over-kiting: you retreat so far you deal no damage and your frontline dies.
- Under-kiting: you stand still and get engaged on when threat ranges reach you.
4.5 Frontline discipline: the “rubber band” rule
Frontline should feel like a rubber band: it stretches forward to create space, then snaps back to protect the carry when the enemy dives. If your frontline only goes forward, your backline gets isolated. If your frontline only retreats, you concede space and lose objectives.
4.6 The front-to-back win condition in one paragraph
Set vision, arrive early, hold formation, absorb engage, peel the first diver, hit the closest threat, and only swap to the enemy carry when it’s safe and guaranteed. If you do this reliably, you’ll beat mechanically stronger opponents who fight without structure.
5) Flanks: Timing, Angles, and Vision
A flank is not “walking behind them.” A real flank is an angle advantage: you threaten the enemy backline from a direction their frontline cannot easily cover, forcing them to split attention or burn defensive tools early.
Flanks are powerful, but they’re also the fastest way to throw games if mistimed. A bad flank arrives late, fights 1v5, and dies before the real fight starts.
5.1 The three requirements of a good flank
- Timing: you must be in position before the fight begins.
- Information: you need vision or certainty about where the enemy is.
- Connection: your team must be able to follow or benefit (collapse, objective, zoning).
5.2 The “early, patient, lethal” rule
Most successful flanks follow this sequence:
- Early: move to the flank route before the objective spawns or before teams collide.
- Patient: don’t reveal yourself too soon; let the enemy commit forward.
- Lethal: hit when your team can pressure from the front and you can pressure from the side/back.
5.3 Flanking jobs: kill vs zone
A flank doesn’t always need a kill. There are two winning flank outcomes:
- Kill flank: you collapse onto the backline and secure a fast elimination.
- Zone flank: you threaten the backline so they cannot step up, reducing their DPS while your team wins the front fight.
Zone flanks are underappreciated. If the enemy carry is forced to run, your team effectively gains a numbers advantage even without a kill.
5.4 How to create flank windows
Flanks become easier when the enemy lacks one of these:
- Vision control (they can’t track you)
- Peel tools (they can’t stop you)
- Space (terrain funnels them into predictable routes)
So you create a flank window by:
- Clearing wards and denying information.
- Forcing peel cooldowns earlier (small skirmish, poke, or previous fight).
- Arriving first to objectives so the enemy has to walk into you.
5.5 Anti-flank: how to stop enemy angles
Stopping flanks is mostly about respecting fog and owning space.
- Don’t over-facecheck. If you must check, do it with numbers and tools.
- Hold a “bodyguard” zone. A support or bruiser shadows the carry at the edge of vision.
- Ward deeper than you think. Defensive wards near your backline are often too late; you need wards on flank routes before they reach you.
- Play near walls carefully. Walls and corners are flank multipliers because they hide approach paths.
When you suspect a flank, you don’t need perfect information. You just need to tighten formation until the threat is revealed.
6) Target Priority: “Hit What’s in Range” (With Rules)
Target priority is the most misunderstood part of teamfights. Players often tunnel on the “most valuable” target (usually the enemy carry) and ignore the correct target: the one you can kill without dying.
Timeless rule #1: If you die trying to hit a carry, you usually lose the fight — because dead champions deal zero damage and provide zero peel.
6.1 The target priority ladder
In most standard fights, your target choice flows like this:
- Immediate lethal threat in your range (diver/assassin hitting your carry)
- Closest frontline / closest safe target (front-to-back baseline)
- Exposed backline (only when safely reachable or caught)
- Cleanup targets (low HP runners, stragglers, re-engage threats)
6.2 “Hit what’s in range” doesn’t mean “never swap”
Swapping targets is correct when one of these happens:
- A carry steps too close and becomes a safe target.
- A key defender is removed, opening access to the backline.
- A priority threat uses mobility and is now punishable.
- Your team creates CC lock on a high value target you can actually finish.
Timeless rule #2: Swap targets to increase certainty, not to chase hope.
6.3 The “threat-based” target priority approach
A better way to think about focus is: kill the thing that changes the fight fastest.
Examples:
- If an enemy diver is on your carry, killing the diver restores your carry’s DPS and wins time.
- If the enemy frontline is overextended, killing them collapses the fight into a 5v4 and gives space.
- If the enemy carry is exposed with no peel, deleting them ends the fight instantly.
6.4 Who should focus what? (By role)
Roles often have different correct targets at the same moment:
- Carry DPS: closest safe target, with quick swaps on exposed threats.
- Frontline: control space, disrupt divers, and deny access paths.
- Divers: coordinate burst on the same backline target or zone them out.
- Support: peel the biggest threat first, then layer CC on the nearest danger.
This is why “focus the carry” spam often fails. Focus calls must match what each role can actually reach.
6.5 The anti-tilt rule: stop target arguments mid-fight
In solo queue, teammates sometimes flame: “Why are you hitting tank?” The correct response is not arguing — it’s executing. If the tank is the closest safe target and your team has no access angle, hitting tank is correct. The argument ends when you win the fight.
7) Engage Timing: Cooldowns, Summoners, and Go Windows
Teamfights are rarely about raw damage. They’re about timing: who uses key tools first, who holds tools for the second wave, and who engages when the enemy cannot respond.
7.1 What is a “go window”?
A go window is a moment where you can commit and the enemy can’t properly answer. Go windows are created when:
- A major enemy defensive cooldown is down.
- An enemy carry has no summoner to escape or survive burst.
- An enemy frontline is separated from their backline.
- The enemy is entering a choke with limited movement options.
Even without perfect tracking, you can play around visible information: “They just used mobility,” “They just used the save,” “They are clumped in a corridor.”
7.2 Cooldown economy: don’t stack everything instantly
Many teams lose by using all tools at once on the first target they see. Good teams win by layering tools:
- First layer: start the fight and force a response.
- Second layer: punish when the response is down.
- Third layer: stop re-engage and finish cleanup.
Layering creates time advantage: the enemy runs out of answers while you still have tools.
7.3 Summoner spell logic (timeless)
Summoners are often the true win condition. If an enemy carry has no escape or defensive summoner, your team can commit more confidently. If your carry has no defensive summoner, your team must play tighter and prioritize peel.
Practical rule: If your carry’s defense is down, fight slower. If the enemy carry’s defense is down, fight faster.
7.4 The “first contact” mistake
Teams often engage the moment they see someone, even if it’s a bad angle. Ask one quick question:
“If we go now, can our damage hit?”
If your backline cannot follow, your engage becomes a donation. If your engage forces your backline to step into danger to help, you’re flipping the fight.
7.5 Disengage is a teamfight skill
Sometimes the best engage is not engaging. If the enemy has a stronger first contact, you can win by disengaging their initial commit and re-engaging after key tools are used.
Disengage tools include slows, knockbacks, zoning threats, and simple movement discipline (kite back together, not in different directions).
8) Positioning & Spacing: Threat Ranges and Tethering
Positioning is the difference between “I got one-shot” and “I carried the fight.” It’s not just where you stand — it’s where you stand relative to threat ranges.
8.1 Threat ranges: the invisible circles
Every champion has a “threat circle”: how far they can reach to start lethal pressure. Good positioning means you’re rarely inside multiple threat circles at once unless your team is ready to punish.
Timeless positioning rule: Don’t enter a threat circle unless you are trading for something: damage, an objective, or a decisive advantage.
8.2 The triangle: you, your frontline, their threats
In most fights, you want a stable triangle:
- You (carry) are behind your frontline.
- Your frontline is between you and threats.
- Threats must walk through frontline space to reach you.
When the triangle breaks (your frontline too far forward, you too far forward, or threats coming from the side), you must adjust: either retreat, tighten, or rotate angle.
8.3 Tethering: staying close without being catchable
Tethering is the skill of keeping an optimal distance: close enough to deal damage and receive peel, far enough to avoid instant engage.
To practice tethering, pick one enemy threat and repeatedly ask: “Am I just outside their reach?” If yes, you’re likely positioned well. If no, you need to kite back, reposition, or wait for their tool to be used.
8.4 Side positioning: don’t stand on the same line as your team
One of the most common teamfight losses is clumping: multiple carries stand on the same angle, making them vulnerable to the same engage and the same AoE damage.
Good teams create staggered lines:
- Frontline occupies space in front.
- Backline spreads slightly to avoid shared punishment.
- Support stays close enough to peel but not stacked on the carry.
8.5 Fighting in open space vs chokes
- Open space: favors kiting, spacing, and front-to-back consistency.
- Chokes: favor engage, AoE, and flanks (but also punish facechecks).
Timeless macro tie-in: if your comp wants front-to-back, try to fight in open space with vision. If your comp wants burst engage, chokes are your friend.
9) Vision Setup: Turning Fights into Free Wins
Vision is a teamfight multiplier. Good vision makes fights feel “easy” because you start with information, positioning, and angle advantage. Bad vision makes fights feel like coin flips because you’re surprised by flanks and forced into chokes.
9.1 The three stages of vision before a fight
- Advance vision: wards placed early on likely routes and flank paths.
- Control vision: deny enemy wards with sweepers and control wards.
- Hold vision: protect the area you warded so it stays yours until the fight.
Many players do stage 1 but skip stage 3. If you ward but then leave the area, the ward often dies and you lose the advantage right before the objective.
9.2 Vision and flanks
Flanks depend on fog. If the enemy sees you move to a flank, the flank often becomes worthless. That means flanks are best when you either:
- Control vision so they can’t see your route, or
- Threaten a flank so strongly that they must play scared even without seeing you.
9.3 Vision discipline: don’t trade your life for a ward
Facechecking to place a ward is one of the most common ways to lose objectives. A single death before an objective can decide the game. If you can’t safely ward, you must change the plan: group, use tools, or give space temporarily.
9.4 Practical vision rules for teamfights
- Ward flank routes first. The lane is often less dangerous than the side angles.
- Sweep where you want to stand. If you want to hold a river entrance, remove wards there.
- Don’t start objectives blind. If you don’t know where the enemy is, you’re inviting a steal or a collapse.
10) Objective Teamfights: Dragon/Baron/Towers
Objective fights are different from random mid-lane fights because both teams are pulled into predictable terrain. This makes setup and roles even more important.
10.1 The most important objective rule: arrive first
Arriving first isn’t just about being there — it’s about claiming space, setting vision, and forcing the enemy to walk into you. When you arrive late, you facecheck, you lose angles, and you often lose summoners before the real fight begins.
10.2 The “three zones” of an objective fight
- Front zone: the entrance the enemy must use (your frontline holds this).
- Back zone: where your damage stands safely (your peel protects this).
- Side zone: flank routes and vision pockets (your flankers or warders manage this).
If you lose control of the side zone, you invite a flank. If you lose control of the front zone, you get walked on. If your back zone is too far, you have no DPS.
10.3 When to start the objective vs when to turn
Many teams lose by committing to the objective while the enemy is in position to fight. A timeless rule:
Start the objective when you can force the enemy to facecheck or when you can disengage and turn cleanly.
“Turning” is winning when the enemy walks in. But turning requires discipline: you must stop hitting the objective together, focus the first enemy who enters, and commit as a team.
10.4 Tower and base fights
In tower fights, frontline often matters more because towers compress space. If you’re defending, look for a counter-engage go window when the enemy steps too far forward. If you’re attacking, don’t dive just because you can — dive because your wave, cooldowns, and follow-up are aligned.
10.5 Smite pressure and fight shape
Even if you’re not the one securing objectives, you should understand smite pressure changes fight behavior. Teams often hold abilities to burst the objective, which means they might be weaker in the first seconds of the fight. Recognize those windows: if the enemy is “looking at the pit,” your flank angle might be free.
11) Common Team Comps and How to Fight Them
You don’t need to memorize metas. You need to identify the shape of comps. Here are timeless comp patterns and how to respond.
11.1 Front-to-back vs front-to-back
In mirrored fights, the winner is usually the team with better:
- Peel timing (denying divers)
- Target selection (hitting the closest safe threat)
- Formation discipline (not overchasing)
These fights reward patience. Don’t force risky angles; let the enemy make the first spacing error.
11.2 Dive comp vs front-to-back
Dive wants to break formation and kill the backline quickly. Front-to-back wants to survive the first wave and win the extended fight.
Front-to-back keys:
- Group tighter, keep peel tools ready.
- Don’t step into fog where dive can start unseen.
- Focus the first diver that commits; punish overextension.
Dive keys:
- Hit together (same target, same timing).
- Don’t trickle in; wait for go window and commit as a unit.
- Use flanks to split peel, not to start 1v5.
11.3 Pick comp (catch) vs grouped team
Pick comps win before the fight by catching someone rotating or warding alone. If you’re facing pick:
- Reduce solo facechecks; move as 2–3 when entering fog.
- Ward earlier and deeper so you don’t have to ward last-second.
- Force grouped objective setups where your formation is strong.
11.4 Poke vs engage
Poke wants time and space. Engage wants one clean commit. If you’re poke:
- Don’t hard start objectives that trap you in a pit.
- Use vision to see engages early and kite back.
- Fight only when poke has created a health advantage.
If you’re engage vs poke:
- Force them into chokes or into objective timers.
- Use sweepers to deny poke setup and remove safe angles.
- Commit decisively when a target is chunked or mispositioned.
11.5 Wombo vs spread
AoE burst comps thrive on clumping. The response is spacing and patience. Spread your backline, avoid predictable choke entries, and don’t all stand on the same line behind your frontline.
12) Shotcalling Templates for Solo Queue
You don’t need long speeches. You need short, correct calls that align the team.
12.1 Before the fight
- “Front-to-back.”
- “Play for peel.”
- “Set vision, don’t facecheck.”
- “Wait cooldowns / wait them to walk in.”
- “I’m flanking, don’t start yet.”
12.2 During the fight
- “Kite back.”
- “Hit closest.”
- “Peel carry.”
- “Turn!” (when enemy walks in)
- “Reset, don’t chase.”
12.3 After the fight
- “Objective now.”
- “Push mid then reset.”
- “Don’t overstay.”
These calls work because they focus on timeless execution, not blaming or complex planning.
13) Practice Drills & VOD Review Checklist
Improvement is faster when you practice the same fundamentals repeatedly. Here are drills that build real teamfight skill.
13.1 The “front-to-back only” drill
For 10 games, commit to a strict rule: never step past your frontline unless the enemy’s engage tools are clearly used or the enemy backline is exposed. Your goal is to build discipline, not highlight plays.
13.2 The “threat circle” drill
Pick one enemy champion each fight and mentally track their lethal range. Position just outside it. If you die to that champion, write down the moment you entered their range and why.
13.3 The “flank timing” drill (for flankers)
When an objective is spawning, practice arriving 30–45 seconds earlier than you normally would. Set vision, hide, and wait. Your success metric is not kills — it’s whether the enemy backline had to play scared and lost damage uptime.
13.4 The 60-second VOD checklist (after each loss)
- What was our win condition? (Could we say it?)
- Did we arrive first or late?
- Did we have vision on flanks?
- Did our carry die first? If yes, why (angle, cooldowns, peel failure)?
- Did we split targets? If yes, who should have hit what?
- Did we chase too far? If yes, what objective did we miss?
Do this consistently and your decision-making becomes automatic.
14) Common Mistakes (And the Fix)
Mistake 1: Everyone tries to kill the carry through the frontline
Fix: Front-to-back first. Hit what’s in range. Only swap when a carry is safely reachable or caught.
Mistake 2: Late to objectives, forced to facecheck
Fix: Move earlier. Vision first, then objective. If you can’t safely ward, group and reclaim space before committing.
Mistake 3: Frontline overchases, backline gets dove
Fix: Rubber band rule. Frontline must return when divers commit. Protect your carry’s uptime.
Mistake 4: Flank arrives after fight starts
Fix: Early, patient, lethal. If you can’t arrive early, don’t flank — play front-to-back instead.
Mistake 5: Over-kiting and doing zero damage
Fix: Kite with purpose: step, hit, reset. Stay tethered to your frontline when safe.
Mistake 6: Burning all cooldowns at once
Fix: Layer tools. Force response, punish response, stop re-engage, then clean up.
Mistake 7: Winning fight but throwing the conversion
Fix: After winning, take the highest-value safe objective (tower, dragon, Baron setup) and reset before death timers end.
15) Faster Improvement: Coaching, Duo, and Elo Goals
Teamfight fundamentals improve fastest when you combine knowledge with repetition and feedback. If you’re aiming for a clear Elo milestone (or you want to break a plateau), structured help can shorten the timeline dramatically — especially when your main issue is decision-making under pressure rather than mechanics.
If you’re looking for support tailored to LoL rank goals, you can check Boosteria’s pricing here: Elo Boost Prices.
Whether you climb via self-improvement, duo coordination, or coaching, the same fundamentals in this guide remain your foundation: clear win conditions, clean formation, correct target priority, disciplined flanks, and strong objective setup.
16) FAQ
Is front-to-back always the best way to fight?
No — it’s the most reliable baseline. If your comp is built for dive, pick, or wombo, you may need flanks or fast engages. But even those comps benefit from front-to-back discipline when the “ideal” fight isn’t available.
How do I know when to flank vs group?
Flank when you can arrive early, have vision control, and your team can pressure from the front. If any of those are missing, grouping is usually safer and more consistent.
What’s the #1 target priority rule for carries?
Hit what’s in range without dying. Swap only when a better target becomes safely reachable or locked down.
Why do I keep dying first in fights?
Most “first deaths” are positioning problems: stepping into threat ranges too early, fighting without vision, or being too far from peel. Use the threat circle drill and tighten tethering to your frontline.
How do I stop chasing after winning a fight?
Decide the conversion before you fight: “If we win, we take tower/dragon and reset.” After the fight, ping the objective and move as a group. Chasing kills is often lower value than guaranteed objectives.
Key Takeaways (Quick Cheat Sheet)
- Front-to-back wins games: hold formation, peel, hit closest safe target, swap only when guaranteed.
- Flanks must be early: arrive before the fight, stay patient, strike when your team can follow.
- Target priority is threat-based: kill what changes the fight fastest, not what looks most valuable.
- Timing beats mechanics: play around go windows, cooldown layering, and summoner advantages.
- Vision makes fights easy: deny flanks, avoid facechecks, and arrive first to objectives.