Master Ability Timing in Marvel Rivals: Combos & Ult Tracking
How to Master Ability Timing in Marvel Rivals (2026): Combo Chains and Ult Tracking Basics
Mechanical aim matters, but ability timing is what turns good players into fight-winning playmakers in Marvel Rivals. Timing decides whether your engage lands, whether your burst actually converts into a pick, and whether your team wins the ultimate economy over multiple fights.
This guide focuses on timeless fundamentals that stay relevant even when heroes, numbers, and metas shift: reading windows, chaining abilities reliably, and tracking ultimates with simple, repeatable habits. For official hero kit details and update notes, keep the game’s reference pages bookmarked: official site, patch notes, and the Marvel overview page.
Why Ability Timing Wins Games
Marvel Rivals is built around hero kits that create windows: brief moments where your team has an advantage because a key cooldown is available, a defensive tool is missing, or an opponent is out of position. Most fights are not won by “more buttons,” but by pressing the right button at the right moment.
Think of every teamfight as a series of negotiations: Who commits first? Who answers correctly? Who runs out of tools first? If your timing is sloppy, your team spends two big abilities to secure nothing, then collapses when the enemy uses a single clean combo or ultimate. If your timing is sharp, you win fights with fewer resources and snowball the next objective.
Great timing does three things consistently:
- Improves reliability: your damage converts into eliminations because it lands inside real control windows.
- Protects your life: you stop “donating” cooldowns and instead save one escape or defensive tool for the moment it matters.
- Wins the macro game: tracking ultimates and managing cooldown cycles lets you plan fights instead of gambling them.
The goal of this guide is to give you a toolkit of habits—small enough to use in ranked, strong enough to scale into high-level play.
The Timing Language: Windows, Tempo, and Threat
1) Ability Windows: Startup → Active → Recovery
Most abilities can be understood through three phases:
- Startup: the wind-up before an ability takes effect (telegraph, cast time, travel time).
- Active: the frames where the ability actually controls space, deals damage, blocks, or applies crowd control.
- Recovery: the “after” where you’re locked in animation, repositioning, reloading, or otherwise unable to respond instantly.
Timing mastery means you learn to fight during your opponent’s recovery and avoid committing during yours. You don’t need perfect frame data. You just need to recognize the feel: “They used the knockback—there’s a short recovery—now we step in.”
2) Tempo: Who Is Allowed to Walk Forward?
Tempo is the invisible permission slip to take space. When your key cooldowns are available, you can safely walk forward and apply pressure. When they’re down, you must play slower—peek less, hold tighter angles, or rotate.
A timeless way to understand tempo is to ask, every 10 seconds: “If a fight starts right now, do we have answers?” If the answer is “no,” you should not be the team that starts it.
3) Threat: Holding an Ability Is Sometimes Stronger Than Using It
Many players lose fights not because they lack skill, but because they remove their own threat by spending a tool too early. A stun, displacement, cleanse, barrier, or mobility tool creates a zone of fear. Enemies respect it—even when it’s not used.
The timing leap is learning to separate: “Can I press it?” from “Should I press it now?” Holding an ability forces opponents into predictable movement, delayed engages, or awkward ult usage. Your job is to wait until the moment where pressing the ability produces a guaranteed advantage: a pick, a forced ultimate, or a clean disengage.
Cooldown Discipline: The “Budget” Mindset
A practical way to improve timing fast is to treat your cooldowns like a budget. You can “spend” them for: information, space, a pick, or survival. The mistake is spending survival tools for information, or spending pick tools for space when a cheaper option exists.
The 4 Budgets (Use These Labels In Your Head)
- Escape budget: mobility/defensive used to avoid dying or to exit a bad fight.
- Confirm budget: the tool that makes damage reliable (stun, snare, displacement, slow, wall, trap).
- Amplify budget: increases kill speed (damage amp, vulnerability, burst mode, empowered shot).
- Space budget: denies areas (zoning, barriers, AoE control, knockback zones, choke control).
Rule of Thumb: Never Spend Two Budgets to Solve One Problem
If you use escape + confirm just to win a small duel, you might get the kill—but you will likely die to the next enemy that appears. Good timing is economical: win the duel with one budget, save the other for the follow-up.
The “One Escape” Promise
One of the simplest, highest-impact habits is this: Before you step into danger, decide which button gets you out. If you can’t name it, you’re about to feed. If you name it, you’ll naturally delay other cooldowns and hold your survival line longer.
Cooldown Staggering: Don’t Empty the Backpack
Many teamfights are lost because a team “empties the backpack”: three players press their best cooldowns in the first second. The enemy survives, then counter-engages into your downtime.
Instead, learn to stagger abilities:
- Use a cheap tool to force a response.
- Wait for the response (dodge, barrier, cleanse, reposition).
- Then use your confirm tool when they can’t respond again.
- Save your finisher for the moment the target is truly vulnerable.
Combo Foundations: Confirm → Amplify → Finish
“Combo chains” sound like fighting games, but the principle in Marvel Rivals is the same: you create a short window where a target can’t escape, then you layer damage inside that window. The key is making your combos match-ready—reliable under pressure, not just in practice range.
The Universal Combo Formula
- Confirm: create reliability (control, displacement, trap, forced movement, soft CC).
- Amplify: increase conversion (burst mode, damage amp, team-up synergy, angle advantage).
- Finish: secure the elimination or force the retreat (execute damage, last shot, follow-up CC, ultimate).
“Hit Confirm” in a Shooter Context
In fighting games, hit confirm means you only commit to the full combo after you see the first hit connect. In Marvel Rivals, it means: don’t spend your finisher until you’ve earned the window. If your opener misses, you reset. If it lands, you commit.
This single habit prevents the most common timing fail: burning an ultimate or long cooldown into thin air.
Hard Chains vs. Soft Chains
- Hard chains: stun/lock → guaranteed burst. Very reliable, but often baited or countered by cleanse/immune tools.
- Soft chains: slow/zone/pressure → forced pathing → burst. Less “guaranteed,” but harder to fully negate and safer to execute.
Timeless advice: build your playstyle around soft chains and keep hard chains as punish tools. Soft chains win consistently because they control movement and space even when opponents play perfectly.
Combo Chains That Work in Real Matches
Instead of listing hero-specific combos that can become outdated, this section teaches combo “shapes” you can apply to almost any kit. Build a small library of 3–5 shapes you can execute on demand.
Shape A: The Corner Trap (Space → Confirm → Burst)
Use a zoning tool (barrier, wall, AoE denial) to limit exits, then apply a confirm tool when the target’s escape route is predictable. This combo is especially strong near objectives, chokepoints, and narrow corridors.
- Best when: the enemy must touch objective or rotate through a lane.
- Timing cue: wait until they commit to the corner—then confirm.
- Common fail: confirming too early while they still have multiple exits.
Shape B: The “Peel and Turn” (Defend → Confirm → Counterkill)
When an enemy dives your backline, the best timing often isn’t to panic burst. It’s to peel first—displace, slow, or stun—then counterkill the diver once they’ve spent their mobility.
- Best when: enemies rely on one big mobility tool to engage.
- Timing cue: peel after you see their commit (dash/leap), not before.
- Common fail: using peel on a feint, then having nothing for the real dive.
Shape C: The “Second Beat” Burst (Poke → Wait → Burst)
Most players expect burst on the first beat—right when you appear. The second-beat burst is delayed by half a second to a second. You poke or reveal yourself, the target reacts (dodges, barriers, sidesteps), then you burst where they end up.
- Best when: opponents have strong reaction-based defenses.
- Timing cue: burst when their defensive animation ends, not when it starts.
- Common fail: waiting so long you lose pressure and your team stops following.
Shape D: The “Layered Control” (Soft CC → Hard CC → Burst)
Layered control is about sequencing so each tool covers the gaps of the previous one: slow forces predictable movement, hard CC catches the predictable movement, burst lands inside hard CC.
- Best when: the enemy has a cleanse/escape that can answer one control effect but not multiple layers.
- Timing cue: hard CC after the target uses their first response (dodge, dash, jump).
- Common fail: stacking CC at the same time, reducing total control duration.
Shape E: The “Displacement Snipe” (Knock/Push/Pull → Angle → Finish)
Displacement combos are timeless because they convert position into damage. Push a target into open sightlines, off cover, or into your team’s crossfire—then finish with focused shots.
- Best when: maps have cover-based duels and strong off-angles.
- Timing cue: pre-aim the landing point before you displace.
- Common fail: displacing without a follow-up angle—creating chaos but not value.
How to Build a Personal Combo Library (Template)
Use this simple template for each hero you play. Keep it in a note app. Update it occasionally, but the structure stays forever:
- Opener (Confirm): What creates reliability?
- Amplifier: What increases conversion once opener lands?
- Finisher: What secures the kill or forces retreat?
- Plan B: If opener misses, what do I do instead of forcing?
- Safety: Which button is my escape?
Timing Your Combos Around Enemy Responses
Combos fail most often because players ignore the enemy’s response tools. Your job is to identify the common “answers”: dodge, barrier, cleanse, invulnerability window, mobility escape, or counter-CC.
A reliable approach is to treat your combo like a two-step test:
- Test: use a cheap pressure tool to force a response.
- Pass/Fail: if they respond, punish the response. If they don’t, punish the greed with a full confirm.
Micro-Timing Tricks That Stay Relevant
- Pre-aim the window: aim where the target will be when your confirm lands, not where they are now.
- Don’t overlap “peak damage”: if two burst abilities hit at the same time but one would have killed anyway, you waste value. Stagger by a fraction so you remember who still has tools.
- Commit only when angle + window align: a good window without an angle is still low value; a good angle without a window is still risky.
- Respect travel time: if your projectile or dash has travel time, you must start earlier than your intuition suggests.
Team-Up Synergy: Two-Player Combos Without Overcommitting
Team-up interactions can create explosive moments, but the same old timing trap exists: two players press big abilities at once, the target survives with a sliver, and your team has nothing left. The solution is to assign roles inside the combo: Setter and Closer.
Setter vs. Closer
- Setter: creates the window (control, displacement, forced movement, barrier cut-off).
- Closer: converts the window into a kill (burst, execute, ultimate, high DPS angle).
The key rule: the Closer waits for confirmation. Even a quarter-second delay is enough to prevent overlap.
Communication That Works Even in Solo Queue
You don’t need long voice comms. You need short, repeatable callouts:
- “I can set.” (I have my confirm tool.)
- “Next touch.” (We punish the next objective touch.)
- “Wait my stun.” (Don’t burst early.)
- “Use one ult.” (We keep the economy clean.)
- “Reset—no escape.” (We’re down survival tools; back out.)
The “Two-Second Rule” for Team-Ups
If your team-up or combo needs perfect alignment, it won’t be consistent in ranked. Aim for combos that can be executed within a forgiving window: two seconds or less from set to finish. If it needs more, simplify: remove one step, or switch to a soft chain that guides movement instead of forcing it.
Defensive Timing: Survive, Reset, Re-Engage
Defensive timing is not passive play. It’s how you turn enemy aggression into a losing trade for them. The strongest teams don’t “tank” enemy abilities—they make the enemy waste them.
Three Defensive Timers
- Pre-emptive: you predict the engage and prepare (positioning, angle, cover, spacing).
- Reactive: you respond to the engage (barrier, peel, mobility out, counter-CC).
- Recovery punish: you punish the enemy while they’re recovering from their commit.
Many players only use reactive defense. The real jump is adding pre-emptive and recovery punish.
Spacing: The Hidden Cooldown
Spacing is a cooldown you can “refresh” instantly by moving. Good spacing buys you time for real cooldowns to return. If you feel like you always die with abilities on cooldown, it often means your spacing is too tight: you’re within range of enemy confirms.
“Trade Up” Defense: Force an Expensive Answer
The best defensive timing creates an uneven trade. You spend a small defensive tool; the enemy spends an ultimate or multiple cooldowns. Over time, that wins games.
Ask yourself after every fight: “Did we force a big button?” If yes—even if you didn’t get kills—you likely improved your next fight odds.
Clean Disengages: The 3-Call Reset
Disengaging is a skill. To disengage cleanly, you need three decisions:
- What’s the trigger? (Down two players, no escape tools, ult disadvantage, objective lost.)
- What’s the route? (Cover-to-cover, not open ground.)
- Who covers? (One player zones while others leave.)
Most throws happen when teams “half-disengage” and get picked one by one. If the trigger happens, commit to leaving or commit to fighting—don’t do both.
Ult Tracking Basics: Simple Systems That Stick
Ultimate tracking sounds complex, but you can make it simple. You don’t need perfect percentages. You need a correct prediction: which ultimates are likely online next fight and which ones were just used.
Why Ult Tracking Matters (Even More Than Combos)
Cooldowns win skirmishes. Ult tracking wins matches. When you predict ultimates correctly, you stop walking into traps, you bait enemy ults into low value, and you plan your own ults to secure objectives rather than “panic saving” fights after they’re already lost.
The 3-Bucket System (Easiest to Use)
Put every enemy ultimate into one of three buckets:
- USED: they used it this or last fight. Low chance it’s ready immediately.
- SOON: they haven’t used it in a while, or they’re farming damage/healing. Expect it next fight.
- READY: you have strong evidence it’s online (multiple fights without use, big performance, clear cues, or pattern).
This system is timeless because it doesn’t rely on exact charge rates. It relies on patterns you can observe in any patch.
The “Two Fights Rule”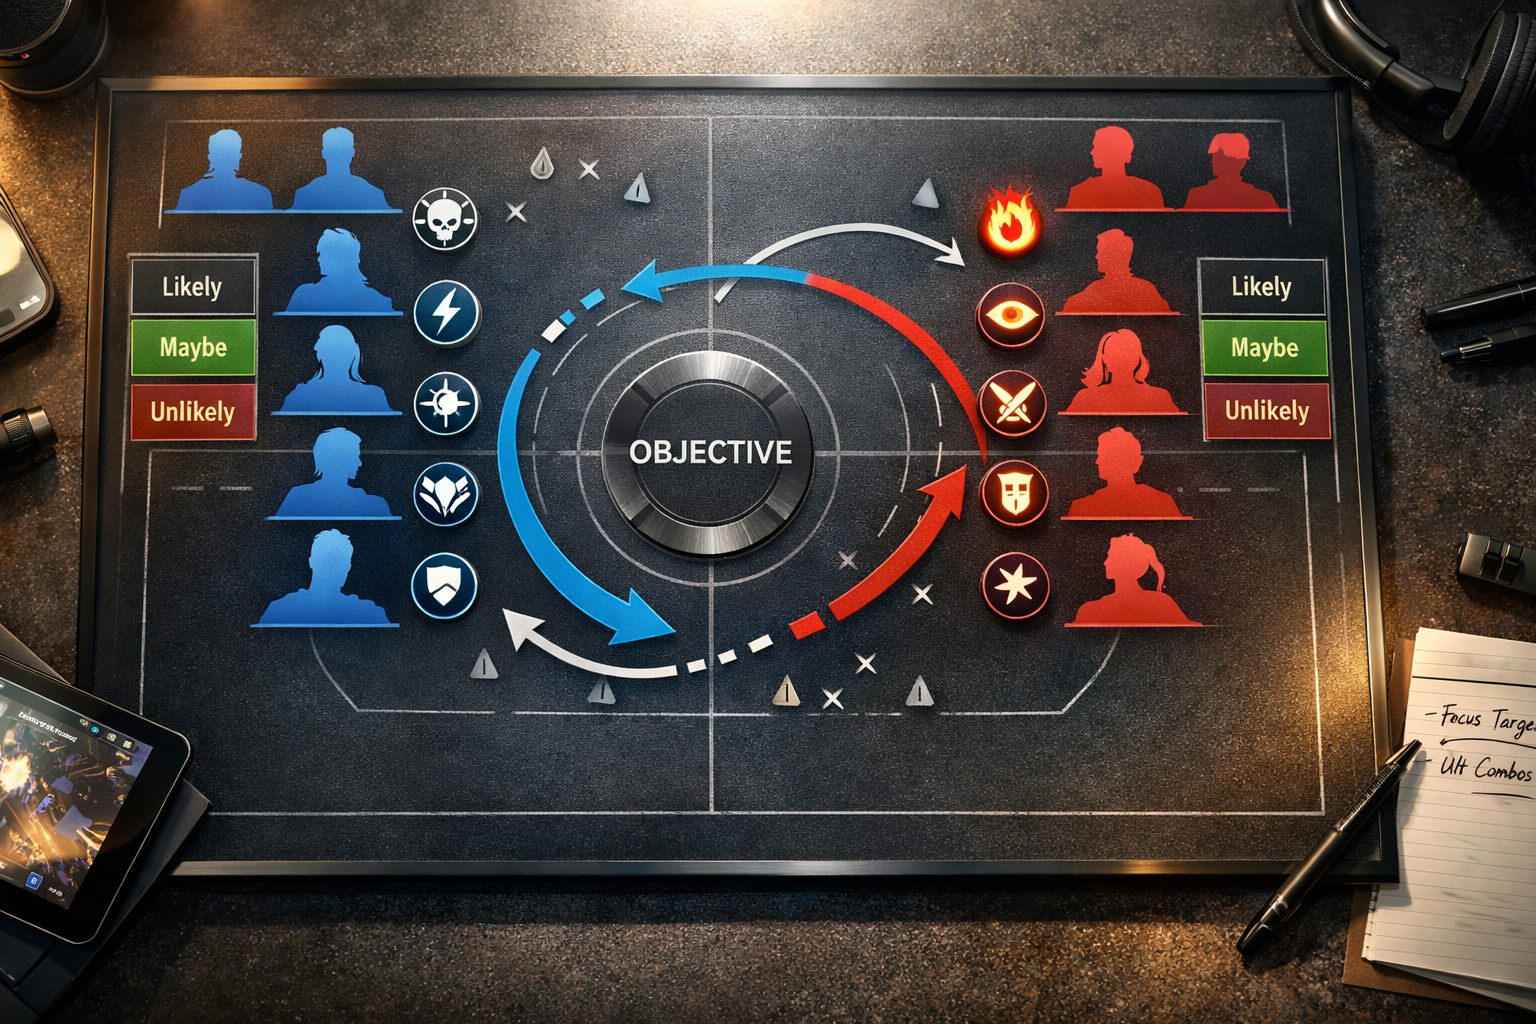
In many hero shooters, if a player hasn’t used their ultimate for about two full fights while actively participating, it becomes increasingly likely they have it. You don’t need to state it as a number. You just treat the absence as a warning: “If they didn’t ult last fight, assume they might ult this fight.”
Ult Clues You Can Track Without Stats
- Fight participation: players dealing lots of damage or healing tend to charge faster.
- Kill streaks / momentum: a winning team often charges more quickly because they stay in fights longer.
- Behavior shifts: players with ult ready often position differently—flank deeper, play safer, or stop using a key cooldown to “combo with ult.”
- Objective timing: expect ult usage on the last defense, overtime, or when the objective is about to flip.
A Simple Tracking Grid (Use in Your Head)
At the start of each fight, quickly name two threats: (1) Which enemy ult can start the fight? (2) Which enemy ult can punish our engage? Then adjust your positioning accordingly.
Ult Tracking Table (Copy This Logic)
| Situation | What to Assume | How to Respond |
|---|---|---|
| Enemy didn’t ult last fight and got multiple picks | One or more ults are SOON/READY | Take safer angles, hold defensive cooldowns, don’t stack tightly |
| Enemy used multiple ults to win last fight | They are likely ult-poor next fight | Pressure early, take space, consider using fewer ults to win clean |
| Your team lost but forced a key enemy ult | Next fight is more winnable | Stabilize, re-take with a planned combo/ult response |
| Overtime / last push | Everyone will press ult | Build a plan: first ult to start, second to counter, third to secure |
Solo Queue Ult Tracking: The “Ping + Phrase” Habit
If you don’t have voice comms, you can still guide your team. Use a consistent pattern: Ping the threat (or the area where it happens) and type one short phrase: “WATCH ULT,” “SAVE CLEANSE,” “PLAY SPREAD,” or “BAIT THEN GO.” Repetition makes teammates trust you—because it’s readable and fast.
Where to Learn More (Trusted References)
For competitive context and tournament/community info, you can cross-check reputable hubs such as Liquipedia’s Marvel Rivals wiki. For official announcements and updates, use the game’s Steam page and the Steam community hub.
Ultimate Economy Plans: Win the Next Two Fights
Ult economy is a long game. The teams that climb consistently are the teams that stop thinking, “How do we win this fight?” and start thinking, “How do we win this fight while setting up the next one?”
The “1-2-0” Plan (Simple and Timeless)
A clean default plan for many situations:
- Fight 1: Use 1 ultimate to secure a clean win (if needed).
- Fight 2: Use 2 ultimates if the enemy answers with theirs or if it’s the key objective fight.
- Fight 3: Aim to use 0 (win with cooldowns), because you now have an economy lead.
The numbers aren’t magic. The mindset is: avoid equal trades where both teams dump everything every fight. If both teams spend three ultimates every fight, the better aim team wins. If you spend fewer and still win, you win by strategy.
When to “Dry Fight” (No Ults) On Purpose
A dry fight is when you intentionally avoid using ultimates—even if you lose—because the objective timing makes the next fight more important. This is not throwing; it’s resource planning.
Dry fights are correct when:
- The objective isn’t winnable due to spawn distance or positioning.
- You are down key teammates or your best ultimate is unavailable.
- You can force enemy ultimates while using none (baiting value).
Ult Layering: Don’t Stack the Same Function
If two ultimates do the same job (both are engage, or both are zoning), using them together often wastes value. A timeless layering strategy is to pair:
- Engage ult + follow-up damage
- Zoning ult + pick/confirm tool
- Defensive ult + counter-engage
Your goal is a chain of functions, not a pile of the same function.
Ult Baiting: Make Their Ultimate Worth Less
The easiest way to win ult economy is to make enemy ultimates hit nothing or hit too little. Three timeless bait techniques:
- Spread: don’t stack in predictable clusters when you suspect a big AoE.
- Hold cover: force them to ult into walls, corners, or line-of-sight breaks.
- Fake engage: show pressure, force a defensive ult, then disengage and re-engage when it ends.
Role Playbooks: Timing by Playstyle
Even if Marvel Rivals shifts hero roles over time, playstyles remain stable: pressure dealers, space makers, and sustain/utility providers. Here’s how timing changes based on what you’re trying to do in fights.
Pressure / Duel-Oriented Play
- Goal: create a short kill window on a vulnerable target.
- Timing focus: wait out defensive responses, then burst on the second beat.
- Rule: take an angle only if you know your escape button and your rejoin route.
- Ult habit: don’t ult to start unless you already have an angle; otherwise ult becomes a loud announcement with no conversion.
Space / Frontline-Oriented Play
- Goal: control where the fight happens and when it starts.
- Timing focus: engage after your team is in range to follow, not when you personally see an opening.
- Rule: if your team can’t see your target, your engage is a solo mission.
- Ult habit: think “objective geometry”: use ult to cut exits, split the team, or force repositioning, not just for damage.
Support / Utility-Oriented Play
- Goal: keep your team alive long enough to win the second phase of the fight.
- Timing focus: delay your strongest defensive tools until you see the real threat commit.
- Rule: if you spend cleanse/peel early, you’ve told the enemy “go now.”
- Ult habit: save defensive ult for the moment your team would otherwise lose two players—not for “comfort.”
Objective / Specialist-Oriented Play
- Goal: win by forcing predictable movement around the objective.
- Timing focus: set traps/zones before the enemy arrives, not after they’ve already taken space.
- Rule: the best objective timing is early—make them spend cooldowns just to enter the fight.
- Ult habit: ult when the enemy’s retreat path is worst (during touch, during funnel, during scramble).
The “Timing Triangle” Check
Before you commit, check three things:
- Information: do we know where the key threats are?
- Distance: can my team follow within one second?
- Cooldowns: do we have at least one confirm and one escape available?
If two of three are missing, your timing is probably wrong.
Practice Plan: Drills, VOD Review, and Measurable Goals
Timing improves fastest when you stop “playing more” and start “playing with one focus.” Use short drills that build reliable habits under pressure.
Daily 20-Min Timing Routine
- 5 minutes: opener consistency — practice landing your confirm tool from common ranges and angles.
- 5 minutes: second-beat burst — intentionally delay your burst by a fraction; practice reacting to movement, not guessing.
- 5 minutes: escape discipline — practice disengaging after one failed attempt; no greed. Reset and re-peak clean.
- 5 minutes: combo library reps — run your 2–3 core combo shapes until they feel automatic.
Weekly Ult Tracking Challenge (Works Forever)
For 10 matches, pick one enemy player each game (a consistent threat). Track only their ultimate using the 3-bucket system: USED / SOON / READY. Write a tiny note after the match: “Was I right?” Your accuracy will improve rapidly.
VOD Review Checklist: 8 Questions
- Did I have a reminder of my escape button before taking an aggressive angle?
- Did I spend my confirm tool into a target that still had an easy exit?
- Did I “hit confirm” before committing my finisher/ultimate?
- Did I overlap burst with teammates unnecessarily?
- Did I die with defensive tools available (panic) or with none available (overcommit)?
- Did we force enemy ultimates without using ours?
- Did we choose the right fight to invest ultimates?
- When the fight turned bad, did we reset cleanly or half-reset and feed?
Measurable Goals (Track 3 Numbers)
- First death rate: how often are you the first death in a fight? Reduce it by improving escape timing.
- Ult value: how often does your ult directly lead to a pick, objective win, or forced enemy ult?
- Overcommit count: how often do you use two big cooldowns and still lose the duel/fight?
Timing improvements show up as fewer first deaths, cleaner ult wins, and fewer “I had no buttons” moments.
Common Timing Mistakes (and Fast Fixes)
Mistake 1: Pressing Everything on First Contact
If you dump cooldowns as soon as you see an enemy, you become predictable and easy to counter. Fix: pressure with a cheap tool first, then confirm after they respond.
Mistake 2: Using Confirm Tools When Targets Still Have Options
Stuns and traps don’t win fights if the target can simply step away. Fix: confirm when exits are reduced (corner, objective touch, post-dash recovery, or after forced pathing).
Mistake 3: Ult as a Panic Button
Panic ults often happen after the fight is already lost. Fix: decide your ult plan before the fight starts: “We ult first,” “We ult second,” or “We dry fight.”
Mistake 4: Not Respecting Enemy Recovery Windows
Many players back up when the enemy is weakest—right after a big ability. Fix: step in during their recovery and punish before their next cooldown cycle.
Mistake 5: No Disengage Trigger
Half-resets cause stagger deaths. Fix: define one trigger: “Down two” or “No escape tools.” When it happens, leave immediately.
FAQ
Do I need exact ultimate charge percentages to track ults?
No. A simple USED / SOON / READY system is enough to make correct decisions most of the time. The value comes from predicting threats and positioning correctly—not from perfect math.
How do I practice combos if patches change numbers?
Practice the shape of the combo: confirm → burst inside the window → disengage if it fails. Even if damage numbers change, the window logic and movement control remain relevant.
What’s the fastest timing improvement I can make today?
Pick one: (1) always name your escape button before peeking aggressively, or (2) delay your burst by a fraction (second-beat burst). Either habit will instantly reduce deaths and increase conversion.
How do I stop overlapping cooldowns with teammates?
Use the Setter/Closer concept. If you are the Closer, wait for confirmation. If you are the Setter, communicate “I can set” before you go. In solo queue, a quick ping plus “WAIT” or “MY STUN” can be enough.
Optional Help: Coaching/Rank Support
If you want to shorten the learning curve—especially for ranked climb, hero mastery, or matchup-specific timing— you can also check Boosteria’s Marvel Rivals options here: Marvel Rivals Boosting Prices. Many players use structured coaching-style sessions to lock in timing habits faster (combo reliability, ult planning, and fight decision-making).