Mobile Legends Macro Basics: Rotations, Turtle, Lord Pressure
Mobile Legends — Macro Basics: Rotations, Turtle/Lord Setup, Lane Pressure
Most players lose games in Mobile Legends long before the final team fight. They lose them in the quiet moments: a late rotation to the river, a side wave left unattended, a Turtle started with no lane priority, a Lord call made while a teammate is clearing the wrong side of the map, or a push that looks aggressive but has no structure behind it. Mechanics matter, but mechanics alone do not create consistent wins. The players who climb the fastest usually understand something deeper: macro.
Macro is the art of making the map work for you. It is not one trick, one hero, or one patch-specific gimmick. It is the system behind your decisions. It determines where you move, when you move, why you contest an objective, which lane you pressure, and what trade you accept when you cannot get everything. Good macro turns even games into winning games. Bad macro turns winning games into random coin flips.
This guide is built to stay useful as long as possible. Exact numbers, hero balance, jungle pacing, and objective stats can change over time, but the principles of rotations, setup, wave pressure, and objective control remain reliable. If you learn these fundamentals, you will make cleaner decisions in solo queue, play better around your team, and understand why high-level players seem to be in the right place before the fight even begins.
We will focus on three core topics that shape almost every ranked game: rotations, Turtle/Lord setup, and lane pressure. We will also connect them into one larger idea: every good objective fight starts with wave control, every good rotation starts with information, and every good push starts with someone forcing the enemy to answer a lane.
If you want to improve fast, stop thinking of the game as five isolated players taking random fights. Start seeing it as a map economy. Waves create time. Time creates windows. Windows create objectives. Objectives create pressure. Pressure creates mistakes. And mistakes create wins.
1. What Macro Really Means in Mobile Legends
Macro is everything that helps your team win the map instead of only winning isolated duels. In practical terms, macro includes lane assignments, wave management, objective timing, rotations, bush control, vision discipline, reset timing, and the decision of whether to fight, trade, or disengage. It is the layer of strategy that sits above mechanics.
A simple way to understand macro is this: micro wins moments, macro wins games. Micro is landing skills, spacing properly, combo execution, and target focus. Macro is knowing whether the fight should happen at all. Many players improve their mechanics and still feel stuck because they keep fighting at the wrong times, overcommitting on empty parts of the map, or grouping without a reason. That is a macro issue, not a hands issue.
In Mobile Legends, macro matters so much because the map is small, rotations are fast, and objective swings are huge. A single lost Turtle setup can snowball into lane pressure, jungle denial, and turret damage. A bad Lord fight can cost the game even if the gold difference was manageable before it. A side lane ignored for one minute can force your team to choose between defending base and contesting map control. These are macro consequences.
Good macro usually answers four questions:
- What matters most right now? Wave, buff, Turtle, turret, vision, reset, or Lord?
- Who should be where? Which hero can safely catch side, who can show mid, who protects flanks, who threatens pick?
- What happens if we do nothing? Do we lose pressure, give free vision, let the enemy crash a wave, or arrive late?
- What are we trading? If you give one side of the map, what do you gain on the other?
Once you start thinking in those questions, the game becomes much clearer. You stop taking random fights because you see the cost. You stop mindlessly grouping because you understand that grouped bodies without lane pressure are easy to read and easy to punish. You stop blaming teammates for every lost objective because you recognize that many objective losses begin 20 to 30 seconds earlier, when someone failed to clear a wave or reset at the wrong time.
That is the foundation of macro in Mobile Legends: arrive first, move together, force responses, and make the enemy choose between bad options.
2. Lane and Role Jobs: Who Creates Space and Who Collects It
To understand macro, you need to understand that every role interacts with the map differently. This does not mean heroes are locked into rigid behavior forever. It means each role tends to solve different map problems.
EXP lane is often responsible for early stability, side control, and front-line presence. EXP heroes usually want enough early experience to become useful in skirmishes around the first major objective. They are often the first side-laner expected to hold or contest pressure near the objective side of the map.
Gold lane usually represents scaling, turret pressure over time, and long-term damage. The gold laner often cannot match the same early impact as a roamer or mid, but lane pressure on that side becomes extremely important later. Strong macro players know when to leave gold lane alone to farm and when to rotate resources toward it for turret conversion or protection.
Mid lane is the pivot point of the map. Mid clears fast, connects lanes, and usually influences river control. Mid is not just “another lane.” Mid is the center of rotation tempo. When mid is pushed first, your team usually gets more freedom to move. When your mid is trapped under turret, everything becomes slower, riskier, and easier to punish.
Jungle is both economy and objective control. Your jungler cares about efficient pathing, buff timing, level pacing, and secure pressure around major objectives. But jungle is not just farming camps. A strong jungler uses pathing to appear where the map is about to matter, not where a fight already ended.
Roam is the glue. The roamer helps create vision, opens paths through bushes, supports lane stabilization, threatens picks, and protects the team’s access to objectives. A weak roamer follows action. A strong roamer creates it.
Macro falls apart when players misunderstand these jobs. If the gold laner leaves a massive side wave to wander mid for no reason, the team loses resources. If the EXP laner never pressures side and permanently groups, the enemy can push waves uncontested. If mid does not clear on time, nobody can move cleanly into river. If jungle shows too early without lane priority, objective setup becomes fragile. If roam stays attached to one person all game, the map becomes dark and narrow.
The key lesson is this: macro is role cooperation, not role isolation. Each hero has a different map task, but all of them connect through wave timing and objective timing.
3. Rotation Basics: Moving With Purpose
Many players think rotation simply means leaving lane and walking somewhere else. That is not enough. A good rotation is a move with a reason, a timing, and an expected payoff. A bad rotation is movement without value.
Here is the simplest rule: clear first, then move. The team that pushes a wave first usually gets the first step into fog, river, or enemy jungle space. This matters because movement without wave control often bleeds gold, experience, and turret health. If you leave a wave at the wrong time, you are not “helping”; you are paying a price. Sometimes that price is worth it. Often it is not.
Good rotations usually come from one of five triggers:
- Your lane is pushed and you can move without losing too much.
- An objective window is opening and your presence matters more than one extra wave.
- An enemy is overextended and vulnerable to a collapse.
- You need to cover a lane because a teammate is resetting or showing elsewhere.
- You are creating number advantage before a fight begins.
Bad rotations usually happen for opposite reasons: moving because the screen looks busy, chasing fights after they already ended, abandoning a critical side wave, or mirroring enemy movement without asking whether you need to match it. Not every enemy move deserves a response. Sometimes the correct answer is to take something else.
One of the most important macro habits in Mobile Legends is learning short rotations versus full rotations. A short rotation is a quick support move: help mid clear, check river, hover for a few seconds, then return or reposition. A full rotation is a committed map shift: leave your previous area because the next play will happen elsewhere. Players who full-rotate too often become late everywhere. Players who never full-rotate become invisible in key fights.
Purposeful rotations also respect information. If your team has no wave priority, no bush control, and no clue where the enemy pick threat is, walking blindly into river is not proactive macro. It is gambling. Good teams rotate with layers: wave pushed, path checked, choke controlled, then objective space taken.
The most useful question before every movement is simple: What do we gain if I go? If you cannot answer that, the rotation is probably weak.
4. Early Game Blueprint: First Waves, First Moves, First Objective
The early game in Mobile Legends is where macro first becomes visible. Everyone begins with limited damage, limited mobility, and clear economic priorities. Because of that, early-game decisions are often less chaotic than late-game fights, which makes them easier to structure.
Your first goal is not to fight everywhere. Your first goal is to build a clean map state. That usually means:
- get lane experience and gold efficiently,
- avoid unnecessary damage before the first objective window,
- help mid secure safe access to river,
- track likely enemy movement,
- prepare the side of the map that will matter first.
Early macro is really about tempo. Tempo means who gets to act first. If your mid and roam clear faster and move first, they can pressure river bushes, threaten a side lane, or protect your jungler’s path. If your EXP laner manages the wave correctly and stays healthy, they can assist sooner when the first objective contest begins. If your gold lane survives without panic and keeps farming, your team avoids a forced resource drain on the weak side.
Strong early-game teams do not just “rotate more.” They rotate in the correct order. Mid priority usually comes first because mid unlocks access to both sides of the map. Then comes river control and information. Then comes support toward the objective side or a punish on an exposed lane. If you skip the first step and run straight to a side lane without mid control, your movement is slower and easier to read.
It is also important to understand weak side and strong side. Strong side is the area of the map where your numbers, wave state, and objective interest are concentrated. Weak side is the opposite side, where fewer teammates are present and where survival and resource preservation matter more than forcing action. Good macro players know when to demand pressure and when to absorb it.
This is why early overreactions are dangerous. If one lane is fine but you send too many people there, you may abandon the more important area. If the enemy shows multiple heroes top side and your team cannot contest directly, sometimes the right answer is not to mirror them late. It is to secure something else: your own jungle, mid control, or a safer wave crash on the opposite side.
The early game rewards discipline. You do not need a flashy lead. You need a map that makes the first big decision easier than it is for the enemy.
5. Turtle Setup: How to Arrive First and Fight Better
Turtle fights are often misunderstood. Many players treat Turtle as a pure smite battle or a brute-force team fight. In reality, the best Turtle setups are usually won before the objective is touched. The team that controls waves and access routes first gets a much easier fight.
Here is the timeless framework for Turtle setup:
- Push nearby waves first.
- Move into river and entrances before the enemy does.
- Check or threaten bushes so the enemy cannot enter comfortably.
- Keep your damage dealers on safe angles.
- Decide whether you want to burst, zone, or turn.
Notice what is missing: “run directly onto Turtle as soon as it spawns.” Starting the objective too early with no setup can be a gift to the enemy. You trap your team inside the pit area, reveal your intent, and allow a better engage angle. Sometimes starting fast is correct. But it is correct because your setup created that option, not because the timer exists.
The easiest way to improve Turtle fights is to stop thinking only about the objective’s health bar and start thinking about entry points. Where can the enemy come from? Which choke matters most? Which bush can hide their engage? Which teammate is responsible for checking flank? Which teammate should never face-check first? Those are macro questions.
Another common mistake is sending too many resources too early or too late. If four people hover Turtle side while side waves are unmanaged, the enemy may get free pressure elsewhere. If your team delays too long, you lose the chance to control river first. Good setup balances presence and income: enough bodies to control space, enough lane attention to avoid bleeding while you do it.
You also need to recognize when a Turtle is not worth a full contest. If your side wave is collapsing, your jungler is late, your engage tools are down, or your key damage hero has no safe angle, forcing a desperate flip can turn a small loss into a game-breaking sequence. Sometimes the better macro play is to trade: get a turret plate, invade the opposite jungle exit, protect a scaling lane, or preserve lives and tempo for the next window.
Think of Turtle as a pressure event, not merely a monster. It pulls players toward one side of the map. That pressure can be used in different ways. You can fight for it directly, threaten it to force the enemy in, or fake heavy commitment and punish their rushed approach. The correct choice depends on vision, wave state, cooldowns, and numbers.
The cleanest Turtle wins usually look boring: wave pushed, bush held, enemy entrance slowed, front line zoning, jungler secure protected, then objective taken with minimal chaos. That is good macro.
6. Mid Game Macro: Tempo, Crossmap, and Resource Trading
Mid game begins when laning becomes less rigid and map decisions start chaining into each other faster. Outer turrets may already be damaged or gone, heroes roam more freely, and objective threats become more layered. This is where many ranked games become messy because players stop asking what the map needs now and start chasing whatever looks available.
Your first mid-game goal is to identify the current map pattern. Usually the game is in one of four states:
- Neutral: neither team has strong pressure; both are collecting waves and probing vision.
- Advantage: one team has better lane push, better control of entrances, or stronger pick threat.
- Recovery: one team is clearing waves defensively and trying to stop the map from collapsing.
- Objective prep: both teams are adjusting around the next big contest.
Once you identify the state, your rotations become easier. In a neutral state, you value safe wave collection and information. In advantage, you want to extend pressure without overforcing. In recovery, you want to stabilize lanes and deny picks. In objective prep, you want side waves placed so the enemy must answer them.
This is also the phase where crossmap thinking becomes essential. Crossmap means accepting that you cannot always match everything, so you take value elsewhere. If the enemy commits several heroes to one side and you cannot arrive in time with good conditions, do not drift halfway and lose both sides. Make a clear decision: push another lane, take jungle camps, trade turret damage, or secure safer vision on the opposite side. Weak macro often fails because players react emotionally to enemy movement. Strong macro responds economically.
Mid game is also where catch timing matters. A side wave does not just give gold. It tells you where someone will probably appear next. If a wave is building on one side, someone eventually must answer it. That means side waves create information and pressure at the same time. Good teams use that to predict movement. Bad teams ignore side waves until the minimap screams at them.
The best way to keep clean mid-game tempo is to link your actions in sequence:
clear wave → move together through safe route → threaten pick or objective space → take something → reset before overextending.
That last step matters. Many players understand how to create a winning moment but not how to end it. They get one pick, one turret, one jungle camp, then stay too long, split badly, and donate shutdowns. Macro is not just expansion. It is expansion with exit discipline.
If you ever feel lost in mid game, return to this rule: the next important action should be supported by the current wave state. If it is not, fix the wave first.
7. Lane Pressure: The Hidden Win Condition Most Players Ignore
Lane pressure is one of the biggest differences between players who understand macro and players who only understand fighting. Pressure means your minion waves are advanced enough that the enemy must respond. It sounds simple, but it changes everything.
When a side wave is pushing toward the enemy, three important things happen:
- The enemy loses freedom because someone must eventually answer the wave.
- Your team gains timing because the enemy answer creates a temporary numbers imbalance elsewhere.
- Turrets become vulnerable if the enemy mismanages the response.
That is why lane pressure is not cosmetic. It is strategic leverage. A Lord attempt becomes easier when a side wave is already threatening a tower. A pick becomes easier when the enemy side-laner must reveal to clear. A mid push becomes stronger when both side lanes are pushing at the same time.
There are three common forms of lane pressure:
Fast Push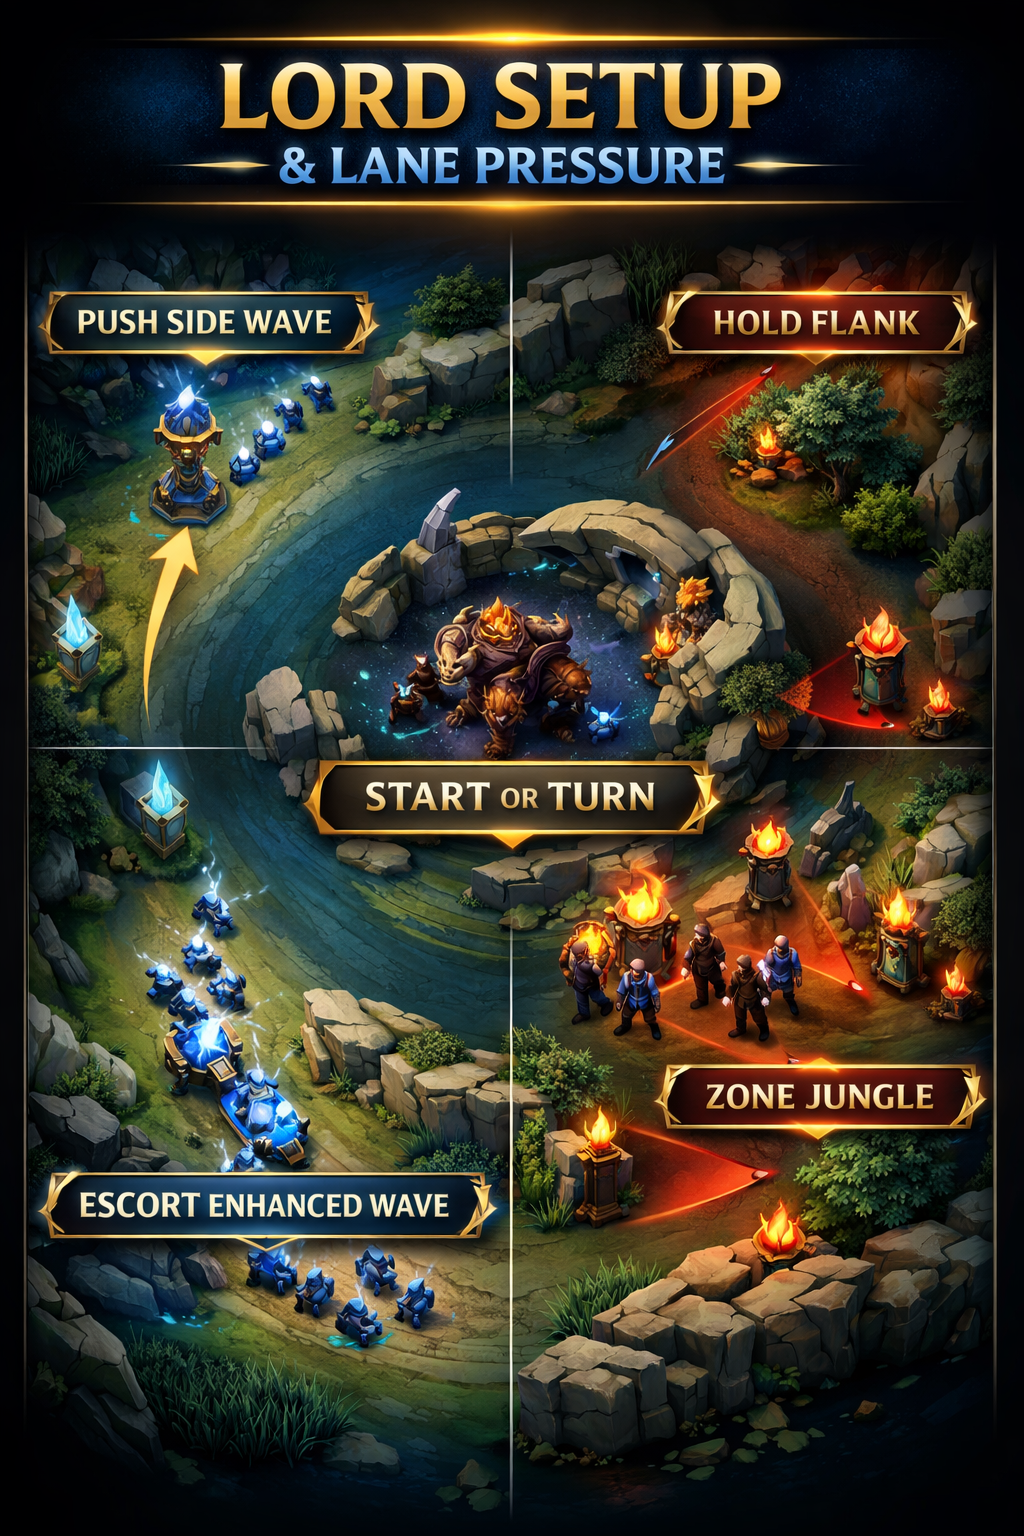
This means clear the wave quickly so it reaches enemy space first and gives you time to move. Fast push is useful when an objective is about to spawn or when you need to regroup fast. The goal is not always turret damage. Often the goal is simply to force the wave forward so you can leave lane without immediately losing it.
Slow Push
This means you manipulate the wave so it builds up over time, creating a larger crash later. Slow push is powerful before Lord setup because a bigger side wave forces a more expensive answer. It can also protect your timing because the enemy cannot ignore a large wave forever.
Held Pressure
This means keeping a wave in a threatening but stable position, ready to be pushed when your team is about to act elsewhere. This is more advanced, but extremely valuable. It allows your team to delay commitment until the enemy shows first.
The major mistake in solo queue is confusing showing in lane with creating pressure. You can stand in side lane for 20 seconds and accomplish nothing if you do not push at the correct time. Likewise, you can create excellent pressure with just one well-timed clear if it syncs with your team’s map plan.
Another common mistake is overcommitting for side pressure alone. Side pressure is valuable because it supports larger goals. If you keep hitting a side turret while your team loses Lord setup, your “pressure” may actually be a misplay. Good macro connects lane pressure to objective timing. The best side push is the one that forces an answer exactly when your team wants numbers elsewhere.
You should also think about who applies lane pressure. Not every hero should be the deep side-lane pusher. Some heroes have escape tools or stronger duel threat. Some are too important to expose. Sometimes the right hero to push side is your durable EXP laner. Sometimes it is a mobile assassin threatening collapse. Sometimes it is simply the teammate whose recall and re-entry timing best match the next objective.
When players say “we need to pressure lanes,” what they really mean is: we need the map to ask the enemy a question before we ask them a bigger one. That is lane pressure.
8. Lord Setup: Start, Threaten, Turn, Escort
Lord is one of the cleanest macro tests in Mobile Legends because it punishes bad preparation so hard. Many players think Lord is just a bigger Turtle. It is not. Lord is not only an objective to secure; it is a map event that can break the game open through wave pressure, turret threat, and forced defensive choices.
There are four main Lord plans:
1. Start
You begin Lord because you already control waves and entrances, and the enemy cannot contest comfortably. This is the simplest version, but only when the setup is earned. Starting Lord with unmanaged side waves or no zone control is often a trap.
2. Threaten
You posture around Lord to force the enemy to walk into your space. Sometimes you do not want a fast burn. You want the enemy to panic, check blind areas, and expose a bad angle. In this case, Lord is a threat generator.
3. Turn
You begin or fake Lord to bait the enemy into a narrow entrance, then turn off the objective and fight them. This is strongest when your engage, burst, or pick tools punish choke points. Turning is not random. It works because the enemy was pressured by waves and objective fear at the same time.
4. Escort
Securing Lord is only half the job. You must convert it. Escorting does not always mean five people walking with it in one lane. Often the stronger macro play is to synchronize other waves, threaten side entries, and force the defense to split attention. The best Lord pushes create too many problems at once.
Before every Lord setup, ask three questions:
- Which side wave is already pushing?
- Which enemy hero is forced to show if that wave reaches tower?
- Do we want a fast take, a bait, or a turn?
If you cannot answer those, do not rush the call.
The worst Lord habits are familiar in ranked: starting it while one side wave crashes into your own turret, sending the wrong hero to catch a lane, face-checking jungle entrances one by one, showing damage dealers first, or celebrating the secure and then escorting Lord with no side-wave sync. These mistakes waste one of the most powerful tools in the game.
A better structure looks like this: push one side wave, stabilize the other, enter river first, hold key bushes, decide whether to burn or threaten, protect secure range, then after the take, immediately think about the next wave meeting point. Where will the enemy be forced to defend? How will your team stretch them? Who can hold flank? Who can threaten dive only after the wave arrives?
Lord is strongest when it arrives as part of a three-layer attack: enhanced pressure in one lane, synchronized threat in another, and control of the space between them.
9. Playing From Ahead and Playing From Behind
Macro is not only for even games. In fact, its value increases when one team has a lead. The trick is understanding that the correct map behavior changes depending on whether you are ahead or behind.
When You Are Ahead
If your team has the lead, your job is not to prove how strong you are in random fights. Your job is to make the enemy map smaller. That means:
- pushing lanes before objectives,
- entering enemy jungle with purpose rather than greed,
- denying safe access points,
- taking clean turrets when possible,
- forcing the enemy to defend multiple things at once.
The biggest throw pattern when ahead is impatience. Players dive deep with no wave, chase kills instead of space, or force Lord because they “should win anyway.” Leads disappear when you stop respecting structure. If you are ahead, make the enemy come to you through bad angles. Do not gift them chaos.
When You Are Behind
If your team is behind, your macro goal is different: delay, collect, and narrow the gap without donating more. That usually means clearing waves safely, avoiding isolated deaths, and contesting only when the map gives you a realistic angle.
Being behind does not mean doing nothing. It means choosing efficient resistance. Side waves become extremely important because they buy time and force the enemy to show. Bush discipline becomes critical because picks are one of the easiest ways for a leading team to end. Sometimes the only winning move is to survive long enough for the enemy to overforce a bad objective setup.
When behind, crossmap trading becomes more valuable. If you cannot realistically hold a full contest, take what the enemy leaves. Clear opposite side, grab unattended jungle, pressure an exposed turret after they commit too many bodies, or reset in time to protect the next important structure. Small stabilizing moves often matter more than one desperate all-in.
The hardest mental skill when behind is resisting ego fights. You do not need to answer every poke, every invade, or every taunt. You need to defend the game state until the map gives you a better opportunity.
10. Solo Queue Macro: How to Lead Without Typing Essays
Solo queue macro is different from coordinated team macro because you cannot assume perfect communication. The good news is that strong macro still works in solo queue if you make your decisions obvious and timely.
First, ping early, not late. If you only ping Turtle after the enemy is already in river, your team hears stress instead of a plan. Ping the lane that needs to be pushed, the area that needs attention, or the objective that is becoming important before it becomes urgent.
Second, use your own movement as communication. In solo queue, teammates often follow clarity more than chat. If you clear mid first, walk decisively into river with support, and hold the correct bush, you create a visible path. If you hesitate, start-stop, or drift through jungle without intent, nobody knows what you want.
Third, do not try to force advanced setups with a team that clearly is not aligned. Adapt your macro to what is realistic. If your teammates refuse to slow-push correctly for Lord, simplify the plan: shove the nearest safe lane, group earlier, protect entrances, and avoid overcomplication. Simple correct macro is better than ideal macro no one follows.
Fourth, recognize which teammate is most likely to play the map correctly and sync with them. Sometimes the best solo queue macro is not leading four strangers; it is forming a reliable two-man rotation core with the roamer, jungler, or mid who reads the same play.
Finally, accept that not every call will be followed. That does not make the call wrong. Focus on repeatable habits: wave before roam, objective before ego, pressure before dive, exit after gain. Over enough games, those habits create more stable wins.
11. Common Macro Mistakes That Throw Ranked Games
Most macro errors repeat across every rank. Here are the ones that matter most.
Grouping With No Wave Setup
Five players mid may look coordinated, but if side waves are crashing into your towers, you are not pressuring anything. You are abandoning income and inviting a trade against yourself.
Starting Objectives Too Early
If your team has not pushed lanes, checked flanks, or established control of entrances, rushing Turtle or Lord often gives the enemy the better fight.
Showing the Wrong Hero in Side Lane
Sometimes the hero catching a side wave is the exact hero your team needs hidden for the next objective. Side assignment matters. Do not reveal your key engage or most important damage source carelessly if another teammate can safely handle the wave.
Chasing Kills Off Objective Timers
One kill can feel huge, but if you chase too far and lose position for Turtle, Lord, or tower pressure, the trade may be terrible. Kills are valuable because of what they unlock, not because the scoreboard changes.
Resetting at the Wrong Time
Recalling right before an objective without managing wave state can leave your team late and scattered. Good resets happen after a wave is handled and before the contested space becomes urgent.
Ignoring Side-Wave Information
If a large side wave is building, someone will answer it. That is information. Players who ignore wave behavior miss predictable movement patterns.
Winning a Fight and Staying Too Long
After a successful play, many teams overextend for one extra camp, one extra dive, or one extra tower hit. Good macro knows when the window is closed.
If you fix only these mistakes, your win quality will improve significantly even before your mechanics do.
12. Practice Drills to Build Better Macro Habits
Macro improves faster when you train specific habits instead of hoping awareness appears automatically. Use these simple drills in ranked or replay review.
Drill 1: Wave-First Check
Before every roam or objective move, glance at side waves and ask: What will I lose if I leave now? This builds the habit of connecting movement to lane state.
Drill 2: 20-Second Objective Prep
Whenever a major objective is coming soon, stop autopiloting and think 20 seconds ahead. Which lane should be pushed? Which bush matters? Who can flank? This makes setup proactive instead of reactive.
Drill 3: Post-Fight Conversion Review
After every won fight, ask what the best conversion was: turret, jungle denial, wave crash, Lord, reset, or defensive stabilization. Replays often show that teams won the fight but chose the wrong reward.
Drill 4: Side-Lane Tracking
During replay review, pause when a side wave becomes large. Then watch who answers it and what opens on the map because of that answer. This teaches you how pressure creates opportunities.
Drill 5: Fewer Coin Flips
After each match, identify every major objective your team contested. Ask whether the setup was good, bad, or desperate. Your goal is not to win every smite. Your goal is to stop taking bad flips.
These drills are simple, but they create the exact habits that separate random movement from real map control.
13. Final Thoughts
Mobile Legends macro is not about memorizing one fixed script. It is about understanding the map well enough that your decisions keep making sense even when heroes, patches, and item values shift. That is why timeless fundamentals matter so much.
If you remember only a few ideas from this guide, make them these:
- Push waves before you ask for fights.
- Arrive early to objectives, not just on time.
- Use lane pressure to force answers before you force contests.
- Do not confuse movement with value.
- Secure gains, then exit cleanly.
Rotations, Turtle setup, Lord setup, and lane pressure are not separate skills. They are parts of one system. Rotations without wave control are weak. Objective calls without lane pressure are unstable. Side pressure without team timing is wasted. But when these pieces connect, the game becomes much easier to read.
That is also why many high-level wins look controlled rather than flashy. The strongest teams often do not “outfight” every opponent in pure mechanics. They out-position them, out-time them, and out-prepare them. They make the next good play easier than it should be. That is the real power of macro.
If you want to climb more consistently, review your games through that lens. Do not only ask whether you landed your combo. Ask whether you were even supposed to be there. Do not only ask who missed secure. Ask whether the setup was good enough to protect secure. Do not only ask why a push failed. Ask whether the side wave, timing, and numbers made the push believable in the first place.
Once you start seeing Mobile Legends as a game of windows, waves, and forced answers, ranked becomes less random. You will throw fewer leads, stabilize more losing positions, and understand how to create advantages that do not rely on a miracle outplay.
For players looking to improve faster, studying official role and lane resources, tracking competitive map trends, and comparing your decision-making to higher-level play can help. The official Mobile Legends hero and lane pages, the MLBB Academy, and reference resources like Liquipedia’s MLBB glossary are useful places to reinforce terminology and map concepts. If your goal is to climb with more structure and less chaos, you can also review ranking support options on Boosteria’s Mobile Legends pricing page.
Master the map, and many fights become easier before they even start.