Rocket League Boost Management: Spend, Starve, Rotate
Rocket League Boost Management: When to Spend, When to Starve, When to Rotate
Rocket League players often think their biggest problem is mechanics. They blame missed aerials, weak shots, awkward recoveries, or inconsistent first touches. Those things matter, but many ranked games are really decided by something more basic: boost management. The player who understands when to spend boost aggressively, when to deny it from opponents, and when to rotate through safe pad routes usually plays faster, cleaner, and more consistently than a mechanically stronger player with poor habits.
Boost is not just fuel. It is time, pressure, safety, and control. The player with boost can arrive earlier, challenge harder, recover faster, protect space, and threaten more options. The player without boost is limited even before the ball is touched. That is why good boost management is one of the clearest differences between average ranked players and reliable climbers.
This guide is built to be as timeless as possible. Instead of focusing on one season, one rank, or one temporary meta, it focuses on principles that stay useful in any standard Rocket League environment: read the play early, value small pads, spend boost for purpose, starve only when pressure supports it, and rotate in ways that protect both your net and your next touch.
If you want to improve in Rocket League without relying on constant mechanical outplays, this is one of the highest-value topics you can study. Better boost usage helps every rank. Bronze and Silver players stop panicking. Gold and Platinum players stop abandoning position for corner boosts. Diamond and Champion players become harder to break down. Grand Champion and above players refine efficiency, tempo, and denial.
By the end of this guide, you should understand:
- when spending boost creates real value,
- when conserving boost is smarter than forcing speed,
- when starving opponents actually strengthens pressure,
- when rotating out is better than chasing one more touch,
- how boost management changes in 1v1, 2v2, and 3v3,
- and how to build habits that make smart boost decisions automatic.
Table of Contents
- Why Boost Management Matters So Much
- Think of Boost as Time, Position, and Threat
- Core Principles of Strong Boost Management
- When to Spend Boost
- When to Starve Opponents
- When to Rotate Instead of Forcing the Play
- Why Small Pads Win More Games Than Corner Boost
- How Boost Management Changes in 1v1, 2v2, and 3v3
- The Most Common Boost Mistakes
- Practical Drills to Build Better Habits
- Boost Management in Solo Queue
- FAQ
- Final Thoughts
Why Boost Management Matters So Much
At a surface level, Rocket League looks like a game about ball touches. At a deeper level, it is a game about who can take useful touches sooner, from better positions, with more options. Boost heavily shapes all three.
A player with good boost can challenge and still recover. A player with poor boost discipline often has to choose only one: commit or survive. That difference changes the entire match. It changes whether you can beat an opponent to a loose ball, whether you can follow your own pass, whether you can retreat to back post, whether you can shadow safely, and whether you can turn defense into offense without giving away possession.
Many goals in ranked are not caused by one obvious mechanical error. They happen because a player used too much boost too early, took a bad corner route, stayed in the play with nothing left, or forced a weak challenge while a teammate had a better angle behind them. By the time the goal happens, the real mistake was already made three seconds earlier.
That is why elite players seem “faster” even when they are not always holding boost. They are efficient. They spend boost where it creates advantage and conserve it when the play does not justify the cost. They understand that speed without purpose becomes overcommitment.
Boost management also scales beautifully with rank. Improving it helps immediately because it removes waste. Unlike advanced mechanics that may take weeks or months to apply consistently, boost habits can improve your game right away. You can learn better routes, safer challenges, smarter recoveries, and better offensive denial in your next session.
Think of Boost as Time, Position, and Threat
The biggest mindset shift is this: stop thinking of boost as a number you want to keep high. Think of it as a resource you convert into advantage. Sometimes that means spending a lot. Sometimes that means spending almost none.
Boost creates time because it helps you reach the ball or your rotation spot sooner. It creates position because it lets you take a stronger line, recover wider, or cover more ground after a challenge. It creates threat because opponents must respect your ability to jump, fake, air dribble, challenge early, or recover into another play.
Once you see boost that way, smarter decisions become easier. You stop asking, “Should I use boost here?” and start asking, “What do I gain if I use boost here?”
That question matters because not all boost spending has equal value. Spending 40 boost to beat a defender and create a shot is different from spending 40 boost to hit a ball you cannot follow. Spending 30 boost to recover into back-post defense is different from spending 30 boost to chase a ball already lost. Spending 20 boost to collect midfield pressure is different from spending 20 boost while your teammate needs you behind the play.
Players who climb consistently learn to separate productive speed from wasted movement. Productive speed turns into possession, a beat, a clear, a save, or a stable rotation. Wasted movement only feels fast.
Core Principles of Strong Boost Management
Before diving into specific situations, build your game around a few universal rules.
1. Spend with intent, not panic
If you do not know what your boost is buying, you are probably wasting it. Every burst should serve a purpose: beat the play, recover safely, secure a touch, close a dangerous gap, or support pressure.
2. Position beats full boost
A player on 24 boost in the right lane is usually more useful than a player on 100 boost arriving late from the wrong side. Good routes make small amounts of boost play much bigger.
3. Small pads are your real economy
Corner boost is valuable, but ranked players massively overvalue it. Small pads let you stay relevant without abandoning structure. Many bad rotations start with “I need corner.”
4. Starving is only strong if pressure already exists
Denying boost is not a replacement for pressure. It is a multiplier on pressure. If your team cannot hold territory, chasing enemy boost often just removes you from the play.
5. Rotation is not retreat
Rotating out is not giving up. It is re-entering the play from a stronger angle with better field coverage. A smart rotation often creates the next good touch.
6. Low boost is playable if your decision-making stays calm
You do not need full boost to defend, challenge, or support. Players get scored on more from panic than from low boost itself. Calm positioning makes 12, 24, or 36 boost enough for many situations.
7. Your next touch matters less than your team’s next sequence
Especially in 2v2 and 3v3, one more forced touch from you may be worse than a clean handoff to a teammate with angle and boost. Good players do not just extend their own play; they improve the team’s next play.
When to Spend Boost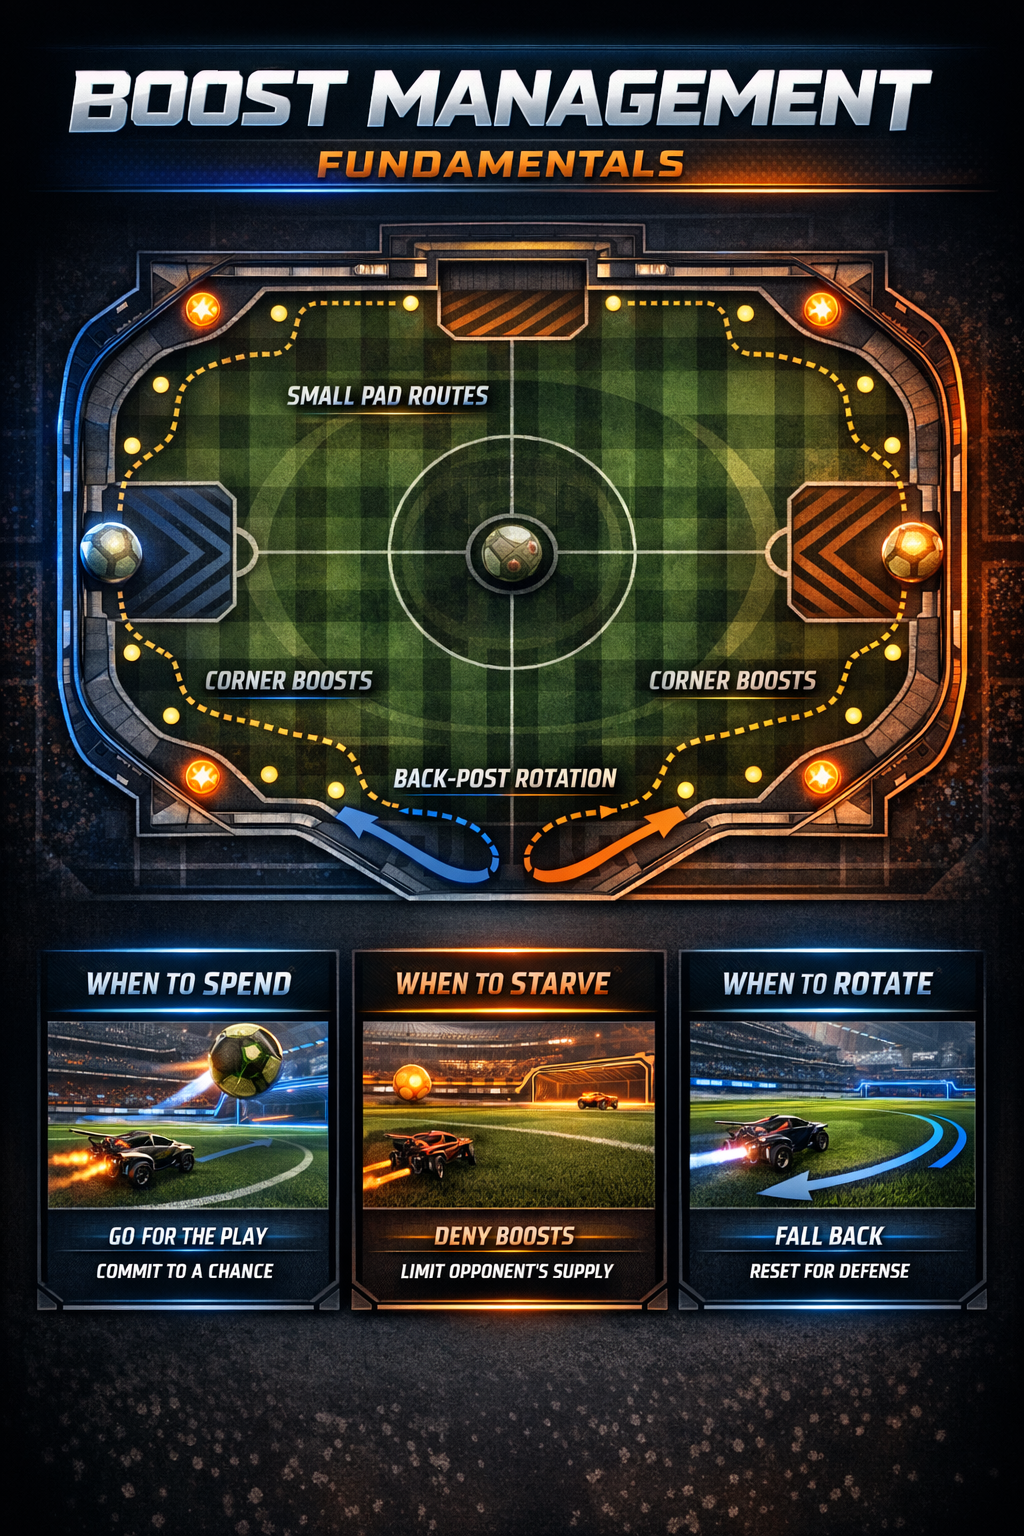
Many players hear “save boost” and become too passive. That is a mistake. The point is not to hoard boost. The point is to spend it where it creates advantage. Here are the main moments when spending boost is correct.
Spend boost to win a meaningful race
If arriving first changes the outcome of the play, spend. This includes beating an opponent to a loose ball, reaching a bounce before it becomes dangerous, or getting to a challenge that prevents a clear. The key word is meaningful. If reaching the ball first gives you a controlled touch, pressure, or safety, accelerate. If it only leads to a weak poke you cannot follow, think twice.
Spend boost to protect your recovery
Recovery is one of the best uses of boost in the game. Players often think the big moment is the jump, flick, save, or aerial, but the next second is often more important. A fast recovery preserves rotation, prevents double commits, and turns a risky play into a sustainable one. Use boost to land cleanly, reorient quickly, and rejoin the structure.
Spend boost when you are last man and danger is real
When you are the final defender, hesitation can be fatal. If the opponent has a threatening lane and you need speed to close space, cover the shot, or get into shadow range, spend decisively. Last-man boost spending should be clean and efficient, but not timid. The worst outcome is often spending half your boost indecisively and still arriving late.
Spend boost to create controlled offense, not random offense
Using boost to turn a favorable first touch into a carry, pass, or shot is often worth it. Using boost to fling yourself at a ball with no angle, no support, and no follow-up usually is not. Productive offense comes from spending boost after reading space, defenders, and support. Random offense comes from spending boost because the ball is near you.
Spend boost to maintain pressure after a good touch
One of the biggest rank-up habits is learning when to follow a strong first action. If your shot forces an awkward save, if your teammate’s 50 sends the ball loose, or if a defender is clearly low and boxed in, using boost to keep that pressure alive can create goals. In these moments, spending boost is not greed. It is capitalizing on advantage before the defense resets.
Spend boost when it keeps possession on your team
A fast adjustment that lets you catch, cushion, or softly challenge the ball can be more valuable than saving boost and giving away possession. Many players save boost but donate the ball. If a small burst helps you keep the ball on your side of the play, that can be highly efficient.
Spend boost when the alternative is getting trapped
Sometimes the correct choice is to spend early because staying cheap creates a worse outcome. If you are stuck under the ball, pinned near the wall, or about to lose an important lane, a quick boost investment can get you out before the play collapses. Smart spending is not always glamorous. Often it is just proactive problem solving.
Spend boost to cover a teammate’s aggressive play
Your teammate’s challenge may be good, but it can still leave space behind. If a quick burst from you secures second-man coverage, blocks a counter, or turns a loose ball into continued pressure, spend. Not all boost is spent on the ball directly. Some of the best boost use in Rocket League is spent on positioning that makes the next team touch possible.
Spend boost to punish obvious low-boost defenders
If a defender has already been forced awkwardly and is likely low, that is the time to speed up the next play. Drive the pace before they recover. Quick shots, strong backboard balls, and immediate second touches become much more dangerous when defenders cannot accelerate properly. Spending boost here has context. You are converting information into pressure.
When to Starve Opponents
Boost starvation is one of the most misunderstood concepts in Rocket League. Some players never think about it. Others obsess over it and chase corner boosts at the wrong times. Good starvation is not random theft. It is the art of limiting opponent options while your team controls pressure.
The basic idea is simple: if the opponent cannot access boost safely, their clears get weaker, their recoveries get slower, and their ability to challenge early gets worse. That makes your offense easier to sustain. But starvation only works well when your positioning and timing support it.
Starve when your team already owns territory
If the ball is in the opponent half, your team is organized, and at least one player can stay active on pressure, taking enemy pads and corners is excellent. You are not leaving the play; you are compressing their space. The best starvation happens while staying close enough to punish the weak touch it creates.
Starve after forcing a defender into an awkward save
One of the cleanest windows for starvation comes right after a shot, challenge, or backboard ball that forces the defense into a stretched or ugly touch. In that moment, stealing the nearby corner or sweeping the small pads on their exit route can turn one awkward defense into a long defensive sequence.
Starve the route, not just the corner
Lower-ranked players often think starvation means grabbing the enemy corner boost. That matters, but the smarter version is denying the path back to comfort. Small pads in midfield lanes, side lanes, and back-post paths can be just as important. If the opponent cannot chain pads on the way out, the corner steal matters far more.
Starve when you can still rotate back safely
If taking the enemy boost leaves your team exposed to a direct counter, it is not worth it. Good starvation keeps one foot in pressure and one foot in safety. If the play turns against you, you should still be able to recover or hand the play off cleanly. Starvation should increase pressure, not gamble structure.
Starve most aggressively in 2v2 after a beat
In 2v2, one clean beat can create a huge amount of space because there is less layered coverage behind it. If you or your teammate force a defender to turn backward, stealing the next boost source often leaves the last player with a much harder read. This is one of the strongest times to deny resources and keep the ball in their half.
Starve when your touch sends the ball somewhere your team can reach first
If your hit or challenge places the ball in a zone your teammate already controls, you can often steal pads immediately after. That is the ideal scenario. The ball remains under your team’s influence while the opponent loses recovery resources. In contrast, if your touch is weak and neutral, stealing boost may simply abandon the next contest.
Starve during offensive cycles, not one-off attacks
Rocket League pressure is often created in waves. Shot, clear, re-entry. Challenge, pop, recover. Backboard, second touch, loose ball. Boost denial is strongest when inserted into these cycles. It is weaker when attempted during isolated attacks where your team cannot keep touching the play.
Starve after demos or bump pressure
If a defender gets bumped out, demoed, or forced into a terrible recovery, stealing nearby boost becomes even stronger. Now the team is not only down a clean defender for a moment; it may also lose the resource needed to stabilize after the respawn or scramble. Physical pressure and boost denial work extremely well together.
Do not starve just because the boost is there
This is the trap. Seeing enemy corner boost available does not automatically mean you should take it. Ask what happens next. Can your team continue pressure? Can you rotate out from that route? Is someone covering the middle? Is the ball likely to spill into dangerous space? If the answer is bad, leave the boost and keep your shape.
When to Rotate Instead of Forcing the Play
One of the most important Rocket League skills is knowing when your turn is over. The players who stay too long usually feel active, but they often damage their own team. They use extra boost for one low-value touch, ruin spacing, and make the next challenge harder for everyone behind them.
Rotation becomes the best choice when staying in the play costs more than it gains.
Rotate when your touch will be weak and unsupported
If you can reach the ball but only for a soft, directionless touch that you cannot follow, rotating out is often better. That weak touch may actually help the opponent more than you. A fresh teammate with angle, speed, and vision often has the better play.
Rotate when you have used your momentum
Momentum matters. A player moving through the play with natural speed can challenge efficiently. A player who has stopped, turned awkwardly, or used most of their boost to stay involved often becomes inefficient. When your line through the play is gone, rotate and let structure restore your value.
Rotate when you would cut across a teammate’s lane
Boost management is not only about your own meter. It is also about whether your movement forces your teammate to spend more. If staying in creates confusion or makes your teammate brake, hesitate, or detour, your extra touch is expensive for the whole team. Clean rotation is an energy-saving skill for everyone.
Rotate when the ball is no longer dangerous for the opponent
Many overcommits happen because players remember where the chance started, not where it ended. A ball that looked threatening half a second ago may now be safe for the defense. If the chance is gone, stop paying for it with extra boost. Reset and prepare for the next phase.
Rotate through useful pads, not empty space
A good rotation does not just leave the ball. It prepares your re-entry. That means choosing routes that collect small pads, restore speed, and keep you goal-side of the play. Strong players often look like they magically have boost again because their exits are efficient. They do not flee randomly. They rotate on lines that refill them.
Rotate when your teammate has the better angle
Even if you still have boost, your teammate may simply be in a stronger position. If they are facing upfield, have a clearer read, or can reach the ball with less commitment, trust the handoff. Good Rocket League is not about proving you can stay in every play. It is about making the next touch as strong as possible for your team.
Rotate early as last man if the play is about to break
Last-man discipline is one of the clearest rank separators. If the play becomes uncertain and you are the safety layer, you often need to rotate or delay rather than spend everything on a maybe. Smart last-man players force the opponent to show the play first. They protect the net, buy time, and preserve the team’s shape.
Why Small Pads Win More Games Than Corner Boost
Small pads are the hidden economy of Rocket League. Players who learn to path through them stop feeling starved all the time. Players who ignore them end up making desperate corner runs that destroy their positioning.
The beauty of small pads is that they fit the flow of rotation. They live on the routes you should already be taking. A smooth pad chain can take you from empty to comfortable without ever removing you from the play. That is why pad awareness is one of the cleanest ways to improve your consistency.
There are several reasons small pads matter so much:
- They keep you connected to the play.
- They help you defend while refilling.
- They let you re-enter faster than wide corner routes.
- They reduce panic and overcommitment.
- They make enemy starvation less effective against you.
A player who can collect pads efficiently is hard to suffocate. Even without full boost, they stay active. They can shadow, challenge, jump off the wall, recover, and rotate. In contrast, players who only trust full boost pads become predictable and easy to pressure.
One of the best habits you can build is to scan for pad chains during downtime. As you rotate out, ask yourself: where is my next 24, 36, or 48 boost coming from? This mindset turns boost collection from an emergency action into normal movement.
Another useful idea is to stop thinking in terms of “I need 100.” In many situations, you do not. You need enough to perform the next job. Sometimes that job is a back-post save. Sometimes it is a fast challenge. Sometimes it is simply staying available while your teammate plays the ball. If you learn to value “enough” rather than “full,” your decisions improve immediately.
Spend, Starve, or Rotate? A Practical Decision Table
| Situation | Best Choice | Why |
|---|---|---|
| You can beat a defender and keep possession | Spend | Speed creates direct value and forces a weak response |
| Your team has pressure and enemy back corner is open | Starve | Denying resources strengthens the pressure cycle |
| You can only get a weak touch and your teammate is behind you | Rotate | Forcing the play lowers team quality and wastes boost |
| You are last man and the opponent has space | Spend carefully | Use boost for angle, shadow, and save distance, not panic dives |
| You just shot and the defense is scrambling | Spend or Starve | Either continue pressure directly or deny the escape route |
| You want enemy corner boost but the ball may counter immediately | Rotate | Safety is worth more than a greedy denial attempt |
| You are low boost but goal-side with pad route available | Rotate through pads | You stay relevant without abandoning coverage |
How Boost Management Changes in 1v1, 2v2, and 3v3
1v1: Every boost choice is personal risk management
In 1v1, boost management is brutally exposed because there is no teammate to fix your route or cover your greed. Spending too much usually means getting countered. Chasing enemy corner boost can be brilliant when you control the ball and angle, but terrible when it hands over possession.
In duel, boost management is heavily tied to challenge timing and ball control. You often want to keep enough boost to threaten both offense and recovery. Full commitment is stronger when the opponent is truly beaten; otherwise, efficiency matters more. Starvation is powerful in 1v1 because one denied corner can force a long defensive sequence, but only if the ball stays under your influence.
The best 1v1 players are patient with boost. They do not waste it showing speed. They spend it when it changes the threat profile of the play. They also use pads exceptionally well, which is one reason they seem permanently available.
2v2: Boost management defines pressure and coverage
In 2v2, every boost error is amplified because there is only one teammate behind or beside you. Overcommitting for enemy boost can leave your partner exposed. At the same time, good starvation is extremely powerful because there are fewer defensive layers to absorb pressure.
Most 2v2 players improve quickly when they learn three things:
- do not abandon the middle for corner boost unless the play supports it,
- after your turn, rotate in a way that restores pads and keeps your teammate informed,
- when your teammate has a strong first action, use boost either to support the continuation or to deny the defender’s recovery route.
2v2 rewards smart aggression. Spend boost decisively when a beat, shot, or pressure continuation is available. Starve when your team can hold the zone. Rotate immediately when your line is over. The mode punishes hesitation and greed almost equally.
3v3: Structure and spacing matter most
In 3v3, boost management becomes more collective. One player taking a bad route can distort the whole shape. Because there are more players involved, the best use of boost is often not a huge solo play. It is a controlled movement that protects spacing, supports the next challenge, or keeps pressure layered.
Starvation can be devastating in 3v3 because repeated offensive cycles force multiple defenders to survive on weak resources. But it only works if the rotating player behind the pressure remains disciplined. If one player greedily dives for corner boost while the rest are stretched, the counterattack window opens instantly.
In 3v3, pad routes and role awareness become essential. First man may spend heavily to challenge or force. Second man often spends to capitalize. Third man must conserve for safety, read the whole field, and avoid useless overlap. Strong 3v3 teams are not just fast; they are economically aligned.
How to Read the Field Before You Decide
Good boost decisions happen before the ball reaches you. If you wait until the touch is in front of your bumper, your choices get smaller. Train yourself to read three things early:
1. Who has momentum?
If your team has forward momentum, boost spending becomes more valuable because pressure can chain. If the opponent has momentum, conserving for defense or rotating through pads may be smarter.
2. Where is support?
A good individual touch with no support often becomes a bad team play. If your teammate is close and ready, spending to extend pressure is stronger. If support is far, consider a safer touch and cleaner rotation.
3. What happens if I lose this challenge?
This question separates smart pressure from reckless pressure. If losing the challenge creates no major danger because your team is covered, spending aggressively can be fine. If losing opens the net or forces a desperate save, choose a lower-cost option.
The Most Common Boost Mistakes
Taking corner boost over ball-side responsibility
This is one of the classic ranked errors. Players leave the most important lane on the field because they want to feel safe on 100 boost. The result is often a free shot, an open midfield touch, or a teammate left alone. Do not make corner boost more important than the play.
Boosting into a challenge with no plan after contact
Many players spend hard to reach a 50 but never consider where they will land or whether they can stay involved. Challenge quality includes the recovery.
Using boost to stay first man for too long
First man who never leaves becomes a problem. Even if you get touches, you may be burning resources to maintain a role that should have already passed to someone else.
Starving without pressure
Stealing boost while your team cannot threaten the ball is usually just a fancy way to be absent. Starvation must support pressure, not replace it.
Panic spending on defense
Defenders often waste boost by accelerating in straight lines without improving their angle. On defense, line quality matters. Use boost to get into a savable position, not just to feel urgent.
Ignoring pad routes after your touch
Bad players finish a play and then think about boost. Better players know their exit route while the play is still happening.
Believing low boost means no options
This mindset creates poor touches and rushed decisions. Low boost does reduce options, but it does not remove them. Position, timing, and calm reads still matter enormously.
Practical Drills to Build Better Habits
1. Play pad-focused freeplay
Spend several minutes driving the field while intentionally chaining small pads. Do not go for full boosts unless necessary. Learn how quickly your comfort level returns when your route is efficient.
2. Review your replays for “why was I empty?” moments
Do not just notice that you had zero boost. Ask why. Did you spend with purpose? Did you chase a weak touch? Did you rotate through empty space? Did you leave for corner when pads were available? Replay review makes boost leaks obvious.
3. Force yourself to leave after one offensive action
In casual or ranked, consciously practice shorter offensive turns. Challenge, shoot, or center, then rotate out through pads unless the continuation is clearly yours. This trains trust, spacing, and economic discipline.
4. Practice shadow defense with limited boost
Deliberately defend with modest boost amounts in training or custom situations. This helps you learn how little you actually need when your angle and timing are right.
5. Count the opponent’s likely recovery route
During games, mentally note where a defender wants to go next. If they are turning out through the corner or side lane, think about denial. This builds smarter starvation, not just random theft.
6. Play one session where your only focus is “use boost for outcomes”
Ignore the score for a short block and judge every use of boost by outcome quality. Did it create a beat, possession, safety, or pressure? Or did it merely feel active? This changes your instincts quickly.
Boost Management in Solo Queue
Solo queue changes boost management because trust is lower and coordination is less explicit. That does not mean you should become selfish. It means your decisions must be easier for strangers to read.
In solo queue, clean rotation is even more valuable because teammates are often guessing your intention. If you stay in too long, cut lanes, or disappear for corner boost at bad times, your teammate has less information and will often compensate poorly.
Here are the biggest solo queue adjustments:
- Rotate more clearly than you think you need to.
- Prefer pad routes that keep you visible and relevant.
- Do not assume your teammate will cover your greedy starvation path.
- Use quick chats simply and predictably.
- Value defensive certainty over flashy economy plays.
One of the best solo queue skills is learning how to be easy to play with. Smart boost management helps. When you choose stable routes and spend boost for obvious value, teammates can read the structure faster. That alone wins extra games.
Advanced Concepts for Higher Ranks
Tempo manipulation
Higher-ranked players do not always play at max speed. They change pace. Sometimes the best boost management choice is to slow down, hold possession, and force defenders to reveal their position. Other times it is to accelerate sharply into the gap they just exposed. Great players use boost to manipulate tempo, not just to move quickly.
Soft denial
You do not always need to steal the boost directly. Sometimes simply occupying the lane to it creates the same effect. If a defender cannot safely path to their corner or side pads because your car shape blocks the route, you have denied resources without leaving the play.
Recoveries as economy
At higher levels, recoveries become a major part of boost efficiency. Cleaner landings, better powerslides, smarter wave dashes, and stronger route planning reduce how much boost you need to stay fast. Mechanical efficiency and boost management become one skill.
Pressure layering
When teammates understand spacing, boost spending can be distributed intelligently. One player spends to force. One holds a cheap but threatening support lane. One conserves for the safety net. That layering makes a team feel relentless without everyone wasting boost at once.
Recognizing dead possessions
Not every attack deserves more investment. Advanced players quickly identify when the ball is no longer dangerous and stop spending on a play that has already expired. This saves enormous amounts of boost over a match.
How to Build a Personal Boost Checklist
If you want a simple in-game mental model, use this checklist:
- What am I buying with this boost?
- If I spend here, who covers behind me?
- If I rotate now, can I refill through pads?
- Is the opponent actually vulnerable, or am I just guessing?
- Would my teammate’s touch be stronger than mine right now?
You do not need to say all five questions every time, but practicing them builds instinct. Over time, the answers become automatic.
Useful External Resources for Ongoing Improvement
If you want to keep sharpening your Rocket League knowledge, it helps to mix your own replay review with official resources and high-level gameplay study. The official Rocket League patch notes are useful for gameplay updates, and the Rocket League support hub can help you stay current with newer interface and information features. For learning how elite teams create and sustain pressure, watching top-level competition and analysis around the RLCS environment is still valuable because strong rotational habits and boost discipline remain visible at the highest level.
If your main goal is ranked improvement and you want a direct look at options for faster progress, you can also check the Rocket League boosting prices page to compare services while you work on your own consistency and decision-making.
FAQ
Should I always take corner boost on defense?
No. If taking corner boost leaves your net, near-post lane, or midfield gap exposed, it is a bad trade. Defensive positioning is usually more important than reaching 100 boost.
Is starving opponents always worth it?
No. Starving is strongest when your team already has pressure and can keep the opponent boxed in. If taking their boost removes you from the play or opens a counter, it is not worth it.
How much boost do I need to stay useful?
Less than most players think. Enough to perform your next job is often enough. Good routes, timing, and angles matter just as much as the number itself.
Why do small pads matter so much?
Because they keep you connected to the play. Small pads let you refill while rotating properly, which prevents the desperate full-boost runs that often break structure.
When should I spend boost aggressively?
Spend aggressively when it wins a meaningful race, secures a recovery, creates controlled offense, or protects an important defensive angle. Do not spend aggressively just because the ball is close.
How do I know my turn is over?
Your turn is usually over when your next touch will be weak, your momentum is gone, your teammate has the better angle, or staying in would distort your team’s spacing.
What is the biggest boost mistake in ranked?
Probably abandoning good position for full boost at the wrong time. That one habit causes countless free goals and broken rotations.
Final Thoughts
Rocket League boost management is not glamorous, but it wins games. It decides whether your speed has purpose, whether your pressure lasts, whether your defense stabilizes, and whether your team can rotate cleanly under stress. Players who understand boost deeply often look calmer, faster, and more reliable because they are spending resources where they matter instead of burning them on low-value movement.
If you remember only one lesson from this guide, make it this: boost should serve the play, not your comfort. Spend when it creates value. Starve when pressure supports it. Rotate when staying in would lower the quality of the next sequence. Build your routes around small pads. Trust positioning more than panic. And treat every boost decision as part of a larger team economy, not just your personal meter.
Once these habits settle in, Rocket League starts to feel different. You stop chasing the game and start controlling it. Your touches become more purposeful. Your recoveries become cleaner. Your rotations become easier for teammates to read. And your ranked results become more stable because they are built on decisions that hold up in any lobby, not just on days when your mechanics feel perfect.
That is the real power of boost management. It does not just make you faster. It makes your entire game smarter.