Dota 2 Stacking & Farming Patterns: Efficient, Not Greedy
Dota 2 — Stacking & Farming Patterns: Efficiency Without Greed
Farming in Dota 2 is not “hit creeps until you’re rich.” Farming is the art of converting time into gold and experience without giving the enemy kills, towers, Roshan, or map control in exchange. The best players don’t just farm fast— they farm clean: minimal downtime, minimal risk, maximum impact when it’s time to fight.
This guide is built to be timeless: it focuses on principles, repeatable patterns, and decision rules that stay relevant across patches. You’ll learn how to stack neutrals reliably, how to build farming routes that don’t break lane pressure, how to “cash” stacks safely, and how each role should think about efficiency. The goal is simple: raise your GPM/XPM while lowering deaths and wasted rotations.
If you want a faster climb with pro guidance, you can also check Boosteria’s Dota 2 options here: https://boosteria.org/dota2-boosting/prices.
Table of Contents
- The Core Idea: Efficiency Without Greed
- The Farming Language: Tempo, Dead Time, and “Show Late”
- Stacking Basics That Never Go Out of Style
- Advanced Stacking Techniques (Without Overcomplicating)
- How to Convert Stacks Safely (The “Cash Out” Plan)
- Farming Routes That Win Games
- Phase-Based Patterns: Lane → Jungle → Objectives
- Role Patterns: Carry, Mid, Offlane, Support 4, Support 5
- Risk Management: Don’t Die for One More Camp
- Vision for Farmers: Wards That Protect Routes
- Itemization and Hero Archetypes for Farming
- Team Communication: Simple Calls That Multiply GPM
- Common Mistakes (and How to Fix Them Fast)
- Practice Drills: Build Muscle Memory
- Quick Checklist: The “Efficient, Not Greedy” Rules
1) The Core Idea: Efficiency Without Greed
“Greed” in Dota 2 isn’t buying a farming item. Greed is when your farm plan ignores reality: enemy heroes missing, your lanes shoved against you, your towers weak, no vision, and you still walk into the most punishable area because “there’s one more camp.” Efficient players do the opposite:
- They farm what is safe first (under vision, near allies, near exits).
- They keep lanes moving so the map stays playable.
- They stack proactively so future minutes become richer.
- They cash stacks when it’s correct, not when it’s tempting.
- They show late (appear on the map after extracting value) to reduce gank windows.
Think of efficiency as a loop: push a lane → use the last seconds of a minute to stack → farm a nearby camp → return to a lane at the next safe moment. This loop keeps gold flowing while also forcing the enemy to respond to creeps hitting their towers.
If you only jungle, your towers get pressured and your map shrinks. If you only lane, you miss neutral gold and fall behind in burst farming. The best pattern is a balance: lanes create pressure and information; neutrals fill the gaps and accelerate item timings.
For official and reference-level mechanics (neutral camps, runes, map fundamentals), Valve’s Dota 2 site is a good baseline: Dota 2 (Official). For community encyclopedic details, Liquipedia is widely used in competitive contexts: Liquipedia Dota 2.
2) The Farming Language: Tempo, Dead Time, and “Show Late”
Before we talk about routes and stacks, you need three concepts that instantly clean up farming decisions: tempo, dead time, and show late.
Tempo
Tempo is the pace of the game: which team is able to take actions without being punished. If your team has stronger spells/items right now, you can farm more aggressively because enemies must respond or lose objectives. If your team is weak right now, you farm defensively and trade the map smartly until your timings arrive.
Dead Time
Dead time is any second that doesn’t produce value: wandering, hesitating, walking long distances for one camp, sitting behind a tower doing nothing, or chasing low-percentage kills while waves die elsewhere. Efficient farming is about eliminating dead time.
A simple rule: if you walked farther than the gold you gained, you lost value. This is why short routes near lanes are king.
Show Late
“Show late” means you reveal yourself on a wave after you already extracted value from nearby camps or stacks. If you show early, the enemy knows where you are and can set up a gank. If you show late, the enemy has less time to rotate, and you can leave the lane before they arrive.
Show late looks like this:
- Farm nearby neutrals while the wave approaches your tower.
- Step into lane, clear the wave quickly.
- Immediately retreat through a safe exit (toward allies, vision, or high ground).
If you combine “show late” with stacking (using the last seconds of a minute), you create a rhythm that is hard to punish.
3) Stacking Basics That Never Go Out of Style
Stacking is one of the highest-leverage skills in Dota 2 because it turns a single minute into future gold. Even if you don’t take the stack yourself, you create resources for your cores—and that often becomes the difference between a “normal game” and a game where your carry hits a key item 2–4 minutes earlier.
How stacking works (timeless version)
Neutral creeps attempt to spawn on each minute mark. If a camp’s spawn box is empty at that moment, a new set of creeps spawns. When you “stack,” you temporarily pull the camp out of its spawn box during the final seconds of the minute, so the game spawns a new set—then the old set walks back, creating multiple packs in one camp.
Practical timing: you usually start the pull in the last ~5–7 seconds before the minute. The exact second varies by camp location and how you aggro (attack, spell, creep-aggro trick), but the concept stays the same: get creeps out before the minute flips.
Why stacking is “efficiency without greed”
- Stacks concentrate gold into a safer, planned moment instead of risky, scattered minutes.
- Stacks create comeback options when lanes are hard—your cores can recover.
- Stacks improve map rhythm: supports stack while moving for wards, runes, pulls, and resets.
Stack priorities by role
The biggest mistake is thinking stacking is only a support job or only a carry job. It’s a team job, but priorities differ:
- Position 1: wants stacks that match their hero’s farming tools (cleave, AoE, sustain).
- Position 2: often stacks during rune control or when lane is pushed; converts stacks to snowball.
- Position 3: stacks when it enables pressure items (blink timing, aura timing) without losing lane control.
- Position 4/5: stacks naturally while doing vision/runes/pulls; sets the table for cores.
Stacking etiquette that increases win rate
- Tell your core what you stacked (“double ancient” / “triple hard camp”) and when it’s safe to take.
- Don’t stack what nobody can clear (huge stacks with no AoE/cleave can become a trap).
- Protect the stack with a ward or by controlling nearby lane—otherwise you stacked for the enemy.
- Don’t abandon lane pressure just to stack; the best stacks happen on the way to something.
4) Advanced Stacking Techniques (Without Overcomplicating)
Once you can stack reliably, you can add layers. Advanced stacking is not about flashy tricks— it’s about stacking without losing tempo.
4.1) “Stack while traveling” (the best habit)
The cleanest stacks happen when you are already moving:
- Walking to a rune? Stack the nearest camp on the way.
- Rotating to place vision? Stack a camp near your intended ward cliff.
- Returning to base to heal? Stack on the way out, then reset.
This eliminates dead time because the stack “piggybacks” on movement you already had to do.
4.2) Multi-camp stacking: when it’s worth it
Multi-stacking means stacking two camps in one minute window. It is possible with the right spacing, the right movement speed, and sometimes spells or summons. The principle: don’t force it if it breaks your lane job.
Multi-stacking is best when:
- Your core will convert it soon (next 1–3 minutes),
- The area is protected (vision/allies),
- You won’t lose a tower or an important wave for it.
Multi-stacking is a trap when:
- Your carry can’t clear it yet,
- You reveal your position too early,
- You sacrifice lane equilibrium and your offlaner gets bullied out,
- The enemy can invade and steal it.
4.3) Stacking with spells, summons, and units
Many heroes can stack with abilities (long-range damage, summons, controlled units). The timeless concept is simple: use extra units to keep your hero efficient.
- If you have a controlled unit, stack a nearby camp while your hero continues a lane/farm action.
- If you have a long-range spell, use it to aggro at the right time without walking deep into danger.
- If you have summons, you can “pre-position” them near camps and stack with minimal hero movement.
Don’t turn stacking into a mini-game that makes you miss the real game. Your priority is still lanes and objectives.
4.4) The “stack + pull” relationship (lane support fundamentals)
Stacking and pulling are cousins: both manipulate neutral camps to shape lane outcomes. While this guide focuses on farming patterns, remember:
- Pulling can fix a dangerous lane by dragging the wave back.
- Stacking a pull camp can deny more creeps and stabilize your carry’s lane.
- A stable lane creates the first “window” for a carry to start the lane→jungle pattern.
If you want data-driven match insights and patterns (skill builds, item timings, win rates), community stat tools can help your study: OpenDota and Dotabuff. Use them to learn trends, but build your decision-making on timeless fundamentals.
5) How to Convert Stacks Safely (The “Cash Out” Plan)
Stacking is only half the skill. The other half is converting stacks into real advantage without dying. A stack is concentrated gold—so the enemy also sees it as concentrated opportunity.
5.1) The three questions before taking a stack
- Can I clear it fast enough? (time-to-clear matters; slow clears create gank windows)
- Is the area protected? (vision, allies nearby, or at least safe exit routes)
- What am I giving up? (a wave, a tower defense, rune control, or an objective timing)
If you can’t answer these confidently, delay the stack. Waiting 60–120 seconds is often better than feeding once. A single death frequently costs more than the stack gives.
5.2) Convert with a “two-step” plan
Efficient conversion is rarely “walk in and hit neutrals until done.” Instead:
- Secure the area first: shove the nearest lane or place a protective ward.
- Take the stack quickly: burst it with AoE/cleave + sustain, then exit immediately.
Shoving the lane first forces enemy heroes to show (defending creeps hitting a tower), which reduces gank uncertainty. This is the heart of “efficiency without greed”: make the stack a planned action behind information.
5.3) When to ask for help
Many stacks are best taken with assistance—even if you “could” take it alone. Ask for help when:
- The enemy has strong pickoff heroes missing on the map.
- Your hero clears slowly and must commit HP/resources.
- The stack is near a contested area (common invade path).
- The stack timing aligns with an objective (tower, Roshan, tormentor-style objectives depending on meta).
Two heroes clearing a stack quickly is often safer than one hero taking longer, because speed reduces punish windows. The gold split can be worth it if it prevents a death and unlocks an objective.
5.4) Don’t “over-stack” your game plan
Over-stacking is a hidden form of greed: you stack so much that your team never cashes it at the right time. A good rule is stack with intention:
- Stack for the next power spike (first farming item, first big ult timing, first teamfight item).
- Stack in areas you can actually defend or contest.
- Prefer “medium stacks often” over “giant stacks rarely” unless your draft is built for it.
6) Farming Routes That Win Games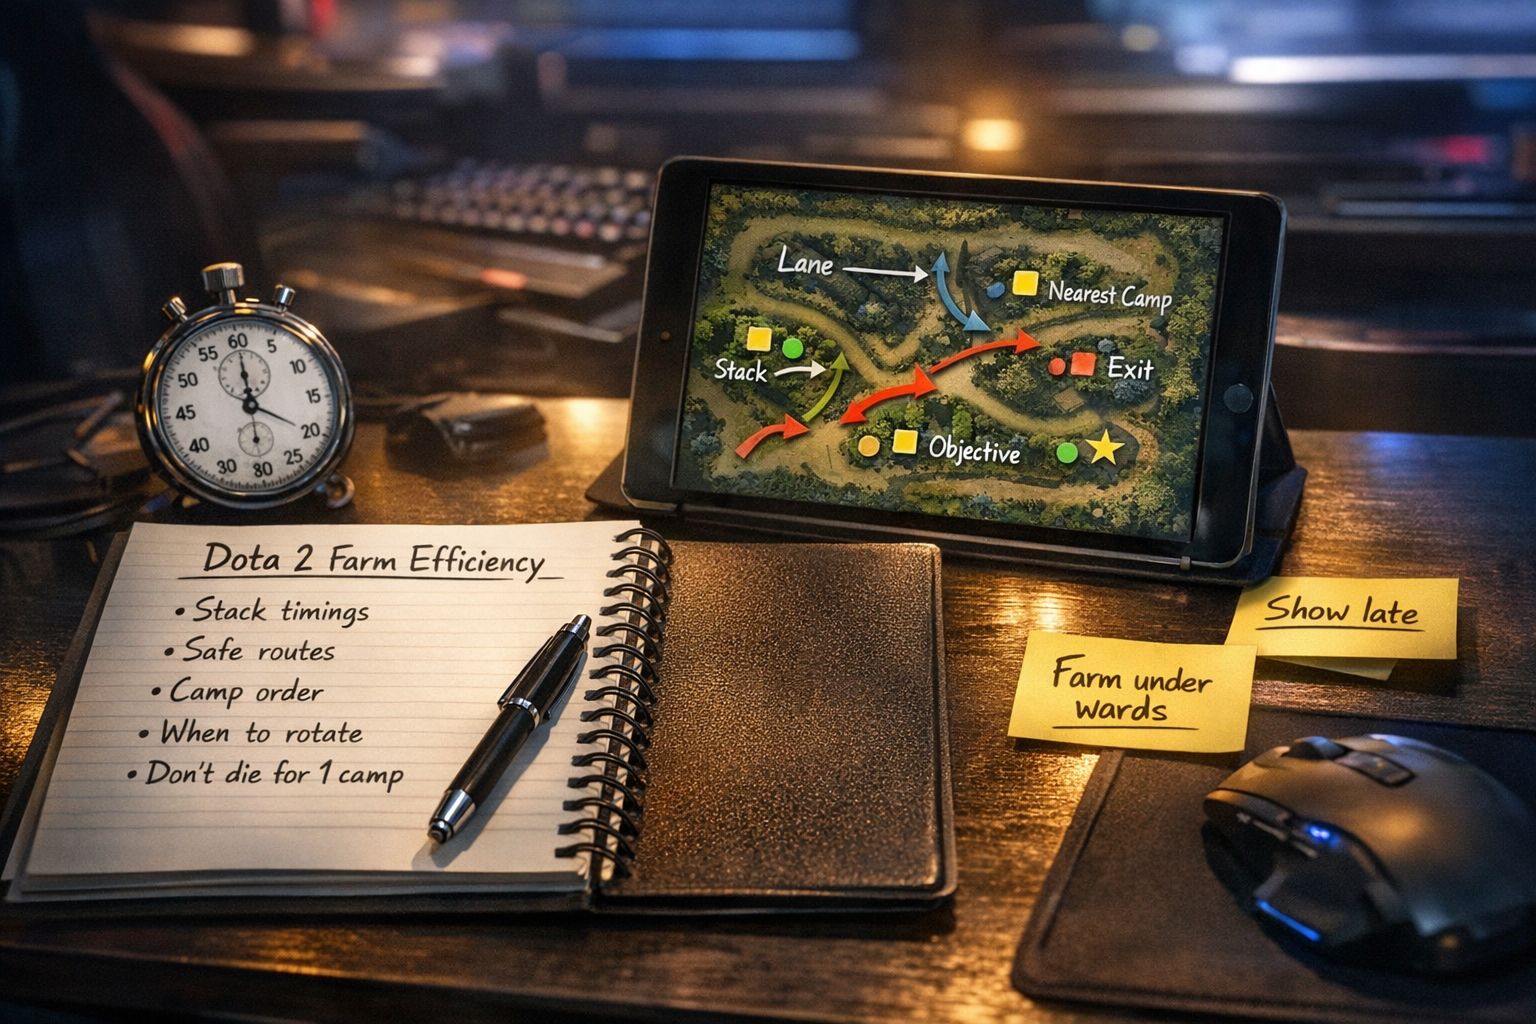
Farming routes are the difference between high GPM and “I’m farming but I’m never strong.” A good route does three things:
- It includes lane waves (the most reliable gold + map pressure).
- It minimizes walking (short distances between wave and camps).
- It has exits (paths to safety if the enemy rotates).
If your route is “deep jungle only,” you may get gold—but you lose the map. If your route is “lane only,” you become predictable and miss efficient neutral bursts. The best route is a triangle of actions: lane → nearest camp → next camp/stack → lane. (Players often call a safe cluster of camps near ancients “the triangle,” but the name matters less than the concept: farm near defendable structures and high ground.)
6.1) The Lane Anchor Rule
Always keep an anchor lane in mind: the lane you can safely appear in to clear a wave and retreat. Your farming becomes safer when you treat lanes as “checkpoints”:
- Clear wave quickly.
- Disappear immediately to nearby camps.
- Return for the next wave when it’s safe again (“show late”).
6.2) The Short Route Rule
A short route beats a “perfect camp list” because walking is the enemy of GPM. If a camp is far, it must justify itself by being:
- Part of a stack conversion, or
- On the way to an objective (tower, warding, rune), or
- Uncontestable safe gold (enemy can’t reach you), or
- A “refuel” camp while waiting for a wave to arrive.
6.3) The Information Route Rule
Farm where you have information. Information comes from:
- Enemy heroes showing on lanes,
- Your wards (and your ability to defend them),
- Allies positioned nearby,
- Recently dewarded areas (less likely to be watched by enemy).
If you have no information, your route must be closer to towers and allies. Efficiency doesn’t mean maximum risk; it means maximum value per risk.
7) Phase-Based Patterns: Lane → Jungle → Objectives
Your farming plan should evolve as the game evolves. A timeless structure is to think in phases: laning, early midgame, midgame, and late game. The exact minutes vary each match, but the pattern stays consistent.
7.1) Laning phase: stabilize and set up your first route
Early farming is about two things:
- Secure lane last hits without dying (death is the biggest GPM loss in the game).
- Create your first safe transition into nearby neutrals when the lane becomes dangerous.
Core idea: your first jungle pattern should begin when you can clear a wave quickly and then retreat to neutrals without being chased. Supports can accelerate this by:
- Stacking a nearby camp during routine movement,
- Helping the carry “reset” the wave (pull, secure range creep, contest denies),
- Placing a protective ward that watches the first invade path.
7.2) Early midgame: farm while lanes are contested
This is where efficiency often breaks. Many players choose one extreme: join every fight and fall behind, or ignore fights and lose towers. The efficient pattern is to farm toward fights:
- Clear the closest safe wave first.
- Stack or farm the nearest camp while moving.
- Arrive to the fight area as your team commits—ideally with a fresh item or level.
If your team is not committing, don’t hover. Hovering is dead time. Farm until you see a real commitment or a real objective.
7.3) Midgame: convert farm into map control
Midgame is when farming must pay dividends: towers, Roshan pressure, vision lines, and control of enemy camps. The best farming pattern in midgame includes:
- One hero pushing lanes (or wave-clearing safely),
- One hero farming protected camps (often the carry),
- Supports guarding vision and preparing the next objective.
If you only farm your own camps forever, you cap your advantage. Eventually, efficient teams take the “next step”: they farm the enemy’s safe camps while maintaining an exit plan and a lane shove.
7.4) Late game: farm with buyback and objective rules
Late game efficiency is not just GPM—it’s decision quality. The biggest late-game greed mistake is dying without buyback or dying right before an objective.
Late-game farming rules:
- Respect buyback: farm in ways that preserve buyback when objectives are imminent.
- Show less: avoid long lane reveals; use waves only when the enemy is showing elsewhere.
- Farm closer to your team: a late-game death is massively more expensive.
- Prioritize lanes that enable objectives: a shoved lane is an invitation to take buildings.
8) Role Patterns: Carry, Mid, Offlane, Support 4, Support 5
Farming patterns change by role. Here are timeless role blueprints you can adapt to any patch.
8.1) Position 1 (Carry): “Lane anchor + protected burst”
The carry’s job is to scale—and to do it without feeding. Your ideal pattern:
- Anchor a safe lane wave (show late, clear fast).
- Farm the closest camps (short route, minimal walking).
- Take stacks when information is favorable (enemy showing, wards up, allies near).
- Join fights selectively when you have a timing (first big item, BKB window, level spike).
Carry efficiency tips:
- Never “AFK jungle” if a safe lane wave is free—lane gold is faster and pressures towers.
- Don’t defend dead towers alone; trade by farming the safest opposite area and shoving a lane.
- Ask supports for one protective ward that covers your route, not just random cliffs.
- Choose camps by clear speed: your best camp is the one you clear quickest while staying safe.
Carry route example (conceptual)
You clear a wave near your tower, retreat to the nearest camp, then move to a second camp or stack, then reappear for the next wave. If enemies go missing, you shorten the route and play closer to allies/high ground. If enemies show elsewhere, you extend the route to include a stack or one deeper camp—then reset.
8.2) Position 2 (Mid): “Wave first, then stack/rune, then pressure”
Mid players often waste time “searching for action” without a clean wave plan. A timeless mid efficiency pattern:
- Wave first: clear mid wave quickly to free your hero.
- Use the minute edges: stack a nearby camp or secure rune timing while traveling.
- Pressure with purpose: rotate when it wins something (tower, rune control, enemy carry pressure), not just for a fight.
Mid heroes frequently convert stacks into snowball items or levels. The key is not to get stuck: if you commit to a stack clear, do it fast and leave; don’t linger and become a gank magnet.
8.3) Position 3 (Offlane): “Pressure lane, take enemy space, farm on the way”
Offlane is about creating discomfort. Your farm is valuable, but your true value is space creation. Timeless offlane pattern:
- Pressure your lane and force rotations.
- Farm the nearest camp(s) while waiting for the next wave.
- When you force enemies to respond, your carry’s side becomes safer.
- Convert your farm into team items and initiation windows.
Offlane greed is dying deep while trying to “get one more wave.” Offlane efficiency is living long enough to keep the enemy uncomfortable and to hit your blink/aura timing.
8.4) Position 4 (Soft Support): “Stack + threaten + connect lanes”
Position 4 is the glue role: you connect lanes, threaten ganks, and still create resources. Your efficiency comes from doing multiple jobs in one movement:
- Rotate through jungle to place vision and stack a camp on the way.
- Show briefly to pressure a lane, then disappear to create uncertainty.
- Help convert stacks by providing control, healing, or vision when your core commits.
A great pos 4 is a “time optimizer.” You don’t need big last-hit numbers to be efficient; you need high-impact minutes.
8.5) Position 5 (Hard Support): “Stabilize lanes, stack with intention, protect routes”
Position 5 efficiency is measured in:
- How stable your carry’s first 8–12 minutes are,
- How many meaningful stacks you create,
- How well you protect the carry’s route with vision and presence,
- How often you die meaninglessly (avoid this).
Simple pos 5 pattern:
- Secure lane equilibrium (pull/contest, protect your carry).
- When carry is stable, move for a stack during minute edges.
- Place one ward that protects your carry’s farming lane/exit.
- Return to lane or connect to mid/offlane if a real objective is available.
If you stack but your carry dies while you’re gone, you lost the real battle. Protect first, then stack.
9) Risk Management: Don’t Die for One More Camp
The most common farming mistake at every rank is the same: a player sees free gold, ignores missing heroes, and dies. This is not a mechanical problem—it’s a decision rule problem. Here are timeless risk rules that keep your net worth rising without feeding.
9.1) The “3 missing” rule
If multiple enemy heroes are missing and you don’t have vision, assume they can reach you. The correct response is not “stop farming”—it’s “change the type of farm”:
- Farm closer to your tower/high ground.
- Farm closer to allies who can react.
- Prioritize lane waves you can clear quickly and retreat.
- Delay stack conversion until you have information.
9.2) The “two exits” rule
When you choose a camp or lane to farm, ask: “Do I have at least two exits?” Exits can be:
- A path to a tower or high ground,
- A path toward allies,
- A path through warded territory,
- A mobility spell/item route.
If you have only one exit, you are easier to trap. In those moments, efficiency means choosing a different camp, even if it’s slightly less gold.
9.3) The “objective clock” rule
Before major objectives, risk should go down. If your team is about to fight for a tower or a big neutral objective, your job is to be alive and have resources (HP/mana/TP/buyback if late game). Farming one extra camp right before the fight is often negative value if it risks death or delays your arrival.
9.4) The “death tax” (why greed is expensive)
Death costs:
- Time (no farming while dead),
- Positioning (you respawn far from where you need to be),
- Map control (enemy takes wards/objectives while you’re dead),
- Momentum (enemy snowballs items and levels).
If you internalize one lesson, make it this: One death often costs more than two minutes of perfect farming gains. Efficiency without greed means valuing survival as part of GPM.
10) Vision for Farmers: Wards That Protect Routes
Many teams ward “random cliffs” and call it a day. Efficient vision is route-based: wards exist to protect the next 2–3 minutes of farming and the next objective setup.
10.1) The three best ward purposes (for farm)
- Watch the invade path into your protected camps/stack area.
- Watch the lane approach so you can “show late” safely.
- Watch the exit choke so you can retreat without guessing.
10.2) Farming-friendly ward habits
- When you plan to convert a stack, place a ward first or ask a support to cover the area.
- If the enemy has strong smoke/pickoff, prefer deeper defensive wards that see movement earlier.
- When your team is behind, ward your safest farm pocket and accept trading the far lanes.
- When your team is ahead, ward to enable invasion: farm enemy camps while maintaining an exit.
Efficiency is not just mechanics—it’s information. Good vision reduces fear and increases your valid farming options.
11) Itemization and Hero Archetypes for Farming
Different heroes convert stacks differently. A timeless way to understand farming is to classify heroes by how they clear:
11.1) Cleave/physical accelerators
These heroes farm faster when they hit multiple units per attack or amplify physical clears. They love stacked camps once they have their key accelerator item(s), and they often prefer tight routes that maximize uptime.
11.2) AoE spell farmers
These heroes delete camps with spells and often want mana sustain and cooldown rhythm. Their routes are about syncing spell cooldowns with wave arrivals: clear wave, clear camp, clear camp, return to wave.
11.3) Illusion/summon farmers
These heroes increase efficiency by splitting units across camps and lanes. Their timeless advantage is “parallel farming”: while the hero is safe, units do extra work. Their timeless weakness is predictability and vulnerability when caught without defensive tools.
11.4) Sustain-based stack converters
Some heroes can take stacks earlier because they sustain through damage (lifesteal, regen, damage reduction). The rule remains: don’t convert stacks in darkness. Sustain does not beat five heroes rotating into you.
11.5) Item principles (timeless)
- Accelerator first when your game plan requires out-scaling (if your hero benefits massively from it).
- Survivability on time when the enemy can punish you (defensive item timing is often the real “greed check”).
- Conversion items that let you cash stacks quickly are safer than slow clears.
- Don’t over-invest in farm if your team needs you to fight earlier—efficiency includes winning fights.
A useful mindset: you don’t buy items to farm forever—you buy items to reach a point where you can take objectives. Farming is the runway; objectives are the flight.
12) Team Communication: Simple Calls That Multiply GPM
Dota 2 is chaotic, and that chaos often destroys farming patterns. The best teams simplify with short, actionable calls. Here are high-value, low-effort communications:
12.1) Stack calls
- “Double stack ready near ancients.”
- “Hard camp stacked twice—take it when you have sustain.”
- “I warded for your stack clear.”
12.2) Map calls
- “Three missing—play close for one minute.”
- “Enemy core showed top—safe to convert stack bottom.”
- “We shoved mid; you can take the stack now.”
12.3) Objective calls
- “Next catapult wave: pressure tower.”
- “Use our item timing—smoke after you finish this wave.”
- “Don’t show; let lanes push then we go.”
The point: align farm with team actions. When your team knows your plan, they can play around your timing instead of accidentally forcing you into bad fights.
13) Common Mistakes (and How to Fix Them Fast)
Mistake 1: Jungling while waves crash into your tower
Fix: treat free lane waves as priority. Clear wave fast, then return to camps. Lane gold is not optional.
Mistake 2: Stacking camps you can’t clear
Fix: stack with intention. If your carry needs one more item to clear stacks quickly, stack lightly until that item arrives.
Mistake 3: Showing early on a lane, then farming nearby jungle
Fix: invert the order. Farm nearby camps first, then show late to clear wave and retreat.
Mistake 4: Walking across the map for one camp
Fix: build short routes. Only travel far if it also accomplishes a bigger goal (objective, warding, forcing rotation).
Mistake 5: Converting stacks with no vision
Fix: secure area first—shove lane or ward. Stacks are concentrated value, so protect them.
Mistake 6: Fighting every time teammates ping
Fix: join fights when they are real objectives or when your timing is meaningful. Otherwise, farm toward the fight and arrive late.
Mistake 7: Defending doomed towers alone
Fix: trade intelligently. If you can’t defend with numbers, push another lane and take safe farm while the enemy groups.
14) Practice Drills: Build Muscle Memory
The fastest way to improve efficiency is to practice small, repeatable drills until they’re automatic. Here are drills you can do in normal games (no special setup required).
Drill A: “Minute Edge” stacking habit
- For 10 minutes, look at the clock every minute and ask: “Can I stack on my current path?”
- If yes, do it. If no, note why (lane duty, danger, too far).
- Goal: make stacking a default option, not a random thought.
Drill B: “Show late” wave discipline
- Pick one side lane you will anchor.
- Before each wave, farm a nearby camp while the wave approaches.
- Step in, clear wave, immediately retreat.
- Goal: reduce deaths and reduce enemy rotations by staying unpredictable.
Drill C: Route tightening
- After each game, remember one moment you walked far for little gain.
- Next game, replace that movement with a short camp-to-wave loop.
- Goal: eliminate dead time.
Drill D: Stack conversion planning
- When a stack is created, decide immediately: “Who takes it, and when?”
- Place one ward or shove one wave before converting.
- Goal: stop treating stacks like random loot and start treating them like planned income.
15) Quick Checklist: The “Efficient, Not Greedy” Rules
- Lane waves are the anchor. If a safe wave exists, take it.
- Stack at minute edges. Use the last seconds of the minute while traveling.
- Show late. Farm camps first, then reveal briefly to clear wave and leave.
- Short routes beat fancy routes. Minimize walking; maximize uptime.
- Convert stacks with information. Shove lane or ward before you commit.
- Don’t die for one more camp. Death tax is bigger than the camp’s gold.
- Farm toward objectives. Items are for taking buildings and winning fights, not for infinite jungle.
- Communicate simply. “Stack ready,” “three missing,” “push then take stack.”
Mastering stacking and farming patterns is one of the most reliable ways to climb in Dota 2 because it improves every game: you hit items earlier when ahead, recover faster when behind, and you give your team structure in chaos. Focus on clean loops, safe information-based decisions, and planned stack conversions—and your net worth will rise without feeding.
Want extra help accelerating your climb? Boosteria Dota 2 options are here: https://boosteria.org/dota2-boosting/prices.
Helpful references for deeper study (official + community): Dota 2 (Official) | Liquipedia | OpenDota | Dotabuff