Valorant Peeking Types Explained: Jiggle, Wide, Off-Angles
Valorant — Peeking Types Explained: Jiggle, Wide Swing, Contact, and Off-Angles
Peeking is the core “mechanical language” of Valorant: how you take space, gather information, create favorable duels, and turn utility into kills. If your peeks are inconsistent, everything else feels random—your aim looks “on and off,” you get punished by better players, and you can’t reliably convert advantages. The good news: peeking is learnable with clear rules.
This guide breaks down the most important peeking types—jiggle peeks, wide swings, contact peeks, and off-angles—and explains when to use each one, how to execute them cleanly, and how to practice until they’re automatic. The goal is a timeless skillset: principles that remain useful across patches, metas, and map rotations.
Official game reference: playvalorant.com. If you want structured help applying these concepts to your rank climb, you can also check Boosteria Valorant Boosting Prices.
Table of Contents
- Quick Definitions (So You Don’t Get Lost)
- Why Peeks Work: Angles, Timing, and “Who Sees Who First”
- Jiggle Peek (Info, Bait, and Micro-Pressure)
- Wide Swing (Punish Crosshair Placement and Create a Clean Fight)
- Contact Peek (Silent Space-Taking and Trap Setups)
- Off-Angles (Win Duels Before They Start)
- Peeking + Utility: Flash, Smoke, Recon, and Drone Pairings
- Role-Based Peeking: Duelist, Initiator, Controller, Sentinel
- The 15 Most Common Peeking Mistakes (and Fixes)
- Practice Plan: 20 Minutes a Day to Upgrade Your Peeks
- How Better Peeks Translate to Higher Rank
- Match Checklist: What to Think Before You Peek
- FAQ
1) Quick Definitions (So You Don’t Get Lost)
Before we get tactical, we need shared vocabulary. Players often argue about “peeker’s advantage” or “wide swings” while describing different things. Use these simple definitions:
- Peek: Any movement that exposes your character model to a new angle to gain information, take a fight, or reposition.
- Jiggle peek: A quick in-and-out shoulder/step exposure (often repeated) to bait shots, confirm presence, or grab info with minimal risk.
- Wide swing: A longer lateral movement that clears past the common “pre-aimed” angle, forcing the defender to adjust.
- Contact peek: A quiet, close-to-cover peek where you “walk” (or move silently) into space, often to catch timing or set a trap before taking the duel.
- Off-angle: A position that is not the default pre-aim spot. Off-angles shift the geometry of the fight so your opponent’s crosshair is likely wrong.
- Counter-strafe / stop-shot: The act of stopping your movement before shooting so your first bullets are accurate (especially important with rifles).
- Slice the pie: Clearing angles one-by-one, exposing yourself to the smallest number of threats at a time.
- Isolation: Peeking in a way that makes a duel 1v1 (or close to it), instead of exposing yourself to multiple defenders.
With that established, let’s look at the “physics” of peeking—why certain peeks win fights and others lose them.
2) Why Peeks Work: Angles, Timing, and “Who Sees Who First”
Valorant is a tactical shooter, but most gunfights are decided by a few repeatable factors: angle geometry, timing, crosshair placement, movement accuracy, and attention.
2.1 Angle geometry: the “distance to wall” rule
A simple principle explains a lot of “I got ferrari-peeked” moments: the player who is farther from the corner often appears earlier (or in a larger “slice”) to the player who is closer to the corner. This isn’t magic—it’s geometry. If you hug a wall, you can accidentally give the swinger a better first look at you.
Practical implication: defenders often want to play with some space from the corner (not always hugging), and attackers often benefit from committing to a swing that changes the angle quickly.
2.2 Timing and expectation: your opponent’s brain is part of the game
Humans aim faster at angles they expect. If you stand in the “default” spot or peek in the “default” rhythm, you make the enemy’s job easier. A high-percentage peek usually does at least one of these:
- Breaks the opponent’s crosshair placement (wide swing or off-angle).
- Forces a rushed shot (jiggle to bait, then punish the reload/reposition).
- Creates a timing window (contact peek when they look away or adjust utility).
- Converts utility into a forced reaction (flash/dog/drone, then swing).
2.3 Movement accuracy: “stop before you shoot” is non-negotiable
Most players think they lost because of aim. Often they lost because they shot while still moving. Clean peeks are married to clean stops. If your first bullet is inaccurate, you’re gambling. This guide will repeatedly return to one habit: commit to your stop-shot timing.
2.4 Isolation: never “peek into two guns” if you can avoid it
The most common peeking mistake at every rank: exposing yourself to multiple angles at once. A good peek is not just “fast” or “confident”—it is designed to fight one threat at a time.
Now we’re ready to go peek-by-peek.
3) Jiggle Peek (Info, Bait, and Micro-Pressure)
The jiggle peek is your safest tool for interacting with dangerous angles. It’s not a “fight” peek first; it’s an information and manipulation peek. Done well, it makes defenders shoot early, reveals sniper positions, and gives you the confidence to decide the next action.
3.1 What a jiggle peek is (and what it isn’t)
- Is: A short, fast exposure—often just a shoulder—then immediate return to cover.
- Is: A bait tool to trigger Operator shots, Guardian taps, or panic sprays.
- Is: A way to “test” an angle before committing bodies.
- Is not: A guaranteed safe peek. Over-jiggling becomes predictable and punishable.
- Is not: An aim duel. Your goal is usually not to kill on the first jiggle.
3.2 When to jiggle peek (high-value use cases)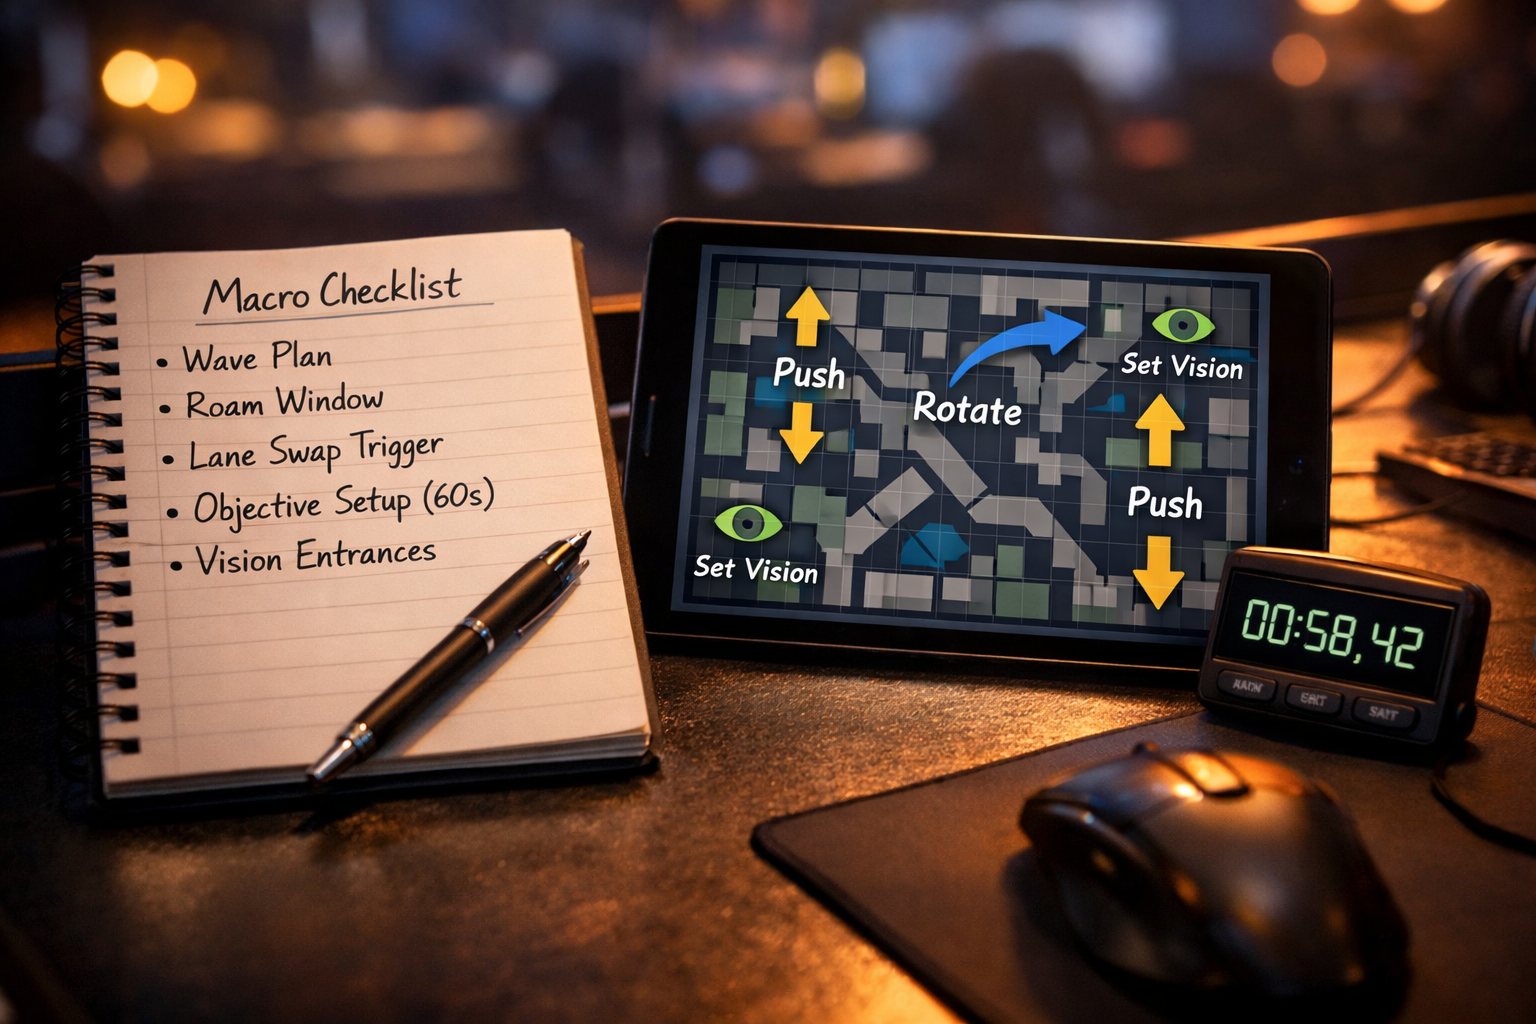
Use jiggle peeks when your priority is to learn or to force the enemy to react:
- Against an Operator / sniper threat: bait the shot, then take space.
- To confirm a setup: “Is someone holding this lane?”
- To trigger utility: bait a Chamber trap shot, a KJ turret burst, or a reactive flash.
- To create pressure without committing: keep defenders “busy” while your team rotates.
- To get sound timing: some players reposition or reload after firing; you can hear it.
3.3 Execution: the jiggle checklist
- Start from cover with intention. Decide: are you gathering info, baiting a shot, or baiting utility? Your follow-up should already exist in your mind (fall back, wide swing, flash + swing, smoke crossing, etc.).
- Expose as little as possible. A “shoulder jiggle” is often enough. Don’t step out so far that your head is fully visible for a long time.
- Return instantly. The power of the jiggle is the timing window. If you hesitate, you turn the jiggle into a slow peek.
- Don’t over-repeat. Two jigs is usually plenty. A third often becomes predictable. If you must repeat, change rhythm (pause, then jig).
- Use it to set up a better peek. The “real” play is often what happens after the jiggle: a wide swing, a re-clear with utility, or a disengage into a new plan.
3.4 Advanced jiggle concepts
A) The “jiggle-to-punish” pattern
A classic: jiggle to bait a shot, then immediately wide swing while the defender is recovering (especially strong versus an Operator). The key is discipline: you’re not swinging because you “feel brave,” you’re swinging because you created a cooldown window.
B) Jiggle + jump info (with caution)
Some players add a jump to see over small angles or gather info while being harder to headshot. In Valorant, jump-peeking can be useful, but it can also be noisy and predictable. Treat it like a situational tool, not a default habit.
C) Jiggle for crosshair placement manipulation
If you jiggle and the defender “micro-adjusts” toward your shoulder, you can punish by peeking a different height or timing. Good defenders don’t overreact; weaker defenders do. Jiggle peeks help you identify which opponent you’re facing.
3.5 Common jiggle mistakes
- Jiggling too wide: you give a full target and get tapped.
- Jiggling too many times: defender pre-fires the rhythm.
- Jiggling without a plan: you “learn” someone is there… then still dry-swing and die.
- Jiggling in multi-angle exposure: you jiggle one angle but actually show to two.
Next, the opposite of the jiggle: when you commit to a fight-changing swing.
4) Wide Swing (Punish Crosshair Placement and Create a Clean Fight)
A wide swing is not “running out like a maniac.” It’s a controlled commitment that changes the geometry of the fight. Most defenders aim at a default pixel. Wide swings punish that by forcing a larger correction—especially when combined with good stop-shot timing.
4.1 Why wide swings win duels
Defenders commonly hold close to a corner at head level, expecting a tight peek. When you swing wider:
- The defender’s crosshair is often placed too close to the edge.
- They must move the crosshair farther than expected, increasing reaction time.
- You can isolate the duel differently, sometimes avoiding a second angle.
- Your movement can disrupt their first bullet accuracy if they panic-shoot.
4.2 When to wide swing (decision rules)
Wide swing when you have a reason to believe the defender is holding tight or is limited in how they can respond:
- After baiting an Operator shot: the recovery window is your permission slip.
- After a flash / stun / recon pressure: their crosshair is compromised.
- When you know the defender’s common position: predictable default hold = punishable.
- To trade for a teammate: wide swing to guarantee contact and enable the trade.
- When you must break a setup quickly: e.g., late-round entry when time is low.
Don’t wide swing just because you’re tilted or bored. A wide swing is still a commitment. If you swing wide into multiple defenders, you’ll look “unlucky” while actually being predictable.
4.3 Execution: how to wide swing without throwing
- Pre-aim the first target zone. Your crosshair should be placed where the defender’s head likely is, not floating mid-air. Wide swing is still a headshot game.
- Commit to a clean stop-shot. Swing, then stop, then shoot. If you shoot while drifting, you lose the biggest advantage of the swing.
- Clear in order. Wide swing doesn’t mean you ignore slice-the-pie. You still need an order: first angle, then second.
- Use spacing if you’re with teammates. If you and a teammate swing together, don’t stack. Proper spacing prevents one spray from killing both and makes trading easier.
- Be ready to disengage. Not every wide swing is a full fight. If you see two guns, your “win” can be falling back with info while staying alive.
4.4 The “wide swing vs. wide swing” mind game
At higher ranks, defenders anticipate wide swings and adjust their hold deeper or wider. This is where timing and variety matter. You can respond by:
- Changing tempo: pause, then swing; or swing instantly after utility pops.
- Changing height: crouch timing (sparingly) or micro-adjust for elevation differences.
- Changing angle: use an off-angle yourself rather than always swinging the same lane.
4.5 Wide swing mistakes that get you deleted
- Swinging into two angles: you’re not “unlucky,” you’re exposed.
- Swinging without info: wide swing is best when you know roughly where the threat is.
- Over-swinging past your crosshair: you run too far and can’t stop in time.
- Relying on movement instead of aim: movement creates the chance; aim closes the deal.
Next: the quiet, patient cousin of wide swinging—contact peeking.
5) Contact Peek (Silent Space-Taking and Trap Setups)
Contact peeking is underrated because it doesn’t look flashy in highlight reels. But it wins rounds. The contact peek is how you take space without giving defenders a clear “swing timing,” and how you set up traps that punish rotations, over-peeks, and impatience.
5.1 What “contact” really means
In tactical shooter language, “contact” often means “make contact with the enemy”—but in this context, a contact peek is about quietly arriving at a fight position before committing. You use silence, patience, and micro-positioning to get a favorable first bullet.
5.2 When to contact peek
- When defenders are likely to push for info: you hold their push from a better position.
- When you expect a rotation: you quietly take a timing spot and catch the mover.
- In clutch situations: silence and patience increase your odds more than “hero swings.”
- When you have utility that rewards contact: e.g., trip coverage, turret info, or delayed flashes.
- When you want to avoid giving away your numbers: contact peeks are great for lurks.
5.3 Execution: contact peek fundamentals
- Silent movement discipline. If the purpose is stealth, don’t ruin it with accidental steps. Know where you can walk, where you must hold shift, and when it’s worth being noisy.
- Use cover as a “volume knob.” You can reveal small amounts of your model while staying ready. The goal is to be in position to fire immediately when the enemy appears.
- Crosshair anchored to the likely path. Contact peeks reward prediction: you are aiming where someone will be, not reacting after they appear.
- Patience with a limit. Contact peeking is not “AFK holding.” You should have a timing window: “I’ll hold this for 8 seconds, then reposition.”
- Plan an exit. If you get one kill, how do you live? Back into cover? Smoke? Reposition? Contact peeks become powerful when you convert one kill into a second opportunity.
5.4 Contact peeking vs. disciplined defenders
Better defenders clear more carefully and rely on utility. This is where your contact peek must adapt:
- Don’t hold the most obvious “lurker” corner. Mix positions and distances.
- Use off-angles inside the contact idea. A “contact off-angle” is a nightmare to clear.
- Respect recon tools. If you’re likely to be revealed, either move before the scan hits, or set up to punish the person following the info.
5.5 Contact peek mistakes
- Holding too long: you get cleared by utility because you refused to move.
- Choosing a low-value lane: your “silent play” does nothing while your team fights elsewhere.
- Making noise at the worst moment: you lose surprise and still take a bad fight.
Now, the concept that makes all peeks stronger: off-angles.
6) Off-Angles (Win Duels Before They Start)
An off-angle is a position that breaks your opponent’s default clearing pattern. Think of it as “aim tax”: you force them to spend time moving their crosshair to an unexpected place. Off-angles are powerful because even strong aimers depend on expectation.
6.1 What makes an off-angle “good”
Not every unusual position is smart. A good off-angle has at least one of these advantages:
- It changes the head height or lateral position relative to common crosshair placement.
- It isolates the first contact so you can get one kill and escape.
- It’s hard to pre-fire because it’s not consistently used.
- It pairs with utility (smoke edge, one-way-ish visual clutter, or flash timing).
- It has an exit route after the first engagement.
6.2 Off-angles as a defender (holding space efficiently)
Defenders often lose because they stand in the “standard” spot and get pre-aimed. Off-angles solve this by:
- Getting a first bullet before the attacker confirms your position.
- Forcing attackers to clear wider, slowing their entry.
- Letting you take one fight and fall back, wasting attacker time.
Defender rule: Off-angle once, then move. If you repeat the same off-angle every round, it becomes the new default—and you get punished harder than before.
6.3 Off-angles as an attacker (breaking setups and anchoring trades)
Attackers can use off-angles too—especially after taking some space. Instead of standing in the obvious post-plant line, you take a slightly shifted position that catches the retake’s first swing.
Attacker rule: don’t off-angle into isolation with no trade. If you’re alone and your off-angle is cleared by two people, you may die without value. Off-angles are best when:
- You have a teammate ready to trade.
- You can get one kill and fall to a second safe angle.
- You are controlling a choke where the enemy must pass.
6.4 Common off-angle categories (timeless examples)
- Deep angle: stand farther back than expected so the swing doesn’t “catch” you immediately.
- Close angle (carefully): stand closer than expected to punish wide clears (risky vs. good crosshair discipline).
- Elevated/low angle: use small height differences that alter head level expectations.
- Smoke edge angle: play just off the smoke boundary to see first (high-risk if spammed).
- Timing off-angle: take a temporary unexpected angle for 3–6 seconds, then reposition.
6.5 Off-angle mistakes
- No escape: you get one fight max and then die.
- Too “cute”: an angle that’s unusual but loses to basic slicing because it’s exposed.
- Repeating: you teach the enemy your trick.
Off-angles multiply the value of good peeks. Next, let’s connect peeking to the thing that makes Valorant unique: utility.
7) Peeking + Utility: Flash, Smoke, Recon, and Drone Pairings
Pure mechanics will take you far, but in Valorant, the highest percentage fights are utility-assisted peeks. Your peek choice should match the utility plan: do you want a quick kill, safe info, or a forced reposition?
7.1 Flash + swing: turning reaction time into a liability
A flash is not just “blind them.” A flash creates a window where the defender must either: (1) turn away, (2) hide, or (3) gamble a blind shot. Your peek should punish the most likely reaction.
- After a good flash: wide swing is often best because the defender’s crosshair is displaced.
- After a weak/partial flash: jiggle first to confirm, then commit only if the defender panics.
- Against disciplined turners: contact peek into a timing angle can catch them as they re-swing.
7.2 Smokes: the art of creating “one fight at a time”
Smokes are the best isolation tool. They reduce multi-angle exposure and allow predictable clears. Use them to make your peeks simpler:
- Jiggle the smoke edge to bait spam, then reposition.
- Wide swing when you expect the defender to hold tight on the smoke boundary.
- Contact peek through space you’ve smoked off (walk into new territory quietly).
- Off-angle just outside the smoke to catch a retake swing (with an escape path).
Learn smoke fundamentals from high-level tactical resources and official references: Riot’s official Valorant site is a stable starting point, and broader FPS movement/aim theory is often discussed on Liquipedia Valorant (great for terminology, roles, and competitive context).
7.3 Recon and drone tools: how to peek with information
Info tools (scan, drone, dog, camera) change peeking priorities. When you know where a player is, you can stop gambling and start executing:
- Known position + teammate ready: wide swing to trade cleanly.
- Known position + you need safety: jiggle first to confirm they didn’t move.
- Known position + you want a free kill: off-angle and hold their forced re-peek.
7.4 Stuns, slows, and displacement
Any utility that disrupts movement or aim simplifies peeking. If an enemy is slowed or concussed, you can often take a more direct fight. Still, keep fundamentals: stop-shot, isolate angles, and avoid exposing to multiple guns.
8) Role-Based Peeking: Duelist, Initiator, Controller, Sentinel
Your role shapes your ideal peek choices. Not because “duelists must always swing,” but because your job in the round changes your risk budget.
8.1 Duelist peeking: create first contact without donating your life
Duelists often take the first contested space. Your goal is to either: (1) get a kill, (2) force the defender off the angle, or (3) gain space so your team can enter.
- Best default: utility-assisted wide swing (flash + swing, smoke + dash entry, etc.).
- Best safety tool: jiggle to bait Operator shots before committing.
- Best mid-round value: off-angle after entry to catch the retake’s first contact.
Duelist rule: don’t confuse “entry” with “dry feed.” If you have no utility and no trade, your best play might be a jiggle into a regroup, not a hero wide swing.
8.2 Initiator peeking: your peek should follow your info
Initiators convert utility into safe fights. Your peeks should look “boring”: you use info to remove uncertainty, then take high-percentage swings.
- After revealing info: wide swing with a teammate for guaranteed trade potential.
- When clearing alone: slice-the-pie with controlled peeks; jiggle dangerous lines.
- In post-plant: off-angle holds that punish predictable retake routes.
8.3 Controller peeking: live, delay, and win with positioning
Controllers win rounds by shaping the map. Your peeks should protect your life so you can keep smoking and control space. Controllers often gain massive value from:
- Jiggle peeks to gather info without risking the round’s most important utility resource (you).
- Contact peeks to quietly take space and anchor a late-round smoke play.
- Off-angles around smoke edges, with discipline to relocate after contact.
8.4 Sentinel peeking: punish and survive
Sentinels want fights on their terms—often with traps, crossfires, and timing. Your strongest peeks often come after your utility confirms something.
- Contact peeks to hold patient traps and punish pushes.
- Off-angles to get a first kill and fall back to your utility.
- Jiggle peeks to “tap” angles when you suspect pressure but don’t want to commit.
9) The 15 Most Common Peeking Mistakes (and Fixes)
If you fix only a few habits, your win rate climbs fast. Here are the mistakes that repeatedly appear at every rank, plus the correction.
- Mistake: Peeking two angles at once.
Fix: Use slice-the-pie. If you must clear two angles, use utility or reposition so only one can see you. - Mistake: Shooting while moving.
Fix: Build stop-shot timing. Practice: swing, stop, single burst, reset. Make accuracy automatic. - Mistake: Repeating the same jiggle rhythm.
Fix: Jiggle once or twice, then change tempo or commit to a new plan (flash, wide swing, rotate). - Mistake: Dry wide swinging without info or trade.
Fix: If you can’t be traded, jiggle or contact peek to gain info first. Wide swing is for committed plans. - Mistake: Holding default angles forever.
Fix: Use a “timer.” Hold an angle for a window, then reposition or change to an off-angle. - Mistake: Over-clearing with panic flicks.
Fix: Slow down your clear order. One angle at a time, crosshair anchored where heads will appear. - Mistake: Peeking after you’ve been spotted.
Fix: If you were revealed, assume you’re pre-aimed. Either change the angle (off-angle) or use utility. - Mistake: Swinging wide into predictable crossfires.
Fix: Ask: “How many can see me?” If more than one, smoke/flash or reposition to isolate. - Mistake: Fighting the Operator like it’s a rifle duel.
Fix: Jiggle to bait, smoke to deny, flash to force movement, then swing during recovery windows. - Mistake: Crouch-peeking every duel.
Fix: Use crouch as a mix, not a default. Default to clean stop-shot at standing head level unless you have a reason. - Mistake: Taking off-angles with no escape.
Fix: Off-angle once, then relocate. Choose spots where you can fall back or be traded. - Mistake: Peeking when your teammate is not ready.
Fix: Sync: “I’m swinging on 3.” Peeking is stronger as a pair. - Mistake: Unnecessary repeeks after getting a kill.
Fix: After a kill, ask: “Can they trade me?” If yes, fall back or change position. - Mistake: Clearing with crosshair too low/high.
Fix: Anchor crosshair at head height on every step. Your movement should carry your crosshair through likely head positions. - Mistake: No plan for what happens after contact.
Fix: Every peek should have a follow-up: re-swing, fall, trade, smoke, flash, or rotate.
10) Practice Plan: 20 Minutes a Day to Upgrade Your Peeks
Peeking skill comes from repetition with feedback. You don’t need a 2-hour aim routine. You need short, focused reps that teach timing, stopping, and crosshair discipline.
10.1 The 5-minute warm-up: stop-shot rhythm
- Enter the practice range.
- Pick a rifle you commonly use.
- Do 50 reps of: strafe → stop → 2–3 bullet burst → reset.
- Focus on the first bullet being accurate. Speed comes later.
10.2 The 7-minute drill: jiggle-to-wide swing
The goal is to train the “bait then punish” sequence:
- Simulate a dangerous angle (use a doorway or corner).
- Jiggle once to “bait.” Immediately return to cover.
- On the second beat, wide swing and stop-shot a target.
- Repeat 20–30 times. Keep the sequence clean, not frantic.
10.3 The 5-minute drill: contact peek patience
- Pick a corner and walk into a slightly new position.
- Hold crosshair on the likely path for 2–3 seconds.
- Then reposition to a different angle (simulate anti-clear movement).
- Repeat: you’re training “timed patience,” not camping.
10.4 The 3-minute drill: off-angle discipline
The goal: learn to take an off-angle, get one “clean” engagement, then move.
- Choose an unusual spot that still has cover.
- Imagine you take a duel and win.
- Immediately reposition to a second angle that covers the trade attempt.
- Repeat until repositioning feels automatic.
10.5 The weekly review habit (high ROI)
Once per week, review 2–3 rounds of your own gameplay with one question: “Did I choose the right peek type for the situation?”
- If you died: were you exposed to multiple angles?
- Did you shoot while moving?
- Were you predictable in rhythm (repeat jiggles, repeat off-angle)?
- Did you fail to use utility before committing?
11) How Better Peeks Translate to Higher Rank
Players sometimes chase “secret settings” or perfect aim trainers, but peeking fundamentals are one of the most direct rank multipliers because they affect every round:
- More first bloods: wide swings and off-angles punish predictable defenders.
- Fewer deaths: jiggles and contact peeks reduce unnecessary commitments.
- More trades: coordinated swings and isolation improve teamfight consistency.
- Better economy outcomes: surviving more often means more guns carried into future rounds.
- Higher clutch win rate: contact peeks and off-angles create asymmetric fights.
The most important shift is mental: you stop “hoping” your aim wins and start engineering favorable duels. That mindset is what separates steady climbers from streaky players.
12) Match Checklist: What to Think Before You Peek
Use this quick checklist in real games. With practice, it becomes instinct.
12.1 The 6 questions
- What is my goal? Info, kill, trade, space, or delay?
- How many angles can see me? Can I isolate? Do I need a smoke?
- Do I expect an Operator? If yes: jiggle first, then punish or deny.
- Do I have utility to improve odds? Flash, recon, smoke, stun—use it before ego-swinging.
- Do I have a trade? If I die, does my teammate get value? If not, lower risk.
- What’s my exit plan? If I get one kill, where do I go?
12.2 Fast decision map (simple rules)
- Unsure + danger → Jiggle peek for info.
- Known tight hold → Wide swing (preferably with utility or trade).
- Need stealth/timing → Contact peek.
- Want to punish predictable clears → Off-angle (one-and-done, then move).
13) FAQ
Is peeker’s advantage “real” in Valorant?
In online shooters, timing and network conditions can influence who appears first in fast interactions. But most “peeker’s advantage” complaints in ranked are actually about angle geometry, crosshair placement, and predictability. If you master jiggle, wide swing, contact, and off-angles, you’ll stop feeling robbed and start feeling in control.
Should I always wide swing when I’m confident?
Confidence doesn’t replace logic. Wide swing when it makes the fight easier: after baiting a shot, with utility, with trade potential, or when you expect a tight hold. Otherwise, a jiggle or contact peek may be higher percentage.
How do I stop dying while clearing corners?
The most common fix is isolation. Don’t clear two threats at once. Use smokes to remove angles, clear in a strict order, and avoid “lazy” half-peeks that expose you to multiple sightlines.
What’s the best peek for low ping vs high ping?
Rather than relying on ping assumptions, focus on consistent fundamentals: stop-shot timing, crosshair placement, and using the right peek type for the situation. Those factors remain valuable regardless of small network differences.
Can I improve peeking without aim trainers?
Yes. Peeking is mostly timing and positioning. Aim trainers can help mouse control, but your biggest gains usually come from practicing stop-shots, clear order, and decision rules in real scenarios.
Conclusion
Great peeking is not random talent—it’s a set of repeatable choices. Jiggle peeks let you safely learn and bait shots. Wide swings punish default holds and convert utility into kills. Contact peeks win timing fights and quiet space. Off-angles break expectation and create first-bullet advantage.
If you focus on one improvement this week, make it this: never peek without a purpose. Decide the goal, choose the peek type, and pair it with an exit plan. Do that consistently and your fights will feel less chaotic—and your rank will follow.
Want a structured path and reliable execution? Start here: Boosteria Valorant Boosting Prices.