Rocket League Rotation Basics (2v2 & 3v3): Spacing & Back Post
Rocket League — Rotation Basics (2v2 & 3v3): Spacing, Back Post, and Turns
Rotations are the invisible skill that makes everything else work: mechanics feel cleaner, saves feel easier, and your shots become more threatening because your team is actually in position to follow up. If you’ve ever thought, “My teammate is chasing,” or “Why am I always stuck in net?”—this guide is for you.
This is a timeless fundamentals guide. No patch notes, no “current meta” buzzwords—just the positioning rules that stay true across ranks and seasons. We’ll break rotation down into three pillars you can practice today: Spacing (how far you should be), Back Post (how you defend without panic), and Turns (how you rotate without cutting or over-rotating).
Helpful reference hubs if you want official and competitive context while you study: the Rocket League official site, Rocket League Support, and the competitive encyclopedia at Liquipedia Rocket League. For replay review and patterns, many players also use Ballchasing.
What “Rotation” Really Means
Many players think rotation means “We take turns hitting the ball.” That’s not rotation—that’s a traffic rule. Real rotation is about maintaining coverage while your team applies pressure and avoids panic. The ball moves fast, bounces unpredictably, and decisions happen in half-seconds. Rotations exist so that when one player commits, the team doesn’t collapse if the play fails.
A good rotation answers three questions at all times:
- Who is challenging now? (the player actively pressuring)
- Who can follow up? (the player ready to take the next touch if it’s favorable)
- Who is protecting the goal? (the player positioned to stop a counterattack)
When rotations feel “clean,” your team always has those three jobs covered—even if nobody is speaking. When rotations feel “chaotic,” two players do the same job (double commit), and nobody covers another job (open net).
The 3 Pillars: Spacing, Back Post, Turns
Most rotation problems are not “teammate problems.” They’re usually one of these three fundamentals breaking down:
1) Spacing
Spacing is your team’s “shape.” Bad spacing looks like a clump: two cars stacked behind the ball, both desperate for the same touch. Good spacing creates options: one player pressures, one supports at a playable distance, one guards the counter lane.
2) Back Post
Back post rotation is the defensive rule that turns panic saves into routine saves. If your defense feels like chaos, it’s usually because you enter your net from the wrong side, face the wrong direction, or challenge too early. Back post teaches you to arrive calm, see the whole play, and cover the most dangerous shot first.
3) Turns
“Turns” means your rotation pathing and decision-making: when you peel out, how you loop, how you re-enter the play, and whether you cut. Clean turns keep your teammate confident. Messy turns force your teammate to guess, hesitate, and then you both commit.
If you improve these three pillars, your rotations will improve in every mode, at every rank.
Rotation Language: 1st/2nd/3rd, Lanes, and Pressure
You don’t need fancy callouts to understand rotation. But you do need a shared mental model. These terms are universal across Rocket League coaching and replay analysis:
First Man / Second Man / Third Man
- First man pressures the ball: challenge, force a touch, or create a 50/50.
- Second man supports: ready to take the next ball if it becomes favorable, while still able to recover if it fails.
- Third man anchors: positioned to stop the counterattack and keep the play alive safely.
In 2v2, you rarely talk about “third man,” but the concept still exists: when your teammate pressures, your job is often to be the safety. In 3v3, third man becomes crucial because mistakes snowball faster and open nets happen instantly.
Rotation Lanes
Imagine three lanes running up the field:
- Ball-side lane: the side where the ball currently is.
- Middle lane: central support and rebound coverage.
- Far-side lane: the opposite side—often the safest rotation path.
When you rotate out, you usually want to exit through a lane that doesn’t collide with your teammate’s lane. That’s why wide rotations and back post entries work: they reduce traffic and increase vision.
Pressure Cycles
Offense is a cycle: pressure → force a touch → follow up → reset → pressure again. Rotations are how your team cycles without losing the ability to defend. If you can keep the cycle going while staying safe, you’ll feel like you have “infinite time” on the ball.
The Real Goals of Rotation (Not “Taking Turns”)
Here are the core outcomes you want from good rotations. If you keep these goals in mind, your decisions get simpler:
Goal A: Avoid Double Commits
Double commits happen when two players believe they are “the one who must go.” Good rotation creates clarity: one goes, one supports, one covers. If you’re ever uncertain, your default should be: support, don’t stack.
Goal B: Keep a Threat Without Overcommitting
You can be aggressive without being reckless. Aggression is positioning that sustains pressure while staying recoverable. Recklessness is sending two cars into the same corner and hoping the opponent misses.
Goal C: Defend with Vision
Most goals conceded at mid ranks come from defenders facing the wrong way or flipping across the goal line blindly. Rotating back post and arriving with a calm angle gives you vision, which creates better saves and better clears.
Goal D: Convert After You Win a Challenge
Winning a 50/50 is meaningless if nobody is in position to take the next touch. Proper spacing places your teammate at “support range” so they can instantly capitalize.
2v2 Rotation Basics: Simple, Safe, Repeatable
2v2 is the purest mode for learning rotations because every mistake is visible. With only two players, you can’t hide a bad rotation—if both commit, your net is open. The good news: 2v2 rotations can be extremely simple.
The Default 2v2 Shape
Most of the time, your team should form a “pressure + safety” shape:
- One player pressures the ball, aiming to force a touch or create a favorable 50/50.
- One player supports at a distance where they can either follow up or retreat instantly.
The most common 2v2 mistake is turning this into “pressure + pressure,” where the second player hugs the play too closely. If the first player loses the challenge, the second player is now behind the ball with no time to defend.
Support Range in 2v2 (Your #1 Spacing Rule)
“Support range” is the distance where you can: (1) capitalize if the ball pops out, and (2) still recover to defense if the play fails. This distance changes based on speed and ball position, but the feeling is consistent: close enough to strike a loose ball, far enough to save a counter.
A practical way to think about it:
- If you’re so close that a single bad 50/50 puts the ball behind both of you, you’re too close.
- If you’re so far that your teammate wins a 50 and you can’t reach the follow-up, you’re too far.
2v2: When You Are First Man
As first man, your job is often not to “score right now.” It’s to force the opponent into a weaker touch. In 2v2, clean pressure wins games because it creates easy follow-ups for your teammate.
Use these first-man priorities:
- Force the ball to a side (preferably away from the center) rather than giving a free dribble lane.
- Take low-risk shots only if you can recover or your teammate is clearly behind you.
- Prefer controlled 50/50s over desperate flips. A “neutral” 50 is often a win because it keeps pressure.
- After your touch, rotate out unless you have a guaranteed second touch with clear safety behind you.
2v2: When You Are Second Man
Second man in 2v2 is the hardest job, because your decision decides whether your team stays safe. Your mindset should be: cover the loss, then punish the win.
If your teammate challenges, ask yourself:
- Where is the dangerous counter line? (usually center or a fast clear to your half)
- Can I cover that line and still reach the follow-up?
- Is the opponent likely to control or boom? (their angle and boost tell you)
The best second man often looks “passive,” but is actually controlling the outcome. You’re inviting the opponent to make a touch you can read, then you strike.
2v2 Defensive Rotation: Back Post as Default
In 2v2, defensive chaos usually starts with a panic turn: someone dives near post, misses, and now both defenders are tangled. The fix is simple: rotate to back post by default and only break that rule with a clear reason. (We’ll go deep on back post later.)
2v2 Common Rotation Mistakes (and Fixes)
Mistake 1: Both players go to the same corner
Corners are where time disappears. The ball is awkward, the camera swings, and you can’t see the field. If your teammate is already in the corner, your highest-value spot is usually: middle support (at a safe distance) or far-post safety. Your job is to be the option, not the second corner car.
Mistake 2: Cutting in front of your teammate on the way back
Cutting feels faster, but it creates confusion. If your teammate thinks you’re rotating out, they will go. If you suddenly cut back in, you both commit. A clean 2v2 rule: If you turned away, commit to leaving.
Mistake 3: “One more touch” syndrome
Many goals against happen because a player takes a second touch with no boost, gets beaten, and the teammate is too close. In 2v2, after your play, your default should be: rotate out and let your teammate become first man. You can re-enter quickly from a better angle anyway.
Mistake 4: Over-rotating all the way to your corner boost
Corner boosts are powerful, but they’re also slow. If you rotate so wide that you abandon midfield, you give the opponent free space. Learn to rotate through small boost pads and keep your car relevant. Most of the time, 36–60 boost from pads is enough to defend and counter.
2v2 Mini-Scenario Rules (Memorable)
- If teammate challenges: you cover the goal line and center first, then follow up.
- If teammate is behind you: you can take a more assertive touch or shot.
- If you are last back: never dive unless you’re confident you win or stall safely.
- If both of you are level: one commits, one shadows—don’t mirror the same line.
3v3 Rotation Basics: Lanes, Coverage, and Third Man
3v3 adds complexity because there are more possible mistakes—but also more possible recoveries. The biggest difference from 2v2 is that 3v3 rotations are about lanes and coverage. If two players stack the same lane, you lose control of the field.
The Default 3v3 Shape
A stable 3v3 shape usually looks like:
- First man pressures the ball-side.
- Second man supports a pass or rebound in the middle lane.
- Third man stays deeper, often far-side or central, to protect against counters.
This is why “third man discipline” is the fastest way to climb in 3v3. If the third man is too close, your team becomes a three-car clump. If the third man is positioned well, your team feels impossible to counterattack.
First Man in 3v3: Create Predictable Outcomes
First man in 3v3 should prioritize touches that keep your team safe:
- Force the ball to the wall or corner instead of giving central space.
- Challenge early enough to prevent a controlled dribble into a flick or pass.
- Prefer “soft” touches when you have support: keep the ball playable for second man.
- After contact, rotate out through a lane that doesn’t collide with second man.
Second Man in 3v3: The “Connector”
Second man is the connector between pressure and safety. You’re the player who turns pressure into a shot, or turns a loose ball into another wave of pressure. Your best habit is to arrive at the play with an angle that lets you do two things: shoot if it’s free and keep pressure if it isn’t.
Second man should avoid “ghosting” (waiting too far away doing nothing) and avoid “stacking” (sitting behind first man). Your location should make the opponent feel trapped: every clear is contested, every touch is punished.
Third Man in 3v3: The Anti-Throw Role
Third man is not “the boring one.” Third man is the reason your team doesn’t concede silly goals. Your job is to:
- Hold a safe distance where you can save a boom clear or a sudden dribble.
- Protect center first (the fastest goals are usually central).
- Decide when to step up only when coverage behind you exists.
- Be ready for the worst touch your team could make.
A great third man makes your team feel confident to pressure because they know you’re behind them. A poor third man makes your team hesitate and then double commit because nobody trusts the backline.
3v3 Lanes: How to Rotate Out Without Collisions
Most 3v3 rotation errors are lane errors: you rotate out ball-side (through the same lane your teammate wants to use), you steal their line, and then two of you end up in the same space. A clean default:
- Exit wide after your touch (often far-side).
- Enter from a different lane than the teammate currently pressuring.
- Keep the middle protected unless you’re sure your team covers it.
3v3 Common Rotation Mistakes (and Fixes)
Mistake 1: Third man too close
If third man is within immediate challenge range of the ball while two teammates are also nearby, your team has no safety. Fix: third man holds deeper, often near midfield or slightly back, positioned to handle the worst-case clear.
Mistake 2: Everyone rotates ball-side
Ball-side rotations create traffic and blind angles. Fix: one player pressures ball-side, another supports central, and the exiting player rotates far-side. This opens vision and reduces accidental bumps.
Mistake 3: Corner obsession
Corners are not where goals are scored; corners are where goals are created. If two players enter the corner, your team loses the center. Fix: when a teammate goes corner, at least one player must claim: midfield center or far-post defensive line.
Spacing Mastery: Distance, Angles, and “Support Range”
Spacing is the skill that makes rotations feel effortless. If you constantly feel surprised—late to the ball, late to defend, bumping teammates—your spacing is off. Spacing is not a fixed distance. It’s a relationship between: ball speed, your speed, opponent control, and your teammate’s commitment.
The Three Spacing Zones
1) Pressure Range (First Man)
You are close enough to challenge immediately. Your job is to influence the opponent’s touch. You don’t need the “perfect” hit—just a touch that prevents control, forces a weak clear, or creates a 50/50 your team can read.
2) Support Range (Second Man)
You are close enough to punish a weak touch, but far enough to recover if the play fails. You should be able to: reach a loose ball quickly and also turn back without flipping across your own goal.
3) Safety Range (Third Man / Last Back)
You are positioned to stop the counterattack. This often means you’re facing the play with space behind you, not parked on the goal line, and not so far forward that a single clear beats you. Safety range is proactive defense: you’re not waiting for a shot; you’re waiting for the clear.
Spacing Rule: Don’t Stack Behind the Ball
The simplest spacing correction most players need: Stop driving directly behind your teammate and the ball. That line is where your teammate’s 50/50 will go wrong. If you want to support, support from an angle—slightly inside or outside—so you can react to multiple outcomes.
Spacing Rule: Control Your Speed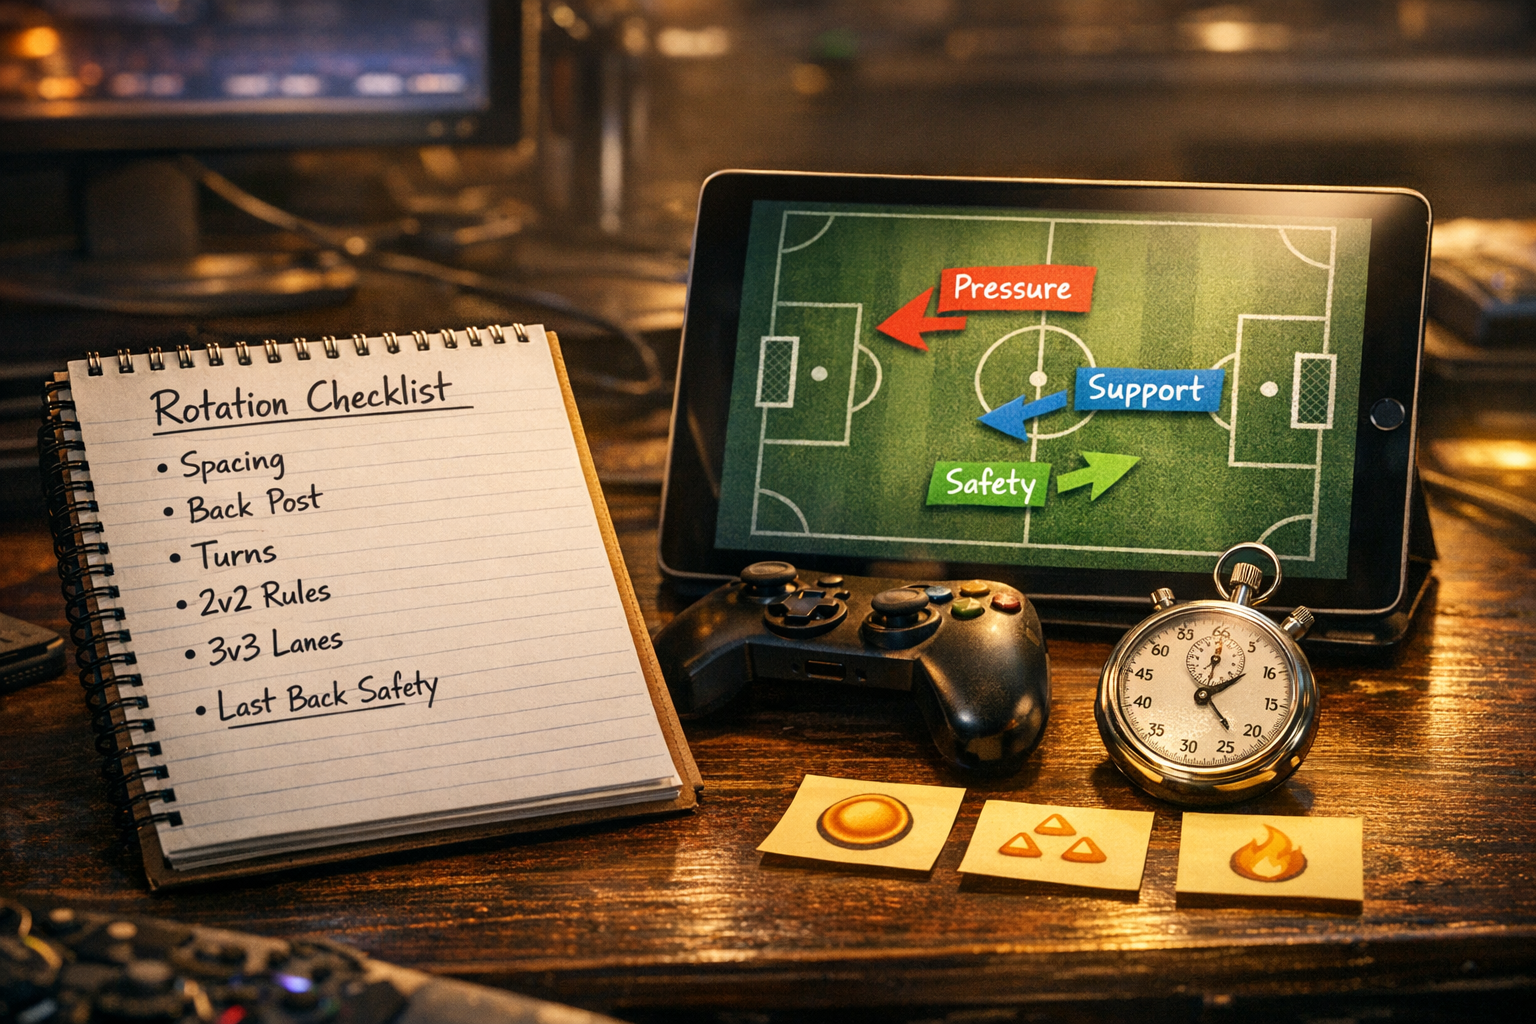
Bad spacing is often bad speed. If you are always supersonic, you can’t adjust. If you are always slow, you can’t contest. The best rotational players shift gears:
- Fast when rotating out to recover and claim a lane.
- Controlled when entering a challenge so you can adjust to a touch.
- Patient when shadowing so you don’t overcommit.
Spacing by Field Zone
In Your Defensive Third
Spacing should prioritize coverage. If you are second man and your teammate challenges in your half, your spacing must protect the goal first. That usually means you are slightly deeper and more central than feels “aggressive.” Survive first, then counter.
In Midfield
Midfield is where spacing wins games. Your support range should allow you to intercept clears. In 3v3, holding midfield lanes (without stacking) is the difference between constant pressure and constant defending.
In the Offensive Third
In offense, spacing becomes about options: one player pressures, one threatens a shot or pass, one covers the clear. If nobody covers the clear, every “almost goal” becomes a goal against.
Spacing vs “Chasing”
Chasing isn’t about touching the ball often. It’s about occupying the same space as your teammate. A player who touches the ball constantly but rotates out cleanly may not be “chasing” at all—they’re cycling pressure properly. Focus less on touches and more on whether your team keeps: pressure, support, safety at all times.
Back Post Defense: The Calm Way to Save Everything
Back post rotation is one of the highest-impact fundamentals in Rocket League. It fixes awkward saves, fixes double commits in net, and improves clears because you approach the ball from a better angle. If you learn one defensive habit from this guide, make it this: Rotate back post by default.
What Is Back Post?
“Back post” is the goalpost farthest from the ball. If the ball is on the right side of your goal, the back post is the left post—and vice versa. Rotating to the back post means you enter your goal area from the far side, facing outward toward the play.
Why Back Post Works
- Better vision: you can see the ball, the shooter, and the passing lane.
- Better angle: you cover the net’s most dangerous area first.
- Less traffic: your teammate can challenge near post while you cover behind.
- Stronger clears: arriving from back post often sets up forward momentum through the ball.
The Back Post Path (Simple)
When rotating back to defend, your path is usually: wide around the play → across the face of your goal (from far side) → stop or slow at back post → face outward. You don’t need to park inside the goal. Often the best spot is just outside the goal line near back post, where you can move forward into the save rather than reacting backward.
Back Post vs Near Post: The Key Difference
Near post defense (diving in from the ball side) often forces you to: (1) face the wrong way, (2) guess early, (3) jump without vision. Back post defense lets you wait an extra moment, then commit with certainty.
“First Save” vs “Second Save” Mindset
In many situations, you don’t need to hard-commit for a perfect clear. Sometimes the highest-value play is the first save: block the shot and keep it out. Then your teammate or your own recovery handles the second save (the follow-up). Back post makes this easier because you’re positioned to block safely without diving forward blindly.
Back Post in 2v2
In 2v2, back post prevents the most common conceded goal: a quick shot while both defenders are awkward. If your teammate challenges and loses, you want to already be: facing the shooter, covering the net, and able to counter clear. Back post rotation is the simplest way to guarantee that.
Back Post in 3v3
In 3v3, back post is also a communication tool. Even without comms, your positioning signals your teammate: “I’m behind you, you can challenge.” This reduces hesitation, which reduces double commits.
When You Should Break the Back Post Rule
Back post is the default, not a prison. Break it only when you have a clear, immediate reason:
- Immediate shot threat: the opponent can shoot before you reach back post, so you must cover near post quickly.
- Guaranteed win challenge: you can beat the opponent cleanly and safely without exposing the net.
- Teammate already at back post: you may cover a different angle to avoid stacking.
If you’re not sure, do not break it. “Not sure” is exactly when back post saves you.
Common Back Post Mistakes (and Fixes)
Mistake 1: Rotating back post but facing into your own net
The point of back post is to face outward. If you arrive and stare at your own goal line, you lose vision and jump late. Fix: slow down, turn outward, and watch the shooter.
Mistake 2: Parking on the goal line
Sitting deep reduces your ability to move forward into the save. Fix: hold slightly outside or just at the edge, so you can drive forward through the ball.
Mistake 3: Both defenders go back post
Back post isn’t “everyone go far side.” It’s a structure. If your teammate is clearly back post, you might cover near post challenge or central block—just don’t overlap. The principle is: cover different threats.
Turns & Rotation Mechanics: How to Rotate Without Cutting
Great rotations look effortless because the turns are clean. A clean turn is not about drifting stylishly—it’s about choosing a path that gives your teammate certainty. When you rotate out properly, your teammate knows they can go. When you fake rotate, cut, or hesitate, your teammate slows down and your team loses pressure.
The “Turn Away” Rule
One of the simplest habits you can build: If you turn away from the play, commit to leaving. Turning away is a signal. If you turn away and then immediately turn back in, you create a double commit trap.
Rotate Out After Your Touch (Unless You Have a Guaranteed Play)
In both 2v2 and 3v3, after you make a meaningful touch—shot, challenge, clear—your default should be to rotate out. You can stay only if:
- You have boost and momentum for a second touch that is clearly uncontested, and
- Your teammate is behind you and ready to cover the counter if you lose it.
If either condition is missing, rotate out. That one decision prevents countless goals against.
Wide Turns Create Vision
Players often cut because they want to be “fast.” But a wide turn is often faster in outcome because it:
- avoids bumps with your teammate,
- keeps your speed stable,
- lets you see the play while you reposition,
- brings you back in with a better angle.
Turning Under the Ball Is Usually a Trap
A common mistake: turning underneath a falling ball in your half. If you turn under it, you risk getting dunked and you block your teammate’s line. Safer pattern: rotate behind the play, take back post if needed, and challenge when you have vision and support.
Turning as Second Man: Be a “Catcher,” Not a “Chaser”
Second man should turn into space where the ball could become free. This means you anticipate outcomes instead of chasing the current dribble line. Position yourself to intercept:
- a weak clear,
- a 50/50 pop,
- a wall bounce,
- a pass across the box.
If you drive directly behind first man, you only cover one outcome. If you take a supporting angle, you cover many.
Turning as Third Man: “Close Enough to Help, Far Enough to Save”
Third man turns should prioritize the worst-case scenario. If you can’t save the worst-case clear, you are too close. If you can save it but can’t step up when the ball dies, you might be too far. The solution is not one fixed spot—it’s constant micro-adjustments based on your teammates’ positions.
When It’s OK to Break Rotation (and When It Isn’t)
Rotation fundamentals are powerful because they’re predictable. But Rocket League is dynamic—sometimes breaking rotation wins games. The key is to break rotation with a reason and a safety check, not with hope.
Safe Reasons to Cut Rotation
- You have a free ball: the opponent can’t contest and your touch will create a clear advantage.
- You are maintaining pressure safely: your teammate is clearly behind you and you can keep the ball pinned.
- You are removing a threat: a quick challenge prevents a dangerous dribble or shot.
- You are demoing with coverage: you can remove a defender while your team still has protection behind.
Danger Signs: Do Not Cut
- You are last back and the opponent can boom the ball past you.
- Your teammate has already committed and you are about to join the same line.
- You are low boost and your cut would leave you unable to recover.
- The ball is central and a single touch could become a direct shot on your net.
The 2-Second Rule
If you cut rotation, you should create value quickly. A useful personal rule: If your cut doesn’t produce value within ~2 seconds, you probably should have rotated. Value can be: a shot, a forced save, a controlled clear, a bump that opens space, or a hard win on possession.
Boost Economy for Rotations: Pads, Corners, and Sharing
Boost management is rotation management. Many “rotation mistakes” are actually boost mistakes: a player abandons the play to grab a corner boost, arrives late, and then double commits to compensate. Learning to rotate through pads changes everything.
Pad Paths: The Rotation Superpower
Small pads are placed in lines that naturally support rotations. If you learn a few reliable pad routes, you’ll stay involved without needing to detour to corners. This improves:
- tempo: you return to the play faster,
- spacing: you don’t clump chasing big boost,
- defense: you arrive with enough boost for a save.
Corner Boosts: Powerful, but Expensive
Corner boosts are best when: (1) you are rotating out anyway, (2) your team has coverage, and (3) you won’t abandon midfield control. They are risky when you grab them while your team is already under pressure and needs you immediately.
Boost Sharing Principles
- Don’t steal your teammate’s route: if they are clearly rotating through a pad line, don’t cut across it.
- Take what you need: 30–60 boost is often enough. Full boost is nice, but not always necessary.
- Leave corner boosts when your teammate is exiting: that boost often matters more for the player who just committed.
Boost and Back Post
Back post becomes much easier when you rotate through pads. A simple habit: exit the play along a pad line that naturally brings you to back post. You’ll arrive calm, boosted, and facing the play—exactly what defense requires.
Kickoffs & Post-Kickoff Rotations (2v2 & 3v3)
Kickoffs are structured chaos. Good rotation after kickoff is less about memorizing a single strategy and more about covering likely outcomes. The safest kickoff teams do one thing well: they cover the loss first, then punish the win.
2v2 Kickoff Basics
Common 2v2 structure:
- Kicker: focuses on a controlled kickoff that doesn’t die centrally in a dangerous way.
- Second player: either cheats up to follow a win, or stays back to cover a loss (depending on comfort and risk).
Post-kickoff, your immediate job is to identify: Where is possession going? Then you rotate into the correct role: pressure if it’s free, support if it’s contested, safety if it’s dangerous.
3v3 Kickoff Basics
Common 3v3 structure:
- Kicker challenges.
- Cheater follows close enough to punish a win.
- Third stays safer, ready to handle a hard loss or a side kickoff outcome.
The biggest kickoff mistake in 3v3 is third man creeping too close. If the kickoff is lost, the opponent gets an immediate shot with no defender properly set. Stay disciplined: third man protects first, then advances.
Kickoff Rotation Rule
After kickoff, do not all drive toward the ball. Decide the roles fast: one pressures, one supports, one covers. If you see your teammate already committing, you take the complementary role.
Drills & Replay Review Checklist
Rotations improve fastest when you train two things: (1) reliable paths (turns, pad routes, back post entries), and (2) decision-making (when to go, when to support, when to cover). Here are practical drills that don’t require hours of mechanical training.
Drill 1: Back Post Entry Reps (5 minutes)
- Start in midfield with low boost (simulate real games).
- Pick a side (ball on right / ball on left) and rotate to the opposite post.
- Arrive facing outward, then drive forward as if making a save.
- Repeat from different angles and speeds.
Goal: make back post entry automatic so you stop panicking in real matches.
Drill 2: Pad Route Loops (5 minutes)
In free play, practice rotating from offense to defense while collecting small pads. Try to reach back post with at least 30–60 boost without detouring to corners. This builds the habit of staying relevant even when boost is low.
Drill 3: “One Touch Then Out” Discipline
In casual or ranked, pick one game where you force a strict rule: after your first meaningful touch in a sequence (shot, clear, challenge), you rotate out unless you have a guaranteed follow-up. This breaks “one more touch” habits and improves team flow instantly.
Replay Review Checklist (10 minutes per session)
Use in-game replays or a replay tool to spot patterns (many players upload to Ballchasing for easy review). Watch your goals against and ask:
- Was it a spacing problem? Were two of us stacked behind the ball?
- Was it a back post problem? Did we enter net from the wrong side or face the wrong way?
- Was it a turn problem? Did someone fake rotate, cut, or collide lanes?
- Who was last back? Did last back dive when they should have shadowed?
- Did we cover the clear? Were we set to stop the counter after our attack?
The secret: don’t judge the touch—judge the shape. Many “bad touches” are caused by bad positioning before the touch.
Rank-by-Rank Focus: What to Fix First
Different ranks struggle with different rotation problems. If you focus on the most common issue at your level, you’ll climb faster because you remove the biggest source of free goals for the opponent.
Bronze to Gold
- Stop stacking directly behind teammates.
- Rotate back post on defense by default.
- After your touch, rotate out (don’t chase “one more”).
- Use small pads so you don’t abandon defense for corner boosts.
Platinum to Diamond
- Improve support range: closer when you can punish, deeper when you must save.
- Control speed: stop overcommitting supersonic into every challenge.
- In 3v3, commit to lanes (ball-side pressure, middle support, far-side safety).
- Start recognizing when to shadow instead of diving.
Champion and Above
- Refine third man timing and stepping up only with coverage behind.
- Use intentional cuts with safety checks (not random cuts).
- Optimize pressure cycles: soft touches, controlled 50s, and predictable outcomes for teammates.
- Add value plays (bumps/demos) without breaking your team’s shape.
No matter your rank, if you consistently master spacing + back post + clean turns, you will feel “ahead of the play” even when opponents are mechanically faster.
Quick Cheat Sheet: Rotation Rules You Can Memorize
- Default defense: rotate back post and face outward.
- Default after touch: rotate out unless you have a guaranteed play and coverage behind.
- Default support: don’t stack behind the ball—support from an angle.
- Default last back: shadow and stall; don’t dive unless you can win safely.
- Default 3v3 lanes: ball-side pressure, middle support, far-side/central safety.
- Default boost: rotate through pads; take corner boosts only when it doesn’t abandon coverage.
- Default turn rule: if you turn away, commit to leaving—don’t fake rotate.
If you apply these defaults consistently, you’ll stop giving away free goals—and that alone wins a surprising number of games.
FAQ
Do I always have to rotate “wide”?
Wide rotations are a safe default because they reduce traffic and increase vision. But you don’t rotate wide just to be wide—you rotate in a way that preserves coverage and avoids cutting into teammates. If a small cut is safe and clearly adds value, it can be correct. If it creates confusion, it’s not.
What if my teammates don’t rotate?
You can’t control teammates, but you can control the team’s safety. If teammates chase, you become the stabilizer: hold safety range more often, rotate back post, and avoid stacking behind them. Many games are won simply by being the one player who doesn’t double commit.
Is back post still important at higher ranks?
Yes. Higher ranks sometimes break the rule for specific reads (pre-jumps, fast challenges), but the default structure remains: arrive with vision and cover the net from the safe side. Back post is timeless because it’s based on geometry and vision, not meta.
How do I know if I’m too close as second man?
If your teammate loses a 50/50 and the ball immediately gets past both of you, you were too close. If your teammate wins and you’re never able to follow up, you were too far. Adjust by small steps and review replays—spacing is calibrated through repetition.
Should I prioritize rotation or mechanics?
Rotation multiplies your mechanics. Good positioning gives you simpler touches, cleaner shots, and easier saves. Even modest mechanics become dangerous when your team shape is strong. If you train one “invisible” skill that boosts your rank quickly, rotations are it.
Optional: Faster Progress
If you want to climb faster and reinforce these fundamentals with structured help, you can check Rocket League options here: Rocket League Boosting Prices. Many players combine fundamentals study (like this rotation guide) with targeted coaching feedback and replay review to speed up improvement.