Diablo IV Endgame Basics: Affixes, Glyphs & Build Testing
Diablo IV — Endgame Basics: Affixes, Glyphs, and Testing Builds Efficiently
Diablo IV endgame can feel overwhelming at first because it stops being about simply equipping the item with the bigger number and starts becoming a game of filters, priorities, and disciplined testing. Most players do not actually stall because they are weak. They stall because they spread their power too thin, chase too many upgrades at once, copy a build without understanding its engine, or waste materials on items that were never strong enough to deserve investment in the first place.
This guide is designed to fix that. It is a timeless, class-agnostic explanation of how to approach Diablo IV endgame in a way that stays useful even when seasons, balance passes, and item details change. Instead of locking you into one short-lived meta, this article teaches the logic behind endgame progression: how to judge affixes, how to think about glyphs and Paragon value, how to test builds quickly, and how to decide whether your next upgrade should target damage, survivability, resource flow, mobility, or content-specific performance.
If you want to keep up with official system changes, the safest habit is to check the official Diablo IV site, Blizzard’s Diablo IV news feed, and a current class-resource hub such as Icy Veins Diablo IV guides. And if your goal is to save time on farming or compare gearing services, you can also look at Boosteria’s Diablo 4 boost and gold pricing page.
What Endgame Really Means in Diablo IV
Endgame in Diablo IV is not one activity. It is the phase of the game where your character stops asking, “Can I equip something stronger?” and starts asking, “What exact stats, interactions, and thresholds does my build need to perform its job better?” That is an important difference. During leveling, you can often brute-force progress with general upgrades. In endgame, efficiency matters more than randomness. That is why players who understand their build’s logic often outperform players with more hours but weaker decision-making.
In practical terms, Diablo IV endgame is built around a loop. You run content, acquire gear, compare affixes, refine your Paragon path, improve glyphs, and test whether the changes actually solved a problem. Sometimes the problem is not damage. Sometimes your boss time is fine, but your map clear is too slow. Sometimes your clear is excellent, but you are unstable against burst damage. Sometimes the build looks powerful in short clips but collapses when resource generation drops, crowd control chains begin, or positioning gets sloppy. Endgame is the art of identifying the real bottleneck instead of solving the wrong one.
This is why a timeless approach matters. Blizzard has already shown that itemization systems, glyph progression flow, and upgrade paths can evolve over time. The names, numbers, and seasonal extras may change, but the strong habits do not. Strong players still identify the build’s damage engine, protect its resource loop, secure baseline defenses, invest only in promising items, and test upgrades one variable at a time. If you learn that logic, you will adapt faster than players who only memorize a build planner.
There is also a psychological side to Diablo IV endgame. Many players burn out because they try to perfect every slot at once. That creates noise. Instead, think in layers. First, make the build functional. Next, make it smooth. Then make it specialized. Finally, make it elite. A functional build clears content. A smooth build clears without awkward pauses, deaths, or resource starvation. A specialized build knows whether it is optimized for farming, bossing, pushing, or general play. An elite build is where you chase premium rolls, best-in-slot interactions, and small percentage gains. Keeping these stages separate saves huge amounts of gold, materials, and frustration.
Your First Endgame Goals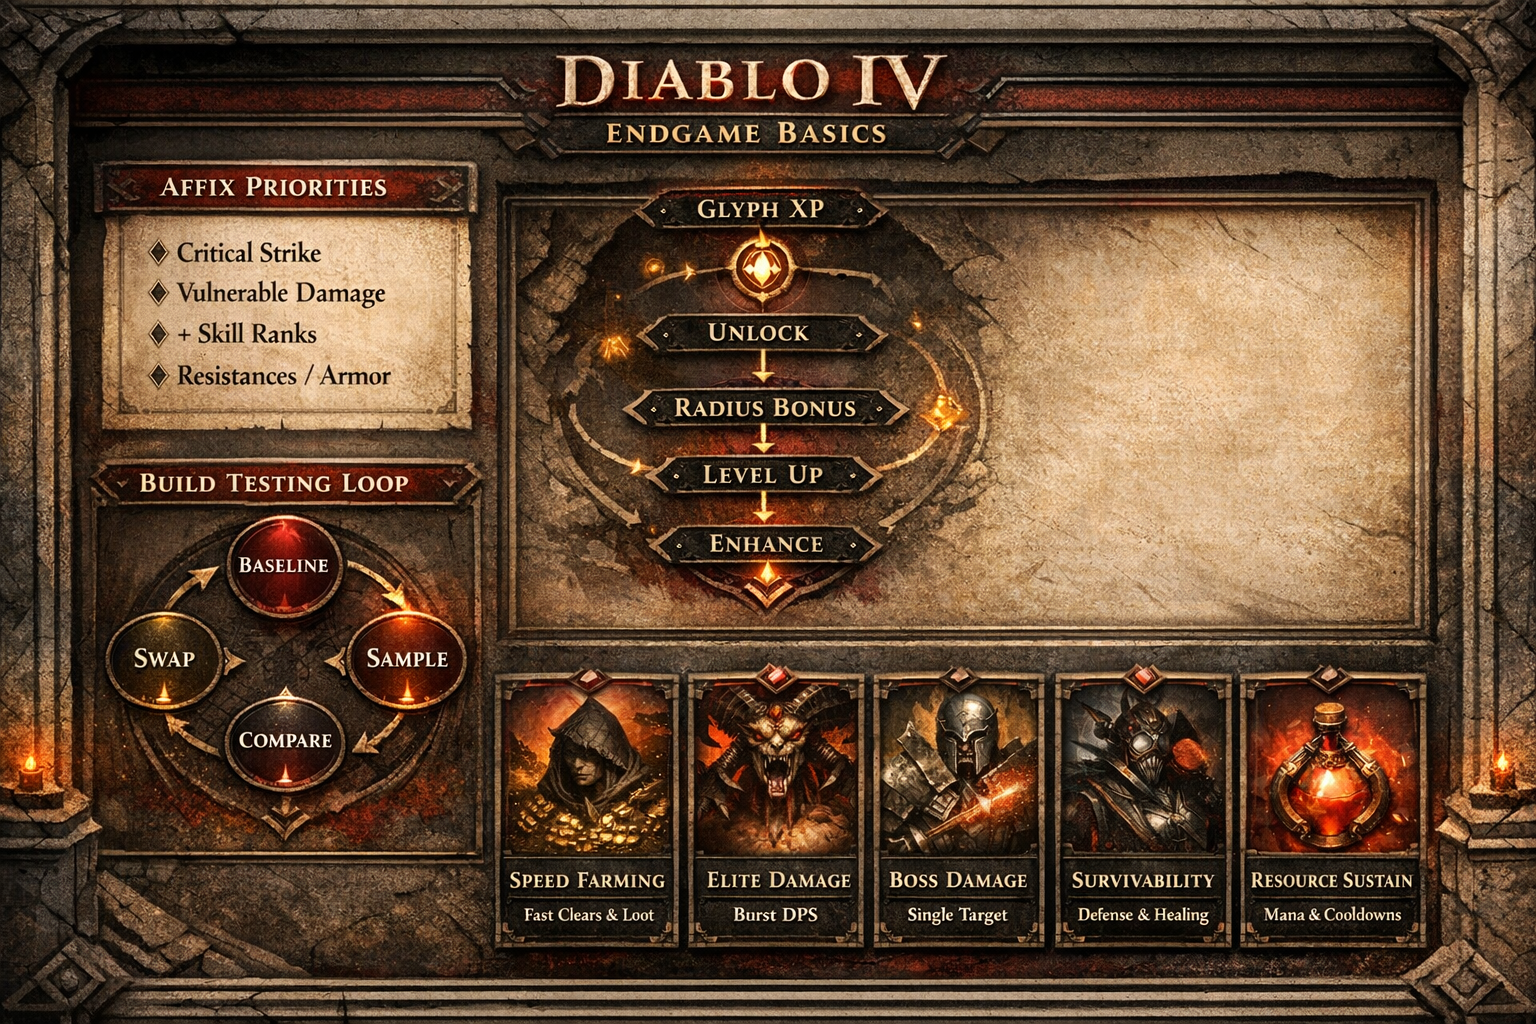
When players enter Diablo IV endgame, they often think they need perfect gear immediately. They do not. Your first goal is simply to make the build coherent. That means your skills, aspects, affixes, and Paragon choices should all point toward the same win condition. If your build wants to scale one skill, one damage type, one summon package, one proc loop, or one form of crowd control conversion, then your gear should reflect that. A scattered character is much weaker than an imperfect but focused one.
Your second goal is to stabilize the character. Stable characters are underrated because they are less flashy than glass-cannon setups, but they progress faster in the long run. Stability means your build can survive ordinary mistakes, can maintain its resource engine in average fights, and does not require every cooldown to be available at once just to function. If you die repeatedly, run out of resource constantly, or need ideal pack density to look strong, you do not have a real endgame build yet. You have a highlight reel build.
Your third goal is to define your main activity. Diablo IV rewards specialization because not every activity tests the same things. Speed farming values movement, bursty area damage, reset frequency, and low setup time. Bossing values single-target pressure, survivability under mechanics, and sustained uptime. Pushing harder content values both durability and consistency. If you try to build one character for every job too early, you usually end up mediocre everywhere. It is smarter to create one primary profile first and only later round out weaknesses.
Your fourth goal is to protect your materials. This is one of the least glamorous but most important endgame skills in Diablo IV. Do not sink expensive upgrades into gear just because it is temporarily equipped. Ask a stricter question: if this item dropped exactly as it is right now, and I had not invested anything into it yet, would I still be excited? If the answer is no, it is probably a bridge item, not a destination item. Bridge items deserve light investment. Destination items deserve real investment.
Affixes Basics: How to Read Gear Correctly
Affixes are the language of endgame power. If you cannot read them correctly, you will constantly misjudge upgrades. The first principle is simple: affixes are not valuable in isolation. They are valuable in relation to your build’s engine. For one build, a certain affix may be premium. For another, it may be nearly dead text. That is why copying generic “best stats” lists without context causes so many mistakes.
Start by sorting affixes into five buckets: direct offense, indirect offense, defense, resource economy, and utility. Direct offense includes stats that obviously increase damage for your core output pattern. Indirect offense includes stats that improve uptime, control, positioning, or proc frequency and therefore increase real damage in actual gameplay rather than on paper. Defense includes life, mitigation, avoidance, recovery, barrier-related stability, and other tools that keep you alive. Resource economy covers generation, cost reduction, restoration, and rhythm. Utility includes movement, cooldown assistance, control tools, and quality-of-life stats that make your gameplay smoother.
Many players overvalue direct offense because it is easy to read. They see bigger damage text and assume the item is better. But indirect offense often produces the larger real gain. Suppose an affix slightly lowers peak damage but makes your skill rotation smoother, keeps your buff window active longer, or lets you maintain pressure with fewer pauses. Over a full dungeon or boss attempt, that may outperform the more explosive option. This is why the best endgame players care about feel as much as they care about raw numbers.
The next principle is that a good affix is either enabling, scaling, or smoothing. Enabling affixes unlock the build. Without them, the build may not work properly at all. Scaling affixes make the build hit harder once it already works. Smoothing affixes reduce friction by fixing resource tension, mobility, cooldown awkwardness, or survivability gaps. Most failed builds are not failed because they lack scaling. They fail because they skipped enabling or smoothing stats and tried to solve every problem by stacking more damage.
There is also a hidden question behind every affix: is this stat conditional, and how often is the condition truly active? Endgame players should love honest uptime. A modest bonus with near-permanent uptime can be stronger than a huge bonus that only appears during ideal windows. If your build planner looks incredible but your gameplay only satisfies its conditions half the time, then your effective power is much lower than it appears. Honest evaluation beats fantasy evaluation every time.
How to Prioritize Affixes Without Guessing
The cleanest way to prioritize affixes is to ask four questions in order. First: what actually kills enemies in this build? Second: what prevents that damage from happening consistently? Third: what makes the build feel slow or unsafe? Fourth: what stat gives the highest practical return on the content I am running most?
That method matters because it keeps you from treating all damage bonuses equally. A build built around repeated casts of one main skill usually wants affixes that directly amplify that skill, the tags that support it, and the systems that keep it active. A proc-based build may care more about trigger rate, attack rhythm, lucky interaction density, or positional consistency. A summon or damage-over-time setup may prize different forms of scaling than a direct-hit setup. The right answer is always tied to what the build is really doing, not what looks good on a screenshot.
After identifying your damage engine, look for the first real limiter. Maybe your damage is fine, but your crowd clear feels clumsy because you lack movement or area reach. Maybe you survive regular packs but fall apart against elites or bosses because your recovery windows are weak. Maybe you are constantly forced into downtime because your resource loop breaks after an opener. Those are not side issues. They are core endgame issues. Solving them often produces more actual progression than adding another damage affix.
It is also smart to separate “always good” affixes from “good for now” affixes. Early and mid-endgame often reward broad reliability. Late endgame rewards sharper specialization. For example, broad survivability or general-use smoothing can be excellent while a build is still stabilizing. Once the character becomes durable and fluid, you may be able to convert one defensive slot or utility line into a more aggressive, specialized choice. That does not mean your earlier setup was wrong. It means it matched a different stage of progression.
Finally, remember that the value of an affix depends on opportunity cost. An affix is not just strong or weak. It is strong or weak compared to what else that slot could hold. That is why slot context matters so much. A merely decent line on a slot with little competition can be acceptable. The same line on a high-impact slot may be terrible because it pushes out a premium option. Advanced players win a lot of value simply by understanding which slots are flexible and which are sacred.
When a Piece of Gear Is Worth Investing In
One of the biggest separators in Diablo IV endgame is not luck. It is upgrade discipline. Most players waste resources by investing too early in gear that looked promising at first glance but was missing one or two critical pieces. The smarter approach is to grade items before you enhance them.
A simple grading system works well. A “test item” has one or two useful lines and is good enough to try the build. A “bridge item” has the right direction and enough quality to support progression for a while. A “core item” has the right structure and deserves meaningful investment. A “chase item” is the kind of piece you would be happy to carry deep into endgame because it has excellent affix alignment, premium potential, or rare top-end value.
Test items deserve almost no luxury spending. They exist to let you feel the build. Bridge items deserve only the amount of investment needed to keep momentum. Core items deserve focused crafting and upgrading. Chase items deserve your best materials because they are the pieces most likely to stay equipped. Thinking this way prevents panic spending. It also keeps your progression moving because you stop treating every small improvement like a final answer.
When judging whether an item deserves investment, check three things. First, does it support the build’s primary engine? Second, does it cover a real weakness rather than a theoretical one? Third, can it still be good after further crafting or rerolling? If an item fails two of those tests, be careful. If it passes all three, it is probably worth working on.
As a timeless rule, upgrade order should usually follow certainty. Invest first in the pieces you are most confident will remain useful. Delay heavy investment on slots where your build may still change direction. This matters especially in Diablo IV because itemization systems can reward planning. The more confident you are that a piece fits your long-term shape, the safer it is to pour resources into it.
Another powerful habit is to keep one backup item for volatile slots. If you are testing an aggressive change, do not destroy your stable version immediately. Keep a fallback. Endgame experimentation is faster when you can compare two real options instead of trying to remember how the old setup felt. That backup mindset becomes even more valuable when you are testing different activity profiles, such as a faster farming setup versus a sturdier boss setup.
Glyphs and Paragon: Where Real Power Starts
Once your basic gear is pointed in the right direction, glyphs and Paragon become one of the most important sources of endgame power in Diablo IV. This is where many builds stop being “a collection of decent items” and start becoming a real machine. A good Paragon path does not just give more stats. It concentrates the right stats around the right bonuses and pushes your build toward stronger thresholds.
The biggest mistake players make with glyphs is treating them like passive filler. They are not filler. They are structure. A well-chosen glyph can amplify a carefully built board path in a way that changes how the whole character performs. A poorly chosen one can waste travel points, dilute stat value, or encourage a board route that looks clever but gives poor real returns.
When thinking about glyphs, start with role rather than rarity or hype. Ask what each glyph is doing for you. Is it a pure damage amplifier? Is it a tag converter that improves your main engine? Is it supporting survivability, control, or uptime? Is it there because the board around it is exceptionally efficient? Good glyph selection is rarely about choosing the “most famous” option. It is about choosing the option that interacts most cleanly with your actual pathing and priorities.
Another common mistake is choosing too many ambitious boards before the character is ready. A longer route that eventually becomes brilliant can still be wrong if it leaves your current character weak, underdefended, or missing practical power on the way. Endgame progression is smoother when you take efficient value first and luxury routing later. Think of Paragon as infrastructure. You want roads that solve today’s traffic before you build a monument.
It is also worth remembering that glyph progression is one of the best examples of compounding returns. A stronger glyph improves the value of the surrounding board, which improves the value of your itemization, which makes content easier, which helps you level other glyphs and farm more efficiently. That is why disciplined players often treat glyph progression as a central pillar of endgame, not a side task to do whenever they remember.
How to Choose the Right Glyphs
The easiest way to pick glyphs well is to separate your choices into mandatory, excellent, optional, and luxury. Mandatory glyphs are the ones that directly serve your main damage engine or protect a core class interaction. Excellent glyphs are not always required, but they create so much efficient value that they are hard to pass up. Optional glyphs solve specific problems or suit specific content profiles. Luxury glyphs are high-end choices you add when the rest of the build is already functioning smoothly.
For each glyph you consider, ask five questions. Does it support the build’s central output? Does the surrounding board naturally supply the stats it wants? Does taking it force inefficient travel? Does it improve current performance, not just future theoretical performance? And finally, if I level this glyph next, will I feel the improvement in the content I am actually running? That last question matters because the “best” glyph on paper is not always the best glyph to level first.
Higher-end players also think about sequencing. You do not just choose the right glyphs; you choose the right order. If one glyph gives your build a meaningful early spike in clear speed, resource stability, or survival, it may deserve early attention even if another glyph eventually scales slightly higher. Strong sequencing creates momentum, and momentum in Diablo IV means faster farming, faster material gain, and faster access to the next round of upgrades.
As a general rule, prioritize glyphs that improve the activity you are using to farm. A character that farms faster upgrades everything faster. That can mean area damage, movement support, quicker elite kills, or smoother resource flow depending on your setup. Boss-only value is excellent when bossing is your main task, but many players overinvest in rare boss windows while ignoring the fact that they spend most of their time clearing toward those moments.
And remember: the goal is not to max every appealing option immediately. The goal is to get the most useful power earliest. Endgame players who understand this usually feel stronger every session. Players who ignore it often grind a lot but feel oddly stagnant because they spread their glyph effort across too many directions at once.
How to Test Builds Efficiently
Efficient build testing is one of the highest-value skills in Diablo IV because it turns endgame from guesswork into evidence. The central rule is simple: test one variable at a time. If you change your weapon, your Paragon path, your glyph, your skill choice, and your aspect setup all at once, you will not know which change actually helped or hurt. That kind of testing feels productive because it is dramatic, but it produces bad information.
The best testing loop is baseline, swap, sample, compare. First, establish a baseline. Run content you can clear consistently and note how the build feels: clear speed, boss time, resource stability, survivability, and comfort. Then change one thing. Next, gather a small but honest sample rather than judging from one lucky run. Finally, compare results in terms of both performance and feel.
Feel matters because not every meaningful improvement shows up as bigger damage numbers. If the new version is calmer, safer, smoother, and easier to maintain under pressure, that is real performance. Many Diablo IV players accidentally downgrade their builds by chasing larger burst windows that make the rotation less stable. The better version is usually the one that lets you perform closer to your theoretical maximum more often.
It helps to rate every test using a simple five-part score: clear, boss, defense, resource, and comfort. Give each category a quick note. You do not need a spreadsheet unless you enjoy it. Even short notes such as “faster packs, worse boss,” “excellent uptime, weaker panic tools,” or “tankier but noticeable resource drag” are enough to stop you from forgetting what actually happened.
Another advanced habit is to test for the reason you changed the item. If you swapped gear to fix boss damage, do not judge it only in easy trash content. If you swapped gear to reduce deaths in harder content, do not reject it because it shaved a little off your speed-farm pace. Testing should answer the question you asked. Otherwise, you are collecting impressions, not data.
Finally, avoid the trap of overtesting tiny changes while ignoring huge problems. Some players obsess over microscopic affix differences while their build still has a major resource hole or an obvious defense issue. In those cases, testing should focus on the big bottleneck first. Endgame efficiency is about solving the most expensive problem, not polishing the least important one.
Use the Right Content for the Right Test
Different content in Diablo IV reveals different truths about your build. That is why efficient testing uses a content ladder rather than a single favorite activity. Easy farm content is good for judging flow, movement, and pack clear. Moderate challenge content is good for testing consistency. Harder push content is where defense, uptime, and boss handling get exposed. If you only test in one environment, you can fool yourself.
For clear speed testing, use content where enemies are dense enough to reveal whether your build chains well, moves well, and resets well. This tells you whether your farming profile works. For survivability testing, use content where incoming damage is meaningful enough to punish greed but not so overwhelming that every attempt becomes chaos. For bossing, use repeatable encounters or sturdy targets where you can feel whether your single-target damage is real or merely dependent on perfect setup windows.
The Pit is especially valuable as a testing arena because it pressures the character in a more honest way. It highlights whether your build can keep output consistent while managing movement, pressure, and survival. It also matters for glyph progression, which means time spent there can serve two goals at once when planned well. That is efficient endgame thinking: choose content that improves both your character and your information.
Nightmare-style dungeon content, seasonal activities, and other farming routes remain useful because they stress a different side of the build. They show whether your character is actually convenient to play for extended sessions. A build that performs beautifully in short, controlled clips but feels awkward across repeated farming runs may not be the best real-world choice for progression.
When possible, keep a consistent test route. Use similar content, similar difficulty, and similar expectations. Consistency makes comparison sharper. You do not need lab-level precision, but you do need enough stability that your conclusions are based on the build rather than wildly different encounter patterns.
The Real Upgrade Order Most Players Should Follow
If you are unsure where to focus next, a timeless order usually works better than random improvement hunting. First, lock in the build’s core functionality. That means the right skills, the right core affix categories, and enough support for the main engine to run. Second, fix severe survivability problems. Third, stabilize resource flow and rotation feel. Fourth, improve your most important glyphs and Paragon efficiency. Fifth, begin sharper gear investment. Sixth, specialize for your preferred endgame activity.
This order works because dead characters do no damage, clumsy rotations reduce effective power, and poorly supported engines never realize the promise of their offensive stats. Players who skip straight to top-end damage affixes often wonder why their “strong” build still feels worse than a less glamorous version. The answer is usually that the glamorous version skipped the fundamentals.
You can think of this as building a house. The foundation is engine functionality. The walls are defense and resource support. The wiring is Paragon and glyph synergy. The decoration is fine-tuned luxury damage. If you try to hang chandeliers before you finish the walls, the whole structure is unstable.
Common Endgame Mistakes
1. Chasing paper DPS. If the build only looks good when every condition lines up perfectly, it is probably less powerful than it seems. Real endgame performance is about repeatability.
2. Overinvesting in temporary gear. Not every equipped item deserves premium materials. Learn the difference between a bridge item and a real destination piece.
3. Ignoring defenses until it is too late. A build that dies to ordinary pressure wastes time, loses momentum, and makes every activity less efficient.
4. Leveling glyphs without a plan. Spreading progress too widely slows everything down. Focus on the glyphs that improve your current farming and progression loop first.
5. Testing too many things at once. This is one of the fastest ways to waste both gold and time. One variable at a time produces usable information.
6. Copying a build guide without understanding its assumptions. A guide may assume specific items, thresholds, or content goals. If your character is missing those foundations, the build can feel much worse than advertised.
7. Solving the wrong problem. If your true bottleneck is resource starvation or survivability, adding more damage may do almost nothing for your real progression.
8. Refusing to keep multiple profiles. Sometimes one item or skill variation is better for farming and another is better for bosses. You do not always need one universal answer.
A Practical Upgrade Workflow You Can Reuse Every Session
Here is a simple workflow that works for most Diablo IV endgame sessions.
- Define the problem. Are you too slow, too fragile, too resource-hungry, or too weak against bosses?
- Choose one target. Do not try to solve three problems with one random gear shuffle.
- Review current items by role. Which slots are enabling, scaling, smoothing, or underperforming?
- Check glyph and Paragon alignment. Are your boards and glyphs still serving the build’s actual engine?
- Pick one upgrade route. Example: better weapon affix alignment, one Paragon correction, or one glyph priority push.
- Run a short sample. Use a consistent content set and compare honestly.
- Record the result. Keep brief notes so you stop repeating dead-end tests later.
- Only then invest more. If the change clearly helped, commit more resources. If not, step back.
This process sounds basic, but it protects you from the most expensive form of endgame waste: emotional upgrading. Emotional upgrading happens when a player sees a new item, gets excited, spends heavily, and only afterward realizes it solved nothing. The discipline to pause, classify, and test is one of the strongest progression skills in the game.
Imagine you are playing a build that clears normal packs quickly but struggles on elite groups and bosses. Your first instinct may be to stack more raw offense. But testing might reveal the real issue is inconsistent uptime because the build loses rhythm during longer encounters. In that case, affixes or board choices that improve resource stability, cooldown rhythm, or sustained pressure may outperform a flashy damage line. Without structured testing, many players never discover that.
Now imagine the opposite situation. Your build feels smooth and safe, but clear times are lagging. In that case, you may have reached the point where a defensive line can be traded for a more aggressive one because the character is already stable. Again, the right answer depends on context. Endgame is rarely about a universal stat hierarchy. It is about solving the next real problem in front of you.
How to Keep the Guide Timeless When the Game Changes
Diablo IV evolves. Systems get tuned, activities rise or fall in value, and item rules can change across major updates. That is exactly why a timeless endgame mindset matters. When patches hit, do not start from zero. Recheck the same foundation questions: what is my damage engine, what supports it, what breaks it, and what content am I optimizing for?
If itemization shifts, affix evaluation still matters. If progression routes change, glyph and Paragon efficiency still matter. If a new seasonal mechanic appears, your testing loop still matters. Even when exact formulas move, the logic of strong endgame play stays recognizable: concentrate value, avoid wasted investment, test honestly, and upgrade according to proven bottlenecks.
This is also why official information should guide your patch-day habits. Blizzard’s own update posts and patch-note hubs are the best place to confirm how gear systems, glyph progression flow, or content rewards have changed. Community resources are excellent for fast interpretation, especially once the season settles, but your strongest long-term habit is learning how to read your build through systems, not just through tier lists.
Quick Endgame Checklist
- My build has one clear damage engine.
- My affixes support that engine instead of pulling in random directions.
- I know whether my current bottleneck is damage, defense, resource, mobility, or comfort.
- I am investing heavily only in gear that has real long-term potential.
- My main glyphs are chosen for actual value, not hype.
- I test one variable at a time.
- I use different content types to test different build qualities.
- I can explain why each recent upgrade was made.
FAQ
Should I always prioritize damage affixes first in Diablo IV endgame?
No. Damage affixes are only best when damage is your real limiter. If your resource loop is weak, your defenses are unreliable, or your build cannot maintain uptime, then smoother or safer stats may produce more real progression than raw offense.
How many glyphs should I focus on at once?
Usually fewer than you think. Focus first on the glyphs that immediately improve your farming route and primary build engine. Spreading effort too widely slows momentum.
When should I stop investing in a temporary item?
As soon as you recognize it is only solving today’s problem and is unlikely to remain valuable after your next major upgrade. Temporary gear deserves practical investment, not emotional investment.
Is it worth having separate setups for farming and bossing?
Yes, often. Diablo IV rewards specialization. A small swap in gear, skills, or Paragon emphasis can create a better profile for a specific activity without rebuilding the whole character.
What is the biggest mistake new endgame players make?
They try to perfect everything at once. Progress is much faster when you identify one bottleneck, solve it cleanly, and then move to the next.
Conclusion
Diablo IV endgame is much easier to understand once you stop treating it like a loot lottery and start treating it like a decision game. Affixes are not random decorations; they are instructions for how your build is meant to function. Glyphs are not background bonuses; they are structural multipliers that reward intelligent routing. Build testing is not something only theorycrafters do; it is the fastest way for any player to stop wasting time, gold, and materials.
If you remember just one idea from this guide, make it this: every endgame upgrade should answer a question. What is my build trying to do? What is stopping it? What single change is most likely to help? Players who ask those questions keep progressing even when the meta changes. Players who do not usually end up farming harder while understanding less.
So keep your build focused, keep your glyph path intentional, and keep your testing honest. That is the real foundation of Diablo IV endgame success. Once you master that foundation, affixes become clearer, upgrades become cheaper, and your build stops feeling random. It starts feeling yours.