



Fortnite Endgame Guide: Rotations, Layers & Storm Pressure
Fortnite — Endgame Fundamentals: Rotations, Layers, and Storm Pressure
Why Endgame Matters More Than Almost Anything Else
If you want better results in competitive Fortnite, you cannot treat the endgame as an optional skill. It is the phase where your earlier decisions are tested under the most pressure, where small positioning mistakes become instant eliminations, and where players with average mechanics can outperform stronger fighters simply by understanding space, timing, and zone logic better.
Many players spend most of their practice time on aim, edits, box fights, and flashy retakes. Those skills matter. But they do not automatically translate into consistent placement when 20, 30, or more players are alive in a shrinking zone. Endgame is not just about being able to build fast. It is about knowing when to rotate, where to rotate, how much to spend, what layer to choose, who to pressure, when to refresh, and when survival is more valuable than a risky elimination.
That is why strong endgame fundamentals create such a big rank and tournament advantage. You stop losing games that were already playable. You stop burning all your materials before the most important moments. You stop arriving late to the safe zone with no health and no plan. Most importantly, you stop letting the lobby decide your fate. Instead, you begin to shape your own endgame path.
This guide focuses mainly on build-mode competitive Fortnite because concepts like layers, tunnels, and controlled moving zones are most visible there. Still, the deeper logic applies widely: position before panic, protect resources, read pressure, and make decisions before the storm forces them on you. If you learn those patterns, your endgames become calmer, smarter, and more repeatable.
What “Endgame” Really Means in Fortnite
Players often talk about “endgame” as if it begins at one exact moment, but that is not how it works in real matches. Endgame is better understood as a transition from open map play to compressed survival. It usually starts when space becomes limited enough that your next safe position matters more than loot, side quests, or off-angle fights. In practical terms, that means the later static circles, pre-moving zones, and the moving zones that follow.
The important idea is that endgame is not only the last minute of the match. It starts earlier than many players think. If you wait until the storm is already moving and everyone is tunneling to suddenly “focus up,” you are already late. True endgame skill begins with preparation. You should enter the late circles with a mental map of your surroundings, a sense of where pressure is coming from, and a clear plan for how you will react if the zone pulls away from you.
That is why the strongest Fortnite players seem calm in stacked lobbies. They are not improvising every second. They are making informed adjustments inside a larger framework. They know what they value: early positioning, material conservation, controlled aggression, and smart layer selection. Their endgame looks smooth because the decisions were already forming before the panic started.
Core Endgame Vocabulary You Should Actually Understand
Fortnite strategy becomes much easier when you understand the language players use in scrims, VOD reviews, and competitive discussions. These terms are not just buzzwords. They describe repeatable patterns that shape nearly every stacked endgame.
Rotation means moving from your current position to a better one, usually because of zone, pressure, terrain, or timing. A rotation is not just walking into circle. A good rotation is efficient, protected, and early enough to avoid getting focused by the entire lobby.
Front side is the safer side of zone, where you arrive earlier and avoid getting held by players already inside. Back side is the storm-facing side where late rotators are usually exposed. Front-side access gives you time and options. Back-side play often forces desperation.
Dead side refers to an area with lower player density and less pressure. Congested side is the opposite: more builds, more bodies, more third parties, more chaos. Good players constantly look for dead-side paths because fewer guns pointed at you means cheaper movement.
Layer refers to your vertical level in the build stack. Players generally describe low ground, mid ground, and height. Every layer has different costs, risks, and advantages. Choosing the wrong layer for your materials, health, or lobby situation is one of the fastest ways to throw an otherwise good game.
Tarp or tunnel is your protected path through danger, usually built to move safely while the lobby shifts. Tunneling is not about spamming pieces randomly. It is about creating controlled forward space while spending as little as possible.
Refresh means gaining materials, ammo, heals, or space through pressure or an elimination. Refreshes are powerful because endgames are often decided by who can keep functioning while others run dry. But hunting a refresh at the wrong time is one of the most common ways players die.
Storm pressure means pressure created by the zone itself. It includes direct storm damage, forced movement, reduced timing windows, and the emotional panic that makes players make bad decisions. You are not only fighting opponents. You are fighting the clock and the map.
Surge pressure in competitive contexts refers to the need to deal enough damage to stay safe when the lobby is highly stacked. Even when the exact thresholds or format rules change over time, the timeless lesson remains: passive play in stacked lobbies can become dangerous if you never create damage opportunities.
Rotation Fundamentals: Getting In Before the Lobby Panics
The single biggest endgame improvement most players can make is rotating earlier. Not blindly early. Not recklessly. But earlier than the average player around them. When you rotate on time, you avoid becoming one more desperate body trying to squeeze through a narrow opening while everyone looks for tags on late movers.
Good rotations start with awareness. The moment a new zone appears, ask three questions. First: how far is the pull? Second: which side is likely to become congested? Third: is there a natural route through terrain, builds, or low-pressure space? If you answer those questions quickly, you create an information lead over players who only react once the storm starts touching their back.
Distance matters, but direction matters more than people realize. A medium pull through open terrain can be harder than a long pull along connected builds. A short pull into a packed edge can be more dangerous than a deeper pull toward dead side. The zone is not only a circle. It is a map of likely pressure points.
One timeless principle is this: do not rotate at the same speed as the slowest players behind you. If you move when they move, you become part of the same wave. That wave gets sprayed, pinched, and boxed by players already in position. The goal is to either beat the wave or avoid it entirely through a smarter path.
Another principle: rotate with purpose, not with hope. Many players waste materials because they build first and think later. They open themselves to angles they never checked. They climb for no reason. They add side pieces in empty space. They tunnel through areas they could have crossed with less investment. Effective rotation means knowing what the next piece is solving. Is it blocking a known angle? Claiming a safer path? Protecting a teammate? Buying time for a heal? If you do not know the purpose, you are probably overspending.
The best default rotation is usually one that gets you near the front side of zone without putting you at the absolute center of attention. You want access to future movement without becoming the first target in every direction. That means looking for controlled edges, strong side walls, old builds you can recycle around, and elevation that gives visibility without overcommitting to height.
Pre-Moving Zone: Where Good Games Become Great Games
The pre-moving phase is often where the entire match is quietly decided. Players who handled the mid game decently but enter pre-moving with no materials, bad spacing, or weak side positioning usually collapse before the true chaos even starts. Players who prepare correctly arrive to moving zones with enough control to actually play for placement and refreshes.
In pre-moving, your priorities should become sharper. You want clean positioning, enough materials to survive the first moving pulls, enough ammo to punish greedy players, and a loadout that lets you stay flexible. This is also the moment to stop taking vanity peeks. Random edit windows and low-value shots are expensive because they reveal your position, burn heals, and invite pressure from multiple teams.
Your pre-moving box should do more than hide you. It should give you choices. Can you look ahead without overexposing? Can you drop a layer if someone pressures from above? Can you exit left or right depending on the next pull? Are you boxed next to players who will grief your rotate the moment zone appears? Small placement details like that matter more than most aim duels.
This is also where storm pressure begins to affect your mind before it affects your health. Players know moving zones are coming. That anticipation creates impatience. They start forcing edits, forcing claims, forcing height attempts that are too early, or panicking because they think they need a miracle. Usually they do not. Usually they need one calm, efficient reposition and better patience.
If you want a strong pre-moving habit, make this your rule: before the first moving zone appears, know your likely path, your likely backup path, and your likely escape layer if you get pressured. That alone can separate organized players from reactive ones.
Moving Zones: Reading Direction, Speed, and Lobby Flow
Once the zone begins to move, the match becomes a race for organized survival. Mechanical speed matters, but reading lobby flow matters even more. Most players do not die because they physically cannot build fast enough. They die because they picked the wrong path, chose the wrong layer, or kept moving in a direction that was already lost.
The first thing to read in a moving zone is the pull direction. If the zone moves across a crowded build mass, expect heavy congestion and rapid piece turnover. If it drifts toward open space, expect faster claims, longer tunnels, and more opportunities to get isolated. Either way, you should think in terms of routes rather than raw distance. Which path lets you move while minimizing the number of players who can see and spray you?
The second thing to read is speed. A faster-feeling moving zone punishes hesitation more than almost any other mechanic in Fortnite. If you stop too long to fight, heal, or argue with your own pathing, the storm turns your indecision into damage. That is why strong players often look “proactive” in moving zones. They understand that every second of uncertainty multiplies future danger.
The third thing to read is the lobby’s collective behavior. Are multiple teams climbing? Is low ground overstacked? Is mid ground flowing smoothly? Is height overbuilt and unstable? Sometimes the best rotate is not the theoretically strongest one. It is the one the fewest players are contesting in that exact moment.
Never assume one layer is always correct. Many players autopilot to mid ground because it feels balanced. Often that is reasonable. But sometimes mid ground is the most expensive place in the lobby because everyone else had the same idea. Sometimes low ground gives the cheapest path because it is shielded by the builds above. Sometimes temporary height gives you space to move and scout before dropping back down. Good endgame players do not marry one answer. They read the moment.
Layers Explained: Low Ground, Mid Ground, and Height
Layers are one of the most misunderstood topics in Fortnite endgame. Players talk about them as if they are social classes: low is desperate, mid is normal, height is victory. Real endgames are more nuanced than that. Every layer is powerful in the right conditions and disastrous in the wrong ones.
Low Ground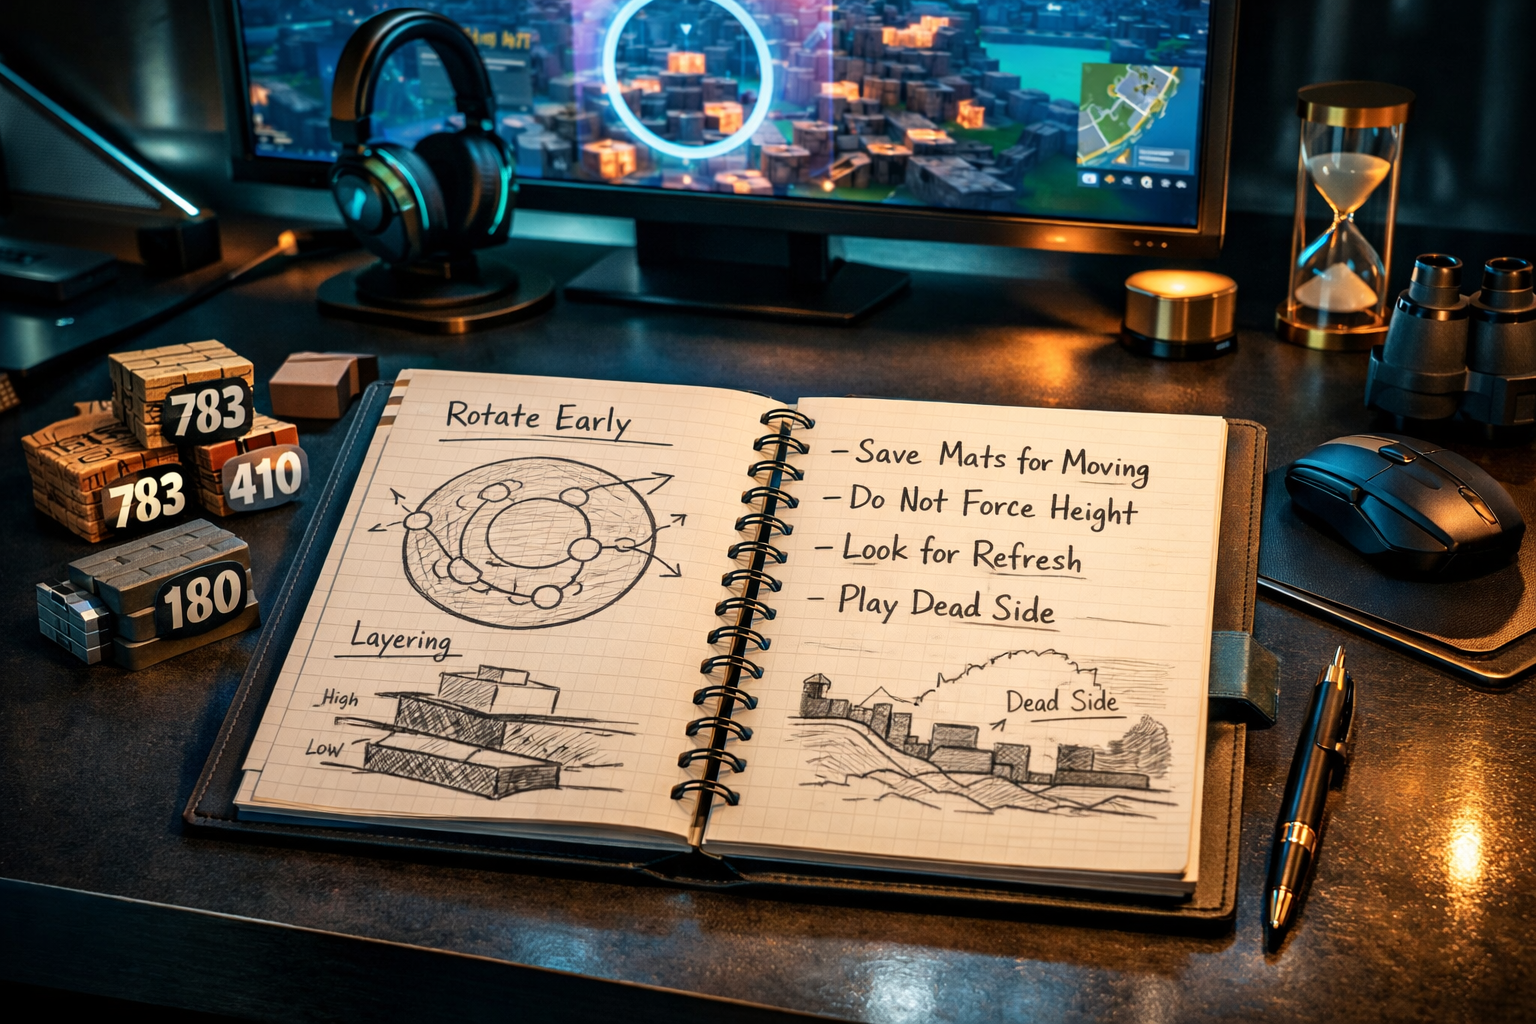
Low ground is often safer than newer players think. It can be naturally protected by the stack above it, which means fewer direct angles from the entire lobby. It also makes it easier to collect loose refreshes, dropped materials, and vulnerable players who fall or overextend. Low ground players can survive deep into endgame if they are disciplined, stay ahead of the storm line, and avoid getting trapped under collapsing builds.
The problem with low ground is that it punishes poor awareness. If you let the zone pull too far ahead, you may get buried under enemy structures and forced into ugly vertical climbs. If you tunnel too slowly, the storm and the stack can squeeze you at the same time. If you build too high from low ground without a plan, you often expose yourself to every angle above.
Mid Ground
Mid ground is the most flexible layer in many endgames. It often offers the best balance between visibility, cover, and route options. You are high enough to avoid some low-ground congestion, but not so high that the whole lobby focuses you. It is a great default layer if you have solid materials and you can keep your path efficient.
The weakness of mid ground is competition. Because it feels comfortable, many teams drift there automatically. That means more contested walls, more side pressure, and more chances of getting cut off by players who want the same space. Mid ground is strongest when you use it with purpose, not habit.
Height
Height is powerful because it gives vision, pressure, and control. Players on height can often choose when to spray, when to drop pressure, and when to deny climbs. They can influence the movement of the whole lobby. That is why many highlight clips glorify high ground takes. But height is not free. It is expensive, vulnerable, and often short-lived unless it is earned at the right moment.
The biggest mistake players make with height is taking it too early or defending it too stubbornly. If you invest too much to claim height before the lobby is ready to respect it, you become the entire lobby’s project. Everyone wants your layer, your materials, or your mistake. Smart height players understand when the layer is worth defending and when a controlled drop preserves more placement value than ego.
How to Choose the Right Layer
Your layer choice should be based on four things: your materials, your health, your utility, and the current lobby flow. Low mats usually push you toward cheaper routes, often low or protected mid. Good mobility or extra utility may allow temporary height claims or more aggressive mid paths. Weak health often means you need safer lines, not ambitious ones. A congested layer may force you to switch even if it is usually your comfort zone.
The best layer is not the most glamorous one. It is the one that keeps you alive longest while giving you a realistic chance to improve your position.
Storm Pressure: Damage Pressure, Time Pressure, and Fear
Storm pressure is one of the defining forces of Fortnite endgame because it does more than deal damage. It compresses decision-making. It shrinks timing windows. It turns small route mistakes into huge punishments. It makes weak players panic and good players reveal whether their plan was real.
There are three kinds of storm pressure you should think about. The first is direct damage pressure. This is obvious: if you are in the storm, your health becomes a resource that is draining. The second is time pressure. Even if you are not taking damage yet, you may only have a few seconds to move before your path becomes impossible. The third is psychological pressure. This is the hidden killer. Players rush edits, waste materials, and take bad fights because the storm makes them feel they must do something immediately.
The best answer to storm pressure is preparation. If you arrive early to space, track likely congestion, and conserve materials, the storm becomes a tool you understand rather than a monster chasing you. If you arrive late with no control, it becomes your second enemy.
Another key idea is that storm pressure affects everyone, not just you. If an opponent is late rotating, weak on heals, or stuck on the wrong side, they are easier to predict. That is why well-timed pressure on late movers is so strong. You are not only shooting them. You are forcing them to spend materials, lose timing, or eat storm damage. In stacked lobbies, that usually matters more than the raw damage number itself.
Competitive players also need to understand lobby-wide storm pressure. In many tournament settings, passive teams can get punished if they fail to generate enough damage over the course of the match. That makes controlled tagging and smart pressure a survival skill, not just an aggression choice. You do not need to grief every rotate. But you do need to recognize windows where damage is safe, valuable, and necessary.
Materials, Loadout, and Utility Planning for Endgame
Fortnite endgame is resource management under movement. Players love to talk about mechanics, but many losses are caused by poor budgeting long before the final zones appear. The deeper you get into late game, the more every material piece, every heal, and every inventory slot reveals whether you planned ahead.
The first rule is simple: treat materials as time. More mats mean more seconds of survival, more route options, more chances to stabilize, and more opportunities to claim a refresh. When you waste materials in mid game on low-value peeks, overbuilding, or unnecessary fights, you are really stealing time from your future self.
The second rule is that not all materials have equal emotional value in different spots. Players often cling to a “save hard mats” mindset without thinking about the current danger. In some situations, using stronger materials to survive a crucial rotate is correct because that rotate determines whether you even reach the next phase. Resource discipline is not stubbornness. It is intelligent prioritization.
Your loadout should also reflect endgame logic. You generally want weapons that let you pressure, claim space, and finish opportunities without forcing awkward exposure. Long, clumsy loadouts that look fun in open fights often feel terrible in stacked moving zones. Utility and heals can be game-changing because they buy reset opportunities or let you outlast players who reach the same placement stage with worse sustainability.
A timeless loadout principle is flexibility. You want to be able to do at least three things: punish exposed players, defend yourself if someone lands in your space, and keep functioning when the zone forces movement. If your inventory is all comfort and no survival, your endgame ceiling drops fast.
Do not underestimate ammo economy either. Players with good materials but weak ammo often miss easy refresh windows because they cannot sustain pressure. Others burn ammo on hopeless spam and enter late moving with nothing meaningful left. Like materials, ammo should be spent where it changes the future, not where it only sounds active.
Refreshes: When to Take a Fight and When to Stay Invisible
A refresh is one of the most important concepts in Fortnite endgame because it can completely reset your chances. One elimination at the right moment can turn a dying run into a top finish. Materials, ammo, heals, and better position often come together in a single successful cleanup.
But refreshes are dangerous because players romanticize them. They think every weak player is “free.” In reality, the best refreshes are usually low-commitment, high-certainty opportunities. Maybe a player is split from their team. Maybe someone is healing late on edge. Maybe a low-ground opponent is trapped by storm and cannot take a fair fight. Those are real refresh windows.
The worst refresh attempts are driven by panic. Players realize they are low on mats, then force a box dive through multiple layers of danger because they think they “need something.” Usually that ends with them dead and the lobby richer. Refresh hunting should improve your odds, not satisfy desperation.
Ask three questions before taking an endgame fight. First: can I finish this quickly? Second: what angles open on me if I commit? Third: does the reward actually solve my next problem? A fight that gives two seconds of excitement but leaves you storm-held, exposed, and out of layer control was not a good refresh.
Good players also know how to create mini-refreshes without full all-ins. A few well-timed tags can weaken a team enough that another squad finishes them. Then you sweep the leftovers. A clean pressure spray can force opponents to overbuild and burn the materials you wanted them to burn. You do not always need the elimination immediately. Sometimes you just need to be on the right side of the collapse.
Solo, Duo, and Team Role Differences in Endgame
Endgame fundamentals stay consistent across Fortnite formats, but the way you execute them changes depending on whether you are alone or coordinating with others.
Solo Endgame
In solos, your information load is higher because every task belongs to you. You must read zone, build, look for tags, protect your path, and decide whether to fight. That makes simplicity powerful. Clean front-side rotations, conservative layer choices, and disciplined material use usually outperform flashy overconfidence. In solo endgames, avoid creating too many decisions at once. The more chaotic your position, the more likely you are to misread the next second.
Duo Endgame
In duos, spacing becomes everything. You need to be close enough to support each other but not so close that one bad spray or explosive pressure breaks both of you at once. Great duo endgames often look synchronized rather than heroic. One player watches an angle while the other moves. One leads the tarp while the other protects the side. One calls the layer change while the other confirms the space. Communication should be short, specific, and future-oriented.
Team Endgame
In trios or larger team formats when applicable, role clarity matters even more. Someone should usually lead the pathing call. Someone should track materials and health state. Someone should watch for pressure windows or high-ground changes. This does not mean rigid roles every second, but it does mean your team should not sound like three different plans speaking at once. The best teams reduce chaos by reducing duplicate thinking.
No matter the format, the strongest endgame communication shares one trait: it tells people what matters next. “I’m low” is incomplete. “I’m low, I need one layer down and a right-side exit” is useful. “They’re above us” is incomplete. “They’re above us, don’t climb, stay left and keep moving” is actionable. Precision saves matches.
Tunneling, Pathing, and Safe Space Creation
Tunneling is not just mechanical speed. It is applied geometry under pressure. Your goal is to create a path that preserves safety, momentum, and resources at the same time. The mistake most players make is assuming more pieces means better tunneling. Often it just means panic building.
A good tunnel solves angles before those angles become shots. It uses existing builds when possible. It avoids climbing unless climbing creates a real advantage. It keeps forward momentum without trapping you in your own box. Most importantly, it remains adaptable. A tunnel is a moving decision tree, not a fixed hallway.
Pathing is the larger concept around tunneling. It is the art of choosing where your tunnel should go. Strong pathing uses player density, terrain memory, old builds, and zone direction. Weak pathing just follows the nearest visible space. That is why some players spend far more mats than others while ending up in worse positions. They are tunneling efficiently through a bad route.
Whenever possible, path through the least contested side of the layer you are on. Use cover that already exists. Stay ahead of collapses instead of reacting to them. If a route begins to overstack, be willing to change layers before the trap fully closes. Layer changes are strongest when done slightly before they become mandatory.
Safe space creation also means claiming moments to breathe. A single protected box at the right time can let you reload, heal, communicate, or re-evaluate the lobby. Endgame is not won by nonstop action. It is won by alternating movement and stabilization better than everyone else.
When to Play Height, When to Drop, and When to Respect It
Height is the dream layer for many players because it feels like control, and often it is. But strong Fortnite endgames are built on judgment, not ambition. The real question is not “Can I take height?” The real question is “Does this height take improve my odds more than it costs?”
Height is worth considering when the current team above is weak, distracted, low on materials, or poorly anchored. It is also stronger when the zone direction favors sustained control and the lobby below is unlikely to focus you immediately. If you can claim height cleanly and establish pressure without spending everything, it can convert into incredible placement and elimination value.
Height is usually not worth forcing when the lobby is still too stacked, multiple teams can contest the climb, or your own materials are too low to protect the layer. This is where ego kills consistency. Some players would rather die taking height than live playing a better low or mid route. That may create clips, but it does not create reliable results.
Just as important is knowing when to leave height. If the layer is becoming too expensive, if another team has equal control, or if the next movement exposes you to multiple takeovers, a controlled drop can preserve far more value than a stubborn defense. Great height players are not attached to the idea of being above. They are attached to winning the match.
And if another player owns height cleanly, respect it. Do not feed free shots upward with no plan. Force them to spend materials. Wait for pressure from another angle. Move efficiently below them. Height should be challenged with purpose, not frustration.
The Most Common Endgame Mistakes
1. Rotating too late. This is still the biggest one. Late rotators enter every decision with less time, less space, and more enemy attention.
2. Overbuilding under stress. Many players burn through materials not because the lobby forced it, but because panic made every movement feel like an emergency.
3. Playing one layer by habit. If you always default to mid or always drop low, your decisions become predictable and often wrong for the lobby.
4. Taking fights that do not solve a problem. Not every elimination opportunity is valuable. The best endgame fights improve your position, resources, or timing.
5. Ignoring dead side. Players often path toward visible space instead of lower-pressure space. Those are not always the same thing.
6. Trying to win every second. Endgame is about maximizing total outcome, not dominating every micro-moment. Sometimes survival is the strongest play available.
7. Weak communication. In team formats, vague calls waste more games than missed shots. The storm does not wait for unclear teammates to sort it out.
8. Failing to plan one zone ahead. Strong players do not just survive the current pull. They position for the next one.
9. Burning heals too early or too emotionally. Heals should solve timing problems, not calm panic without purpose.
10. Forgetting that storm pressure affects everyone. Many refresh windows come from reading who is already being squeezed by the zone.
How to Practice Endgame Without Wasting Hours
If you want real improvement, do not just “play more Fortnite” and hope the endgame fixes itself. Practice should isolate the decisions you keep failing.
Start with VOD review. After every bad late-game death, ask simple questions: Was my rotation late? Was my route too crowded? Did I overspend? Did I take the wrong layer? Did I force a refresh? Most players know the answer once they slow the clip down. That is good news, because it means the problem is often recognition, not talent.
Next, use realistic endgame practice modes. Zone-based practice can help you learn movement speed, layer comfort, and tunneling rhythm. The point is not to treat those modes as exact tournament replicas. The point is to rehearse common late-game patterns until your decision-making becomes calmer.
Then bring one improvement goal into real matches at a time. For example, spend a session focusing only on earlier front-side rotations. Another session, focus on material conservation before moving zones. Another, focus on recognizing dead side faster. If you try to fix everything at once, you usually fix nothing clearly.
Finally, review successful endgames too. Players often only analyze losses, but your wins contain useful patterns. Maybe your best games happen when you rotate earlier than normal. Maybe your best placements come from low-ground patience rather than height attempts. Find out what your strong games have in common and turn those patterns into deliberate habits.
If you are serious about climbing while refining your competitive habits, it can also help to study official competitive resources like the Fortnite Competitive hub and the Rules Library so your practice stays connected to real tournament structure and standards.
A Simple Endgame Checklist You Can Use Every Match
When the game reaches late circles, ask yourself these questions quickly and honestly:
- Am I rotating early enough to avoid becoming part of the back-side wave?
- Which side of zone looks dead side, and which side looks congested?
- What layer gives me the cheapest survival right now?
- How many materials can I realistically spend before I need a refresh?
- Do I need to pressure for damage or can I stay hidden for a moment?
- If I get pressured here, what is my backup route?
- Is there a weak player or collapsing fight that can become a safe refresh?
- Am I moving with purpose, or just reacting because the storm is loud?
This checklist is intentionally simple. Endgame punishes complicated self-talk. Clear, repeatable questions lead to clearer, repeatable results.
Conclusion
Fortnite endgame is where decision-making becomes visible. Rotations, layers, and storm pressure are not isolated topics. They are one system. Rotate well and your layer choices improve. Choose the right layer and storm pressure becomes easier to handle. Handle storm pressure well and your refresh windows become clearer. Everything connects.
If you want consistent improvement, stop thinking about endgame as random chaos. It has structure. There are patterns in how lobbies move, how zones punish, how space gets claimed, and how weak positions collapse. The players who keep placing are usually the ones who learned to recognize those patterns before panic begins.
Study your late-game losses. Practice cleaner rotations. Respect dead side. Spend materials like they are time. Treat height as a tool, not a fantasy. Look for refreshes that solve real problems. And above all, remember that the best endgame players are rarely the most frantic. They are the most prepared.
If you want help accelerating your progress while you sharpen these fundamentals, you can also check Boosteria’s Fortnite boosting prices. For official competitive updates, event details, and rules, keep an eye on the official Fortnite Competitive page. For broader conduct expectations inside the Epic ecosystem, the Epic Community Rules are also worth knowing.