Honor of Kings Team Comp Basics: Frontline, CC, Damage
Honor of Kings — Team Comp Basics: Frontline, Burst, Sustain, and CC
In Honor of Kings, most ranked games are decided less by “who has the best hero” and more by who has the cleaner team plan. Team composition is the blueprint for that plan: who starts fights, who survives the first impact, who deletes a target, who keeps your core alive, and how you chain control so the enemy can’t respond.
This guide breaks team comps into four easy building blocks—Frontline, Burst, Sustain, and CC—then shows you how to draft them into consistent, patch-proof win conditions. You’ll learn simple frameworks you can apply with any hero pool, plus practical checklists for solo queue: how to recognize your comp type, how to position, and how to convert a won fight into towers, jungle control, and the enemy crystal.
Table of Contents
- Why Team Comps Win Games (Even in Solo Queue)
- The 4 Pillars: Frontline, Burst, Sustain, CC
- Roles & Lanes: Where Each Pillar Usually Lives
- Frontline Done Right: Engage, Peel, and Space
- Burst: Pick Threat, First Blood, and Fight Control
- Sustain: Healing, Shielding, and “Reset” Teamfights
- Crowd Control: How to Chain It Without Wasting It
- Damage Profile: Burst vs DPS and Why It Matters
- 7 Patch-Proof Team Comp Archetypes
- A Simple Draft Framework You Can Use Every Match
- Synergy Rules: What “Works Together” in HoK
- Counterplay: How to Identify and Attack Enemy Weakness
- Macro Conversion: Turning Fights into Objectives
- Teamfight Playbooks (Positioning + Calls)
- Common Composition Mistakes (and Fixes)
- Quick Checklists for Ranked
- Want Faster Progress? (Optional)
1) Why Team Comps Win Games (Even in Solo Queue)
Honor of Kings is a 5v5 MOBA where heroes fall into broad classes (like Warrior, Assassin, Mage, Marksman, Support), each designed to fill different responsibilities in fights and on the map. Your team comp decides:
- How fights start (hard engage, poke, pick, or counter-engage).
- How fights end (burst kill, extended DPS, sustain reset, or CC lockdown).
- Who gets to stand where (frontline creates space; backline converts space into damage).
- Which objectives you can take safely (towers, jungle camps, major monsters, and the final push).
Even if your teammates don’t communicate, comp still matters because it changes the “default correct play.” For example:
- If you have strong frontline + follow-up burst, you want grouped fights around objectives where your engage is guaranteed.
- If you have weak frontline but strong poke/burst, you want vision control, short trades, and picks—not long front-to-back brawls.
- If you have heavy sustain, you want to force repeated skirmishes, reset, and re-enter when the enemy runs out of cooldowns.
When you understand your comp type, you stop taking “random” fights and start taking high-percentage fights. That’s the most timeless skill in any MOBA: patches change heroes, but they don’t change the logic of space, control, and damage conversion.
Trusted references (optional reading): the official Honor of Kings site describes core roles and lane playstyles (Honor of Kings), and Epic Games’ beginner guide summarizes lane/role basics and jungle purpose (Epic Games HoK Tips).
2) The 4 Pillars: Frontline, Burst, Sustain, CC
Nearly every “good” team comp has answers to four questions:
Frontline
Who stands first? Frontline absorbs pressure, blocks paths, scouts, and creates the space your damage dealers need. Frontline is not only “tanks”—it can also be bruisers, durable supports, or heroes with defensive kits. Your frontline decides whether you can contest river, objectives, and towers without instantly collapsing.
Burst
Who deletes a target fast? Burst threatens picks, punishes oversteps, and creates the first kill that turns a fight into a clean objective. Burst can be single-target (assassin + mage combo) or area-based (big AoE damage after engage).
Sustain
Who keeps your team alive long enough to win? Sustain includes healing, shielding, damage reduction, and “reset” tools (disengage, re-engage, re-position). Sustain is what turns a messy fight into a winning fight when both sides trade cooldowns.
CC (Crowd Control)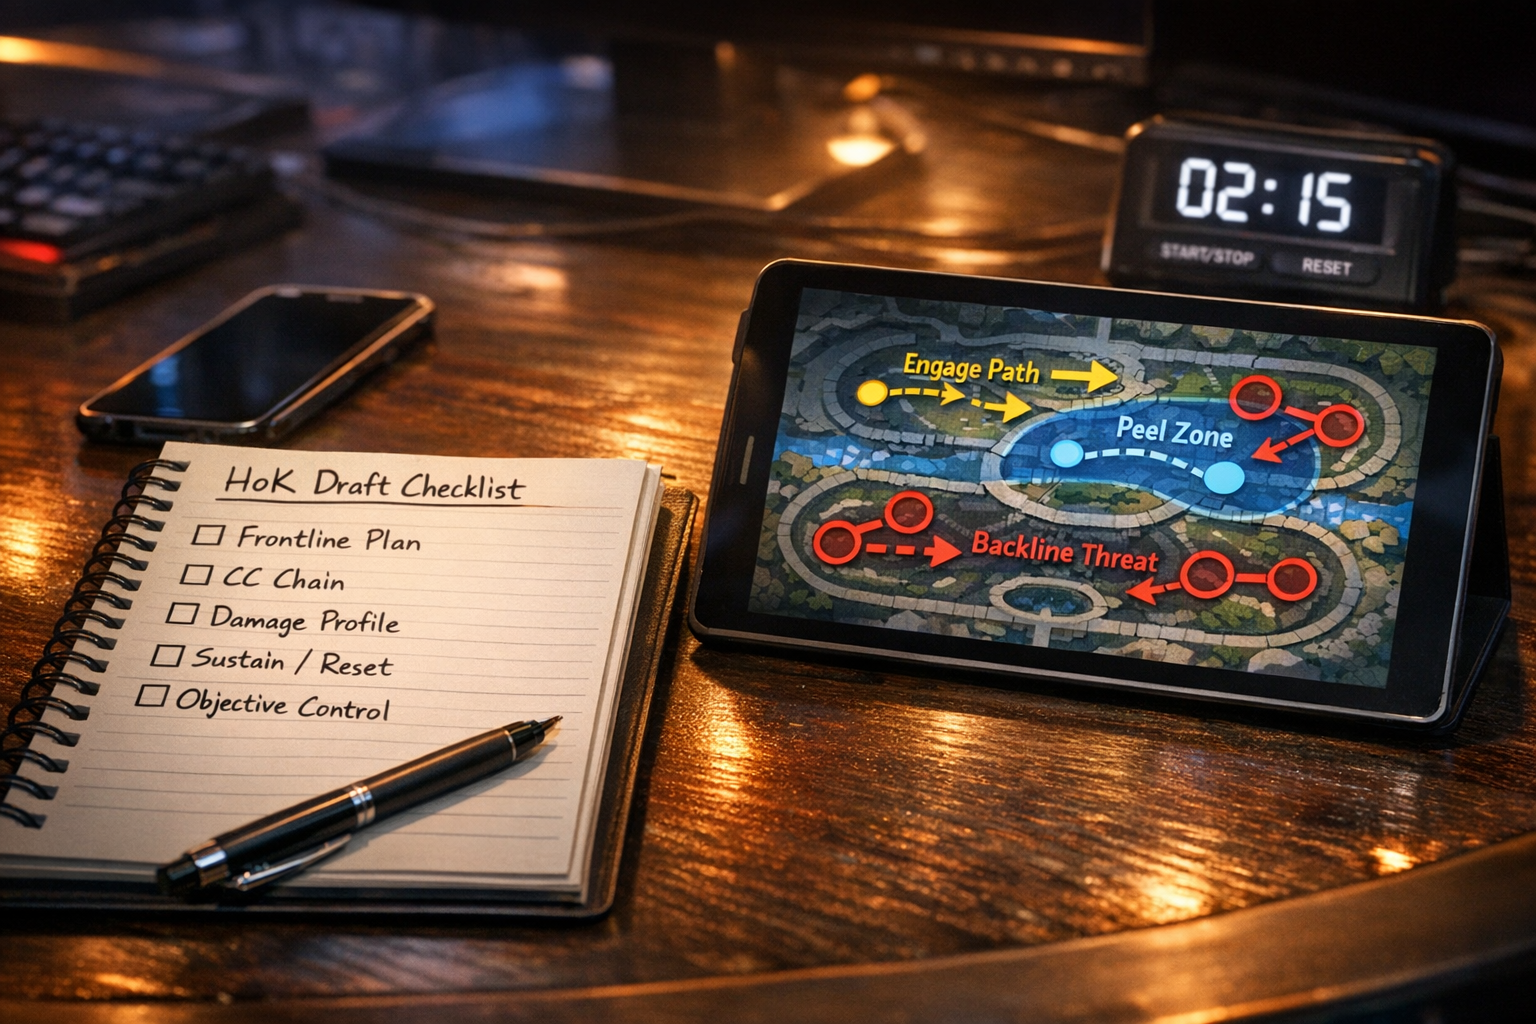
Who stops the enemy from playing? CC is the glue: it secures burst, protects your backline, and prevents enemy mobility from undoing your engage. In practice, CC is also “time control”—it buys seconds for your DPS to finish a kill.
The key: You don’t need “maximum” of all four, but you must avoid being missing one entirely. If you have no frontline, you’re forced into risky picks. If you have no burst, you struggle to punish mistakes. If you have no sustain, you lose long fights. If you have no CC, you can’t secure kills or protect your carry.
3) Roles & Lanes: Where Each Pillar Usually Lives
Honor of Kings compositions typically distribute responsibilities across roles and lanes:
- Clash/Side Lane (Warrior/Fighter): often contributes frontline and/or engage, sometimes sustained damage.
- Jungle (Assassin/Fighter): often provides burst or pick threat, sometimes secondary engage.
- Mid (Mage): often provides burst, AoE damage, and/or utility CC.
- Farm Lane (Marksman): often provides sustained DPS to finish fights and melt objectives.
- Roam (Support/Tank): often provides CC, peel, and early-game tempo (vision, rotations).
The official site highlights the core archetypes (Warrior, Assassin, Mage, Marksman, Support) as distinct play styles (Honor of Kings). The details vary by hero kit, but the composition logic stays stable across patches: you need a plan for engage/peel, damage profile, and control.
4) Frontline Done Right: Engage, Peel, and Space
Most players think “frontline” means “stand in front and take damage.” In high-quality games, frontline is more like space management. The frontline’s job is to control where the fight happens and who is allowed to walk forward.
4.1 Engage vs Peel
Frontline has two classic modes:
- Engage frontline: starts fights with a reliable initiation (gap close, knock-up, stun, displacement). This enables burst and AoE follow-up.
- Peel frontline: protects your backline by denying divers with CC, body blocking, and threat zones. Peel frontline makes your marksman and mage “safe enough” to output damage.
Great comps usually have both, but you can split duties: a roamer might be primary engage while a warrior becomes peel later, or vice versa.
4.2 Space: The Hidden Resource
Think of space as “how far your backline can step forward without dying.” Frontline creates space by:
- Threatening CC: enemies must respect your engage range.
- Absorbing first cooldowns: the enemy spends burst on you instead of your carry.
- Blocking angles: you deny flanks and protect safe corridors.
4.3 Frontline Timing Rules
Frontline isn’t permanent; it’s timed around cooldowns and information:
- Don’t engage without follow-up: if your burst isn’t in range, your engage becomes feeding.
- Don’t peel too early: save your strongest CC for the enemy’s real threat (often the jungler diver or mid burst).
- Trade your health for an advantage: a “good” frontline trade is one that buys your team a kill, objective, or positioning.
4.4 Frontline Checklist
- Can we start a fight on demand (hard CC engage)?
- Can we protect our farm lane from divers (peel + body block)?
- Do we have a second layer after the first engage (bruiser or support CC)?
5) Burst: Pick Threat, First Blood, and Fight Control
Burst is how you convert a small mistake into a numbers advantage. The core burst question is: Can we kill someone fast enough that they can’t play the fight?
5.1 Two Types of Burst
- Pick Burst (single-target): catch one hero, delete them, then take objective with 5v4 advantage.
- Teamfight Burst (AoE): engage lands, mid/jungle dumps AoE damage and CC, fight ends quickly.
Pick burst is often better in solo queue because it doesn’t require perfect 5-man coordination. Teamfight burst can be devastating when you have reliable engage and layered CC.
5.2 Burst Needs a Delivery System
Burst fails when targets can escape, shield, or disengage. To make burst reliable, your comp needs:
- Setup CC (stun/root/knock-up) to lock a target.
- Vision or information so you know where the target is walking.
- Follow range so your burst arrives on time (roams and rotations matter).
5.3 Burst Windows
Burst is strongest in windows:
- Cooldown windows: enemy mobility or defensive tools are down.
- Item/level spikes: your assassin/mage hits a power point before enemy sustain comes online.
- Rotation windows: you have more bodies at the fight because you moved first.
Practical solo queue rule: if you can’t win the full 5v5, win a 4v5 by bursting one target first.
6) Sustain: Healing, Shielding, and “Reset” Teamfights
Sustain is what makes a comp stable. It doesn’t just mean healing; it includes any tool that prevents the enemy from “finishing the job.”
6.1 What Counts as Sustain?
- Healing & shielding (obvious).
- Damage reduction or defensive buffs.
- Disengage tools (knockbacks, slows, terrain control).
- Reposition/escape that saves your carry after they step forward.
6.2 Sustain Wins by Resetting
Many fights aren’t won in one clean engage; they’re won in phases:
- Phase 1: both sides trade initial cooldowns.
- Phase 2: the team with better sustain “stabilizes” and keeps their damage alive.
- Phase 3: re-engage or chase when the enemy runs out of tools.
That’s why sustain is patch-proof: no matter which heroes are meta, fights still have phases and cooldown cycles.
6.3 Sustain Tradeoffs
Heavy sustain comps sometimes lack:
- Instant kill threat (you can’t punish greedy enemies quickly).
- Hard engage (you’re strong when the enemy comes into you, weaker when you must force).
If your team has lots of sustain, your win condition is often: survive the first burst, then win the extended fight.
7) Crowd Control: How to Chain It Without Wasting It
CC is the most misunderstood pillar. Players often spam CC the moment they see an enemy, then lose because they have nothing left when the real threat dives the backline.
7.1 CC Has Jobs
- Engage CC: starts a fight.
- Confirm CC: ensures burst lands and a target dies.
- Peel CC: prevents divers from reaching your damage.
- Disengage CC: stops chase, resets fight, or buys time for cooldowns.
7.2 The “Two-Layer” Rule
In most winning comps, you want two layers of CC:
- Layer 1: initial catch or engage.
- Layer 2: follow-up to prevent escape (or peel if enemy counter-engages).
If you have only one layer, good enemies will cleanse, dash, or reposition and your entire play collapses.
7.3 CC Chaining Basics
- Stagger, don’t stack: if two stuns overlap fully, you waste time and cooldowns.
- Save one tool for mobility: assume the target has an escape; hold a CC to punish it.
- Prioritize the right target: CC the hero who threatens your win condition (often jungler diver or fed marksman).
7.4 Solo Queue CC Call
If you can type or ping one message, make it: “Hold CC for diver” or “CC after engage”. Even minimal coordination increases CC value dramatically.
8) Damage Profile: Burst vs DPS (and Why It Matters)
Beyond “how much damage,” comps need the right shape of damage.
8.1 Burst Damage
Burst is best when you can lock a target and delete them before they respond. It thrives against squishy carries, low sustain teams, and teams that rely on one fed hero.
8.2 Sustained DPS
DPS wins long fights and melts objectives. Marksmen are usually the main DPS engine. DPS needs:
- Time (peel/frontline to keep them alive).
- Space (safe positioning corridors).
- Target access (you must reach the enemy frontline/backline without getting zoned out).
8.3 Mixed Damage (Ideal)
Many strong comps have both: burst to secure the first kill and DPS to finish the fight and convert objectives. If you’re drafting, try to avoid “all burst, no DPS” or “all DPS, no setup.”
9) 7 Patch-Proof Team Comp Archetypes
Archetypes are timeless because they describe jobs, not specific heroes. Use these labels to understand your comp quickly in draft or loading screen.
Archetype A: Front-to-Back (Classic)
Identity: durable frontline, protected marksman DPS, controlled fight line.
Needs: strong peel, at least one reliable engage or counter-engage, sustained DPS.
Wins by: holding formation, killing enemy frontline first, then cleaning up.
Loses to: heavy flank/pick if your backline has no protection.
Archetype B: Dive & Delete (Backline Access)
Identity: multiple divers (often jungle + warrior) and burst follow-up to kill the enemy carry.
Needs: reliable entry path, layered CC, and enough durability to survive initial counterburst.
Wins by: removing enemy marksman/mage early.
Loses to: strong peel and disengage; comps with “save” tools and chain CC on divers.
Archetype C: Pick Comp (Catch)
Identity: vision control + one or two long-range CC tools + burst to delete a caught target.
Needs: information, patience, and quick objective conversion after a pick.
Wins by: 5v4 fights and snowballing map control.
Loses to: disciplined grouping and tanks that face-check safely.
Archetype D: Wombo Combo (AoE Teamfight)
Identity: strong engage into stacked AoE damage and CC.
Needs: reliable initiation and follow-up timing (don’t dump everything on one target if the rest can escape).
Wins by: decisive 5v5 around objectives.
Loses to: spread formations, mobility, and disengage before your combo lands.
Archetype E: Sustain & Reset (Attrition)
Identity: healing/shields/defensive tools, strong extended fight power, sometimes weaker burst.
Needs: enough CC to stop divers and enough DPS to finish once you outlast.
Wins by: surviving first burst and winning the second phase.
Loses to: anti-heal strategies and hard pick if your squishies face-check.
Archetype F: Poke & Zone (Chip + Objective Control)
Identity: ranged pressure that forces the enemy off objectives before a full fight.
Needs: vision, disengage, and a plan to finish fights (poke alone doesn’t end games).
Wins by: controlling space, forcing bad engages, then punishing.
Loses to: hard engage that reaches backline and ignores poke.
Archetype G: Split Pressure (Map Stretch)
Identity: strong side-lane threat plus a stable 4-man core that can disengage.
Needs: clear wave control, safe vision lines, and discipline not to 4v5 without the split threat.
Wins by: dragging enemies across the map, taking towers, then forcing a favorable fight.
Loses to: fast hard engage 5v4 and teams that punish mis-rotations.
10) A Simple Draft Framework You Can Use Every Match
Drafting in solo queue can feel chaotic, but you can make it simple. Use this order of operations:
Step 1: Identify your “must-have” function
Ask: Do we have a reliable way to start or stop fights? If your team has no engage and no disengage, you’re playing coinflip. Try to ensure at least one of these exists.
Step 2: Ensure a complete fight cycle
A complete fight cycle looks like:
- Start: engage or catch tool
- Lock: CC chain
- Kill: burst or focused DPS
- Survive: peel/sustain
- Convert: objective damage (usually marksman + teammates zoning)
Step 3: Avoid “all of one thing”
Common draft traps:
- All damage, no control: looks scary but can’t secure kills.
- All tanks, no damage: survives but can’t finish fights or objectives.
- All burst, no DPS: kills one target, then runs out of damage for the rest.
- All sustain, no threat: lives but never forces the enemy to respect you.
Step 4: Pick a win condition sentence
Make one sentence you can play around:
- “We engage first and burst their carry.”
- “We protect our marksman and win front-to-back.”
- “We get picks with CC and take objectives 5v4.”
- “We outlast with sustain then re-engage.”
If you can’t say your win condition, you’re likely to take random fights.
11) Synergy Rules: What “Works Together” in HoK
Synergy is not “two strong heroes.” It’s two jobs that fit together. Here are timeless synergy rules:
11.1 Engage + Follow-up
If someone goes in, someone must immediately punish the target. Engage without follow-up becomes feeding. Follow-up without engage becomes useless poking.
11.2 CC + Burst
Lockdown makes burst consistent. Burst makes CC meaningful. If you have one but not the other, kills slip away.
11.3 Peel + DPS
Marksman DPS is only real if they can free-hit. Peel is the “permission” your DPS needs to win fights.
11.4 Double Threat (Frontline + Backline Pressure)
Great comps force enemies to choose: peel for their carry or stop your frontline engage. When the enemy must answer two threats at once, mistakes happen.
11.5 Damage Mix
Mixed damage profiles reduce the chance your team is hard-countered by one defensive approach. Even if you don’t track exact resistances, mixing burst + DPS and adding utility makes you harder to answer.
12) Counterplay: How to Identify and Attack Enemy Weakness
Counterplay begins with one skill: spot the missing pillar.
12.1 If the enemy has weak frontline
- Group and force objective fights.
- Walk up with confidence, take space, and deny them angles.
- They will rely on picks—don’t face-check alone.
12.2 If the enemy has low burst
- You can take more aggressive vision and posture.
- Force skirmishes; they can’t punish mistakes quickly.
- Protect your carry, then out-DPS.
12.3 If the enemy has low sustain
- Poke and chip before committing.
- Take short trades repeatedly.
- Once they’re low, force an objective or a decisive engage.
12.4 If the enemy has low CC
- Your mobile heroes can play more freely.
- Flanks are safer because they can’t reliably stop you.
- However, still respect raw damage—don’t overextend.
12.5 If the enemy is a dive comp
Answer with:
- Peel layering (save CC for the diver, not the tank).
- Tight formation (don’t split your backline far apart).
- Anti-burst tools (shields, damage reduction, disengage).
12.6 If the enemy is a poke/zone comp
Answer with:
- Hard engage that reaches backline.
- Flank angles so they can’t kite in one direction.
- Patience—don’t start fights at half HP after eating free damage.
13) Macro Conversion: Turning Fights into Objectives
Winning a fight is only valuable if you convert it into map progress. This is where comps matter: different comps convert in different ways.
13.1 The Objective Conversion Rule
After a won fight (or pick), do the highest-value safe action:
- Take a tower (opens the map).
- Secure a major objective if available and safe.
- Invade jungle (deny resources, place vision).
- Reset and spend if you’re low or key ultimates are down.
13.2 Composition-Based Conversion
- Front-to-back comps convert best by grouping and taking towers with protected marksman DPS.
- Pick comps convert by immediately starting an objective while the enemy is down a player.
- Wombo comps convert by forcing fights at objectives where enemies must contest into your combo.
- Split comps convert by taking towers and pulling rotations before committing to 5v5.
13.3 A Simple Solo Queue Call
After a kill, ping the nearest tower or objective. If you can type: “5v4, take tower” or “push mid”. Simple, actionable calls work best.
14) Teamfight Playbooks (Positioning + Calls)
Most teamfights are decided by positioning before the fight starts. Use these playbooks based on your comp.
14.1 Front-to-Back Playbook
- Formation: frontline in front, carry behind, support near carry.
- Rule: don’t chase too far; keep your carry protected.
- Targeting: hit the closest safe target; let enemy divers come into your peel.
- Win condition: carry survives + free-hits for 6–10 seconds.
14.2 Dive & Delete Playbook
- Formation: hide angles; don’t reveal divers too early.
- Rule: go together—one diver without follow-up dies.
- Targeting: enemy marksman/mage first, then reset out or continue if you have numbers.
- Win condition: delete backline before they can output DPS.
14.3 Pick Comp Playbook
- Formation: spread slightly, control entrances, place vision.
- Rule: patience—your power is in the threat of CC.
- Targeting: catch anyone who steps into fog or rotates late.
- Win condition: 5v4 objective and map snowball.
14.4 Wombo Playbook
- Formation: stack near engage range, but don’t clump so you get counter-wombo’d.
- Rule: land engage on multiple targets or on a high-value carry with follow-up guaranteed.
- Targeting: hit grouped enemies; don’t waste AoE on one tank if carries are free.
- Win condition: decisive fight win around objective.
14.5 Sustain & Reset Playbook
- Formation: protect your sustain source and carry.
- Rule: don’t panic—stabilize after first burst.
- Targeting: punish overextensions after the enemy uses cooldowns.
- Win condition: survive phase 1, win phase 2.
15) Common Composition Mistakes (and Fixes)
Mistake 1: No reliable engage AND no reliable disengage
Why it loses: you can’t start winning fights and you can’t stop losing fights. You become reactive and coinflip.
Fix: prioritize one role (often roamer or clash) to bring either hard engage or strong peel/disengage.
Mistake 2: Everyone drafts “damage” and nobody drafts “permission”
Why it loses: damage dealers need space and time. Without frontline/CC, damage doesn’t land.
Fix: add at least one heavy CC/peel pick and one durable body.
Mistake 3: Blowing all CC instantly
Why it loses: the real threat arrives after the first second—often a diver or assassin.
Fix: assign CC jobs: one engage tool, one confirm tool, one peel tool.
Mistake 4: Carry positioning ignores comp identity
Why it loses: a DPS carry stepping forward without peel dies; a poke carry standing too far back wastes pressure.
Fix: match your spacing to your frontline. No frontline = shorter trades; strong frontline = step up and hit.
Mistake 5: Winning fights but not converting
Why it loses: the enemy gets time to scale and comeback.
Fix: after every win: tower > major objective > jungle invade > reset.
16) Quick Checklists for Ranked
16.1 Loading Screen Checklist (10 seconds)
- What is our comp type (front-to-back, dive, pick, wombo, sustain, poke, split)?
- Who is our win condition hero (usually farm lane or fed jungle/mid)?
- Who starts fights? Who peels? Who follows up?
- Which enemy hero threatens our win condition most?
16.2 Midgame Checklist (before objectives)
- Are we grouped on time, or rotating late?
- Do we have vision/information before we face-check?
- Are key ultimates ready (engage, burst, save tools)?
- Is our carry positioned to free-hit safely?
16.3 Teamfight Checklist (during fights)
- Frontline: create space, don’t overchase.
- CC: stagger and save at least one for diver/escape.
- Burst: commit on locked target only.
- Sustain: stabilize after first wave, then re-enter.
- Conversion: after win, ping tower/objective immediately.
17) Want Faster Progress? (Optional)
If you enjoy climbing but want to accelerate improvement, you can combine these comp fundamentals with coaching or a structured ranked plan. Boosteria offers services for Honor of Kings—see pricing here:
https://boosteria.org/honor-of-kings-boost/prices
Further Reading (Trusted Links)
- Honor of Kings (Official Site)
- Epic Games: Honor of Kings beginner tips
- Honor of Kings overview (Wikipedia)
Last note: metas shift, but composition fundamentals don’t. If you consistently draft with the four pillars in mind—frontline, burst, sustain, CC—you’ll win more fights, lose fewer throws, and climb with a repeatable plan.