



Honor of Kings Macro Rotations: Objectives, Lanes & Control
Honor of Kings Macro Rotations: Lanes, Objectives, and Map Control
If your mechanics are solid but your wins feel inconsistent, the missing piece is usually macro: how your team moves, which waves you touch, when you group, and what you trade on the map. In Honor of Kings, good macro is less about “always fight” and more about creating unfair numbers, arriving first, and turning every objective window into guaranteed value.
This guide is a timeless, fundamentals-first breakdown of macro rotations—how to rotate between lanes, how to set up objectives, and how to control the map with information and tempo. You’ll learn repeatable rules you can apply in any rank, any meta, any patch.
Want a faster climb with structured coaching or rank help? Check Boosteria’s Honor of Kings boosting pricing for options that fit your goals.
Table of Contents
- 1) Macro Rotations: The Core Idea
- 2) Win Conditions and Your Rotation Plan
- 3) Lane Roles: Who Rotates and Why
- 4) Wave Control for Rotations (Crash, Hold, Reset)
- 5) Tempo: The Hidden Currency of Map Control
- 6) Objective Cycles: Setup, Take, Reset
- 7) Numbers Advantages: How to Create 4v3 and 5v4
- 8) Jungle + Mid Priority: The Engine of Macro
- 9) Side-Lane Macro: Splitting, Shadowing, and Collapse
- 10) Vision and Information: Turning Fog into Control
- 11) Tower Pressure: How to Convert Rotations into Structure
- 12) Trading Cross-Map: What to Give, What to Take
- 13) When to Group: Fight Windows vs Farm Windows
- 14) Late-Game Macro: One Pick, One Wave, One Objective
- 15) Simple Shotcalling Scripts (Solo Queue Friendly)
- 16) The 15 Most Common Macro Mistakes
- 17) Drills: How to Practice Macro in Real Matches
- 18) Quick Checklists
- 19) FAQ
1) Macro Rotations: The Core Idea
Macro rotations are your team’s planned movements between lanes and objectives—based on wave states, cooldowns, and where the enemy is showing on the minimap. A “rotation” can be as small as your mid moving to help a side skirmish, or as large as your whole team swapping sides to secure an objective.
In Honor of Kings, macro is especially important because:
- Objectives snowball map space: winning a major objective often means easier towers and safer jungle access.
- Waves determine freedom: if you ignore waves, you lose tempo, get trapped defending, and arrive late to fights.
- Information is everything: vision and map reads decide whether your rotation is a free win or a free throw.
Macro is not “always group mid.” Macro is: touch the right waves, show the right people, hide the right people, and take the right objective at the right time.
The three questions that decide every rotation
Before you rotate, answer these:
- What is the next objective window? (major objective spawn timing, tower plate timing, power spikes, enemy recalls)
- Which wave state helps us arrive first? (push, crash, then move)
- Where is the enemy? (who is visible, who is missing, who can match the rotation)
If you consistently answer these three, your macro becomes predictable—in the best way: you’ll stop coinflipping and start forcing.
2) Win Conditions and Your Rotation Plan
A rotation without a goal is just wandering. Macro starts with a win condition—the simplest plan that wins the game from your current state.
Common win conditions in Honor of Kings
- Objective stacking: secure early objectives to open towers and choke the enemy’s map.
- Side-lane pressure: create a permanent numbers advantage by forcing someone to answer a split push.
- Pick composition: use vision and fog to catch a target, then convert the pick into towers/objectives.
- Teamfight scaling: avoid bad fights early, farm safely, then force around key items/levels.
- Siege and poke: slowly take towers with safe chip damage, using waves and spacing as your shield.
How your win condition changes rotations
Objective stacking teams rotate early, clear vision first, and prefer fights in objective corridors. Split pressure teams rotate later, often trading objective for towers and forcing the enemy to choose. Pick teams rotate into fog, not into lanes, and treat vision control as the objective.
Always ask: Are we rotating to fight, to take, or to bait? If you can’t answer, don’t commit.
3) Lane Roles: Who Rotates and Why
Macro is easier when everyone has a “job.” Even in solo queue, you can play your role’s macro correctly and win more games.
Mid lane: the steering wheel
Mid is closest to everything. Your mid’s first job is priority: pushing the wave so they can move first. Mid priority unlocks:
- invades with jungle,
- side-lane ganks,
- objective setup,
- defensive rotations without losing tower.
Jungle: the tempo engine
Your jungler decides which side of the map is “alive” by being there first. Jungle macro is choosing between:
- farm to spike (safe, consistent),
- gank to unlock lanes (volatile, high reward),
- invade to deny (requires priority and information),
- hover to protect (prevents enemy snowball).
Side lanes: pressure and anchors
Side lanes do two macro jobs:
- Wave management: keep waves healthy so your team can rotate without losing towers.
- Map pressure: force enemies to show, creating space for objectives elsewhere.
Support/roamer: information + first move
Your roamer is the macro glue: they provide vision, cover rotations, and help the first move happen safely. A good roamer:
- moves with mid/jungle on key timers,
- controls river entrances,
- protects your carry during resets,
- starts fights only when waves are ready to convert.
Macro shortcut: If you’re not sure what to do, do your role’s most reliable job: mid pushes, jungle syncs with mid, side lanes manage waves, roamer places vision and shadows the strongest teammate.
4) Wave Control for Rotations (Crash, Hold, Reset)
If macro is chess, waves are the clock. Every rotation gets easier when your waves are correct. Your goal is to make the enemy choose between losing minions/tower HP or arriving late.
The three wave states you must master
1) Crash (push into tower)
Crash means you push your wave into the enemy tower so the tower kills minions and the wave “resets.” Crashing is the best setup before:
- rotating to an objective,
- grouping for a tower,
- invading jungle,
- recalling safely.
Why it works: if the enemy follows your rotation, they lose the wave under tower. If they clear it, they arrive late.
2) Hold (freeze/slow)
Holding means keeping the wave near your side so you can farm safely and deny the enemy. This is great when:
- you are weaker and want safety,
- you want to bait the enemy forward for a gank,
- your team is playing for the other side of the map.
Macro warning: Holding while your team wants to fight is a mistake. If your team is grouping soon, you usually want to crash instead of hold.
3) Reset (clear and neutralize)
Reset means quickly clearing a wave to stop it from crashing into your tower, then returning to your team or objective. This is the “defensive rotation” wave state.
Wave rule for every objective
Before an objective, push the side lane on the same side as the objective. Then push mid if possible. This creates the classic macro advantage: enemy has to choose between defending waves or contesting the objective.
Wave rule for every roam
Don’t roam on a losing wave. If you leave a wave pushing into your tower, your roam “costs” you gold, XP, and tower health. Good roams start after a crash or a fast clear.
5) Tempo: The Hidden Currency of Map Control
Tempo is the ability to act first. Teams with tempo arrive first, place vision first, start objectives first, and force the enemy to respond.
Where tempo comes from
- Wave priority (you pushed first)
- Healthy recalls (you reset without losing waves)
- Information (you see enemy positions)
- Cooldown advantage (enemy used ultimates/spells)
- Numbers advantage (enemy is showing far away)
Tempo is lost by one thing: being late
Being late is usually caused by:
- clearing the wrong wave at the wrong time,
- chasing kills instead of resetting,
- starting objectives without vision, then backing off,
- splitting when your team needs you,
- recalling on a slow wave you didn’t crash.
Macro mindset: after you take something (kill, tower, objective), your next step is often reset + spend + re-take tempo. The team that resets cleaner usually wins the next fight.
6) Objective Cycles: Setup, Take, Reset
Most objective throws happen because teams only think about the objective when it’s already up. A consistent team treats objectives as a cycle:
- Setup: push waves, place vision, clear enemy vision, position first
- Take: start only when conditions are met
- Reset: don’t overstay—spend gold and stabilize waves
Objective setup checklist
- Mid wave is pushed (or at least neutral)
- Side wave on objective side is pushed
- At least one deep vision point (see approach paths)
- Enemy jungler location is known (or you can punish if they appear)
- Team is healthy and has resources (ultimates, key cooldowns)
When to start the objective
Start when you have one of these advantages (two is ideal):
- Numbers: you see an enemy far away or dead
- Zone control: your team is already positioned and enemy must walk into you
- Damage timing: your team can finish quickly before enemy arrives
- Pick threat: enemy face-checking is dangerous for them
Reset after taking
After an objective, the most common mistake is “one more greedy play.” Instead:
- clear the nearest dangerous wave,
- take a safe jungle camp on the way out,
- recall and spend,
- return first to the next lane/objective with tempo.
This is how you turn one objective into two.
7) Numbers Advantages: How to Create 4v3 and 5v4
Macro wins are usually math wins. Your job is to create fights where you have more players—or where your players arrive first.
Three ways to create numbers
1) Force someone to answer a wave
If you crash a big wave into a tower, someone must clear it. While they clear, you can move first and take space elsewhere.
2) Track the enemy roamer/jungler
When you see the enemy jungler top-side, you can safely rotate to bottom-side objectives or towers—because you know they can’t contest quickly.
3) Recall timing (the underrated trick)
If your team resets together after a crash, you’ll return to the map as a group. Enemies often reset at random times, creating temporary 5v4s without anyone dying.
Macro rule: don’t “equalize” a numbers advantage
If you have 5 people grouped and the enemy has 4 near you and 1 splitting far away, you usually don’t chase the splitter. You force the 5v4: take tower, take objective, take vision, then decide if the splitter matters.
8) Jungle + Mid Priority: The Engine of Macro
The cleanest macro is built around mid priority + jungle presence. If mid pushes and can move, the jungler can invade, secure vision, and start objectives safely. If mid is stuck under tower, jungle macro becomes guesswork.
How to play for mid priority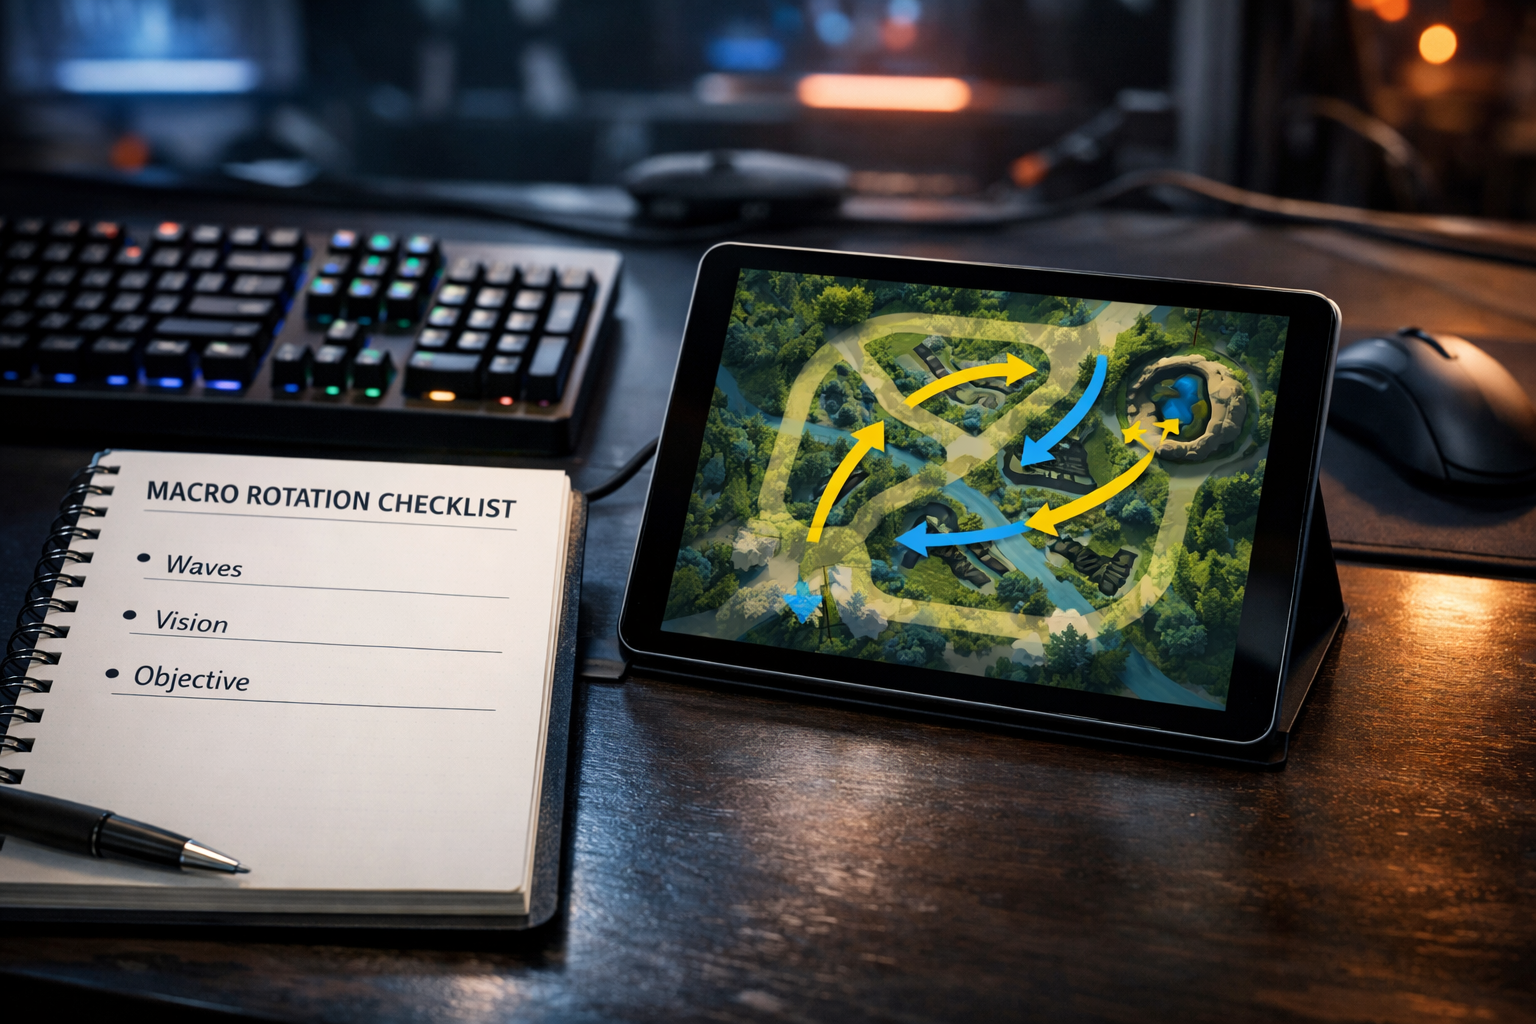
- Clear fast, then move: don’t “trade forever” in mid when an objective window is coming.
- Protect mid during the first rotations: roamer and jungle should prevent mid from being zoned off waves.
- Use wave timing: move as the wave meets, not after you’ve already lost it.
Jungle macro: pathing with purpose
Pathing should answer: Which lane is my next play? If the next objective is on the lower side, your jungle path should end there with:
- a completed clear (gold/xp),
- mid priority support,
- vision in the river entrances,
- a plan: gank, invade, or start objective.
Invade rules (to avoid throwing)
Invading is powerful but only when you meet conditions:
- Priority: your mid (and ideally your nearest side lane) can move first.
- Information: you know at least one enemy location, especially the roamer.
- Exit: you have a safe route out if the enemy collapses.
If you don’t have at least two of the above, don’t invade. Take guaranteed value: clear your jungle, push waves, then set vision for the next objective.
9) Side-Lane Macro: Splitting, Shadowing, and Collapse
Side lanes are where games are quietly won. Most teams lose because they ignore side waves until they are forced to respond—late, scattered, and without vision.
Split pushing: what it is (and what it isn’t)
Split pushing is not “AFK farming side.” It’s applying lane pressure at a time when your team can benefit elsewhere. A good split push:
- pushes to create a response,
- backs off before dying,
- creates numbers for your team at the objective,
- takes towers when enemies rotate incorrectly.
When splitting is correct
- Your champion is safe (mobility/escape) or your team has vision coverage.
- Your team can hold 4v4 without you for a short time.
- The next objective is not immediately contestable, or you are trading it.
- You can join quickly (teleport-like tools or fast rotation routes).
Shadowing: the pro macro concept you can use in solo queue
Shadowing means your jungler/roamer plays near the split pusher—not to fight constantly, but to:
- prevent a collapse,
- turn a collapse into a counter-kill,
- secure jungle vision and camps,
- create a sudden 2v1 or 3v2 on the side lane.
If you’re a jungler, shadowing is often better than forcing mid fights with no waves.
Collapse: how to punish the enemy split
To collapse correctly, you need:
- cutoff angle (don’t chase behind—intercept),
- information (don’t collapse if you don’t see the enemy team),
- trade awareness (if you send 3 people, what does the enemy take elsewhere?).
Sometimes the best “punish” is simply pushing mid and taking vision while the splitter wastes time.
10) Vision and Information: Turning Fog into Control
Map control isn’t just where you stand—it’s what you know. Strong teams use vision to make rotations safe and enemy rotations risky.
Two vision layers
- Defensive vision: protects your entrances, prevents ganks, stabilizes side waves.
- Offensive vision: sees the enemy jungler, spots rotations early, enables picks and objective starts.
Vision rules that always work
- Place vision after pushing: pushing gives you time to walk into river/jungle safely.
- Vision is temporary: refresh vision when objectives approach; old vision expires in value even if it remains on the map.
- Control corridors: prioritize paths the enemy must use to contest objectives.
- Don’t face-check alone: if you must check fog, do it with a teammate or from range.
Information wins fights before they start
If you see two enemies on the opposite side lane, you can:
- start the objective,
- siege mid tower,
- invade and steal camps,
- set a trap at the enemy’s next entrance.
Even one extra piece of info (enemy jungler location) can turn a 50/50 objective into a free take.
11) Tower Pressure: How to Convert Rotations into Structure
Objectives feel great, but towers are what shrink the enemy map. The smaller their map, the easier your next rotation becomes.
Why towers are the best macro currency
- They open safer routes for rotations.
- They expose enemy jungle camps.
- They force enemy defenders to show on the map.
- They turn vision into permanent control.
How to take towers with macro, not brute force
Most failed sieges happen because teams push without waves. The correct tower take pattern is:
- Push wave first (preferably crash a big wave)
- Show 3–4 members (keep 1–2 in fog if you have pick threat)
- Zone defenders (threaten engage or poke)
- Hit tower only when safe (don’t tank unnecessary damage)
- Reset after tower or after chunking it—don’t overstay
Macro trick: “Tower or Objective” forks
If you have a wave crashing and an objective spawning soon, you can force a fork:
- If the enemy defends the tower with multiple people, you take the objective.
- If the enemy contests the objective, you take the tower.
This is how you win without needing perfect teamfights.
12) Trading Cross-Map: What to Give, What to Take
Perfect macro doesn’t mean you get everything. It means when you can’t contest, you trade efficiently.
Good trades vs bad trades
- Good trade: you give a minor objective but take a tower + enemy jungle camps.
- Bad trade: you give an objective and also lose waves + die late trying to “check.”
Three trade rules
- Trade on the opposite side: if you can’t contest top-side, take bottom-side value.
- Trade structures first: towers and inhibitors shrink the map and create future value.
- Don’t trade if you can reset and contest later: sometimes the correct move is to stabilize waves, spend gold, and contest the next window instead of forcing a low-value trade now.
“We can’t contest” script
If your team is behind or missing key ultimates, say (or think):
- “Drop it. Push mid. Take vision. Farm safely.”
Then do it immediately. Late indecision is how teams lose two objectives instead of one.
13) When to Group: Fight Windows vs Farm Windows
Grouping is not always correct—especially in mobile MOBAs where waves move quickly and side pressure matters constantly.
Fight windows (good times to group)
- Objective is spawning soon and your waves are prepared.
- You hit a power spike (item completion, level breakpoints).
- Enemy cooldowns are down (ultimates used, key mobility missing).
- You have a numbers advantage (enemy showing far or dead).
Farm windows (good times to split and stabilize)
- Objective is not contestable (you’re weak or missing resources).
- Waves are dangerous (about to crash into your towers).
- You need to spend gold and reset for the next window.
- Your comp scales and the enemy comp must force early fights.
The #1 rule: fights must convert
If you win a fight and don’t take anything (tower, objective, vision, camps), you effectively traded health and cooldowns for nothing. Always convert:
- nearest tower if wave is ready,
- nearest objective if safe,
- enemy jungle camps if nothing else is available,
- deep vision + reset if the map is neutral.
14) Late-Game Macro: One Pick, One Wave, One Objective
As the game progresses, death timers get longer, and one mistake decides everything. Late-game macro is about discipline:
- Don’t show unnecessarily
- Don’t clear waves alone in fog
- Don’t start objectives without information
Late-game macro framework
- Get side waves pushed safely (at least neutral)
- Group in vision-controlled areas (deny enemy angles)
- Fish for a pick or force an objective
- After one kill, immediately convert to a major objective or a decisive push
How to avoid the classic late-game throw
The classic throw is: “We got a pick, now chase the next kill into fog.” Instead, take the free win:
- objective first,
- then towers,
- then reset and do it again.
15) Simple Shotcalling Scripts (Solo Queue Friendly)
You don’t need long speeches. You need short, clear calls that match the macro reality.
Scripts you can use
- Before objective: “Push mid + objective-side lane, then group.”
- When enemy shows far: “They’re top—start objective / take mid tower.”
- When behind: “Drop it, clear waves, wait for next spawn.”
- After winning fight: “Tower/objective, then reset.”
- When split pushing: “Don’t fight—stall while I push.”
Ping priorities (what to ping)
- objective timer and location,
- enemy jungler last seen,
- wave state (dangerous side wave),
- group point (river entrance, choke, brush).
16) The 15 Most Common Macro Mistakes
- Starting objectives with unpushed mid wave (enemy arrives first).
- Chasing kills while waves die (you win fight but lose tempo).
- Recalling without crashing (you lose tower plates/HP).
- Invading without priority (you get collapsed on).
- Face-checking alone (free pick for the enemy).
- Grouping too early (waves collapse and you lose gold/XP).
- Splitting during a must-contest objective (your team loses 4v5).
- Fighting on the wrong side (away from your waves and vision).
- Overstaying after taking something (you give shutdowns).
- Ignoring enemy jungler location (coinflip contests).
- Taking fights with no conversion (kills only, no towers).
- Not syncing resets (random recalls create constant 4v5s).
- Forcing contested objectives while behind (should trade instead).
- Letting side waves build against you (late-game disaster).
- Sieging without wave control (you get flanked or stalled).
17) Drills: How to Practice Macro in Real Matches
Macro improves fastest with small, focused drills. Don’t try to “play perfect.” Pick one drill per session and repeat it for 5–10 games.
Drill A: Objective setup discipline
In every match, do this before the next major objective:
- push mid,
- push the objective-side lane,
- place vision,
- arrive first and hold position.
Success metric: you are already positioned when the objective becomes contestable.
Drill B: Crash then move
Every time you want to roam, force yourself to:
- clear wave,
- crash it (or at least neutralize),
- then move.
Success metric: you roam without losing tower HP or missing multiple minions.
Drill C: Reset timing
After every successful fight/tower/objective, immediately:
- clear one safe wave,
- recall and spend,
- return together.
Success metric: your team returns to map with tempo instead of being scattered.
Drill D: Enemy jungler tracking
Every time the enemy jungler appears, say (in your head) where they can go next. Then position accordingly:
- if they show top, you play bottom-side aggressively,
- if they disappear, you respect fog and avoid solo face-checks.
Success metric: fewer surprise collapses and fewer lost objectives.
18) Quick Checklists
Objective checklist (print this mentally)
- Mid pushed?
- Objective-side lane pushed?
- Vision placed and enemy approach paths watched?
- Enemy jungler location known?
- Team resources ready (HP, cooldowns, items)?
Rotation checklist
- What are we rotating for: fight, take, bait, or trade?
- Which wave needs to be touched first?
- Who is showing on map? Who is missing?
- Do we have an exit plan if it goes wrong?
Late-game checklist
- Side waves not crashing into us?
- No solo face-checking?
- Grouped in vision-controlled area?
- Ready to convert one pick into objective/push?
19) FAQ
Should we always fight for every objective?
No. Fight when you have conditions (priority, vision, numbers, cooldowns). If not, trade: push the opposite side, take towers, take camps, stabilize waves, and contest the next window with better prep.
How do I rotate properly in solo queue when teammates don’t listen?
Play “self-sufficient macro.” Push waves before moving, avoid risky face-checks, and rotate to guaranteed value (towers/camps) when contests are messy. Ping short scripts: “push mid then group,” “drop it clear waves,” “tower then reset.” Even partial team alignment wins games.
What’s the best macro habit to learn first?
Wave before move. If you fix this one habit—crash/clear before rotating—you’ll automatically get more tempo, safer roams, and cleaner objective setups.
When do we split vs group?
Split during farm windows and when your split creates a response without risking a 4v5 loss at a must-contest objective. Group during fight windows—especially when objectives are near and waves are prepared.
Recommended Next Step
If you want a faster, more structured climb, Boosteria offers Honor of Kings support tailored to your goals. See options here: https://boosteria.org/honor-of-kings-boost/prices