LoL Vision Economy Guide: Wards, Sweepers, Objective Setups
LoL Vision & Information Economy: Wards, Sweeper Timings, and Setups
Vision in LoL isn’t “support homework.” It’s an economy. Every ward placed, every Control Ward bought, every Sweeper activation, and every second you spend walking into fog is a trade of resources for information. Teams that consistently win are usually the teams that consistently buy better information and deny the opponent’s ability to buy it back.
This guide is built to stay useful across seasons. Patch numbers change. Objective stats change. Item names sometimes change. But the underlying truth stays the same: information creates tempo, tempo creates map control, and map control creates winning fights you didn’t have to “outplay.”
1) What “Vision Economy” Really Means
“Vision economy” is a simple concept with huge impact: you spend resources to gain information, and you try to force the enemy to spend more resources than you did to get the same (or worse) information. Resources include:
- Gold (Control Wards)
- Cooldowns (trinkets, Sweeper)
- Time (moving into fog, warding routes, grouping to sweep)
- Health/Position (risk taken to place deep wards)
- Wave/Tempo (leaving lane to ward vs pushing and moving first)
Information is valuable because it changes decisions
A ward is not “value” by itself. It’s value when it changes what your team can safely do: start an objective, invade, push a side lane, take a turret plate, avoid a gank, or set a trap. If you place a ward that nobody looks at, or in a place that never influences decisions, you didn’t buy information—you bought a comforting animation.
The three core vision trades
- Safety trade: You spend time/gold to reduce risk (anti-gank wards, flank wards, defensive lines).
- Tempo trade: You invest vision to move first (push wave → ward line → rotate while enemy clears).
- Threat trade: You deny enemy vision so they must face-check or give up an area (classic objective setups).
Why this wins games in every elo
Mechanics are volatile. Some games you hit everything, some games you don’t. Vision economy is stable. It creates repeatable, low-variance advantages: fewer deaths to ganks, more uncontested objectives, better fights, cleaner resets. Even in chaotic solo queue, you can become the player who makes the game easier for everyone else.
Trusted reading for fundamentals and official references: Riot Games Support and community-maintained knowledge bases like League of Legends Wiki can help with specific mechanics details as they evolve.
2) Your Vision Tools: Trinkets, Control Wards, Plants
Before you talk about “where to ward,” you need to understand what each tool is for. Most vision mistakes come from using the right tool for the wrong job.
2.1 Trinkets: your free information budget
- Stealth Ward (yellow): default choice for most laners early. Great for anti-gank coverage and stabilizing lane.
- Farsight Alteration (blue): long-range information with lower denial resistance. Best when you can’t safely face-check (often later game on immobile carries, or when you’re behind).
- Oracle Lens (Sweeper/red): information denial and trap enabling. It doesn’t “give vision”; it creates uncertainty for the enemy and permission for you to move.
2.2 Control Wards: your paid information anchor
A Control Ward is not “just another ward.” It’s an anchor point for an area: it claims space, denies space, and forces reactions. It also has a hidden cost beyond gold: if you place it in a spot you cannot defend, you’re donating gold and tempo.
A timeless rule: place Control Wards where your team can stand, not where you wish you could stand. If you can’t realistically protect it (or at least trade something for its death), your Control Ward is a tip to the enemy.
2.3 Vision plants (and why they matter)
Scryer’s Bloom, Blast Cone, and Honeyfruit change how safe routes are and how likely picks become. In vision economy terms, plants are free or discounted information and free access. A team that uses Bloom before an objective often saves wards and saves time.
Quick habit: when you’re about to set up an objective, ask: “Did we Bloom first?” If not, you’re often spending more wards than you need.
3) Ward Lines: Thinking in Frontlines, Not Spots
Players love memorizing “best ward spots.” That’s fine, but it fails when the game state changes. The timeless approach is to think in ward lines—a connected set of wards that mirrors the current frontline.
3.1 The three common ward lines
- Defensive line: wards near your side of river/entrances. Goal: prevent ganks and protect farming.
- Neutral line: river wards + objective pit surroundings. Goal: contest objectives safely and track rotations.
- Offensive line: wards inside enemy jungle and behind lanes. Goal: enable invades, dives, picks, and clean objective setups.
3.2 Ward lines move with waves
Your ward line should usually be ahead of the wave you want to play around, but not so deep that it costs deaths. A simple decision rule:
- If your lanes are pushed in and you’re weaker: defensive line.
- If waves are even and objectives are coming: neutral line.
- If you have push + tempo: offensive line.
3.3 “Triangle coverage” for side lanes
When playing a side lane (top or bot after lanes break), you want three pieces of information: (1) river approach, (2) jungle approach, (3) deep rotation path. That’s a triangle. You don’t need 8 wards; you need a triangle that matches where you can safely stand.
3.4 High-value ward categories (timeless)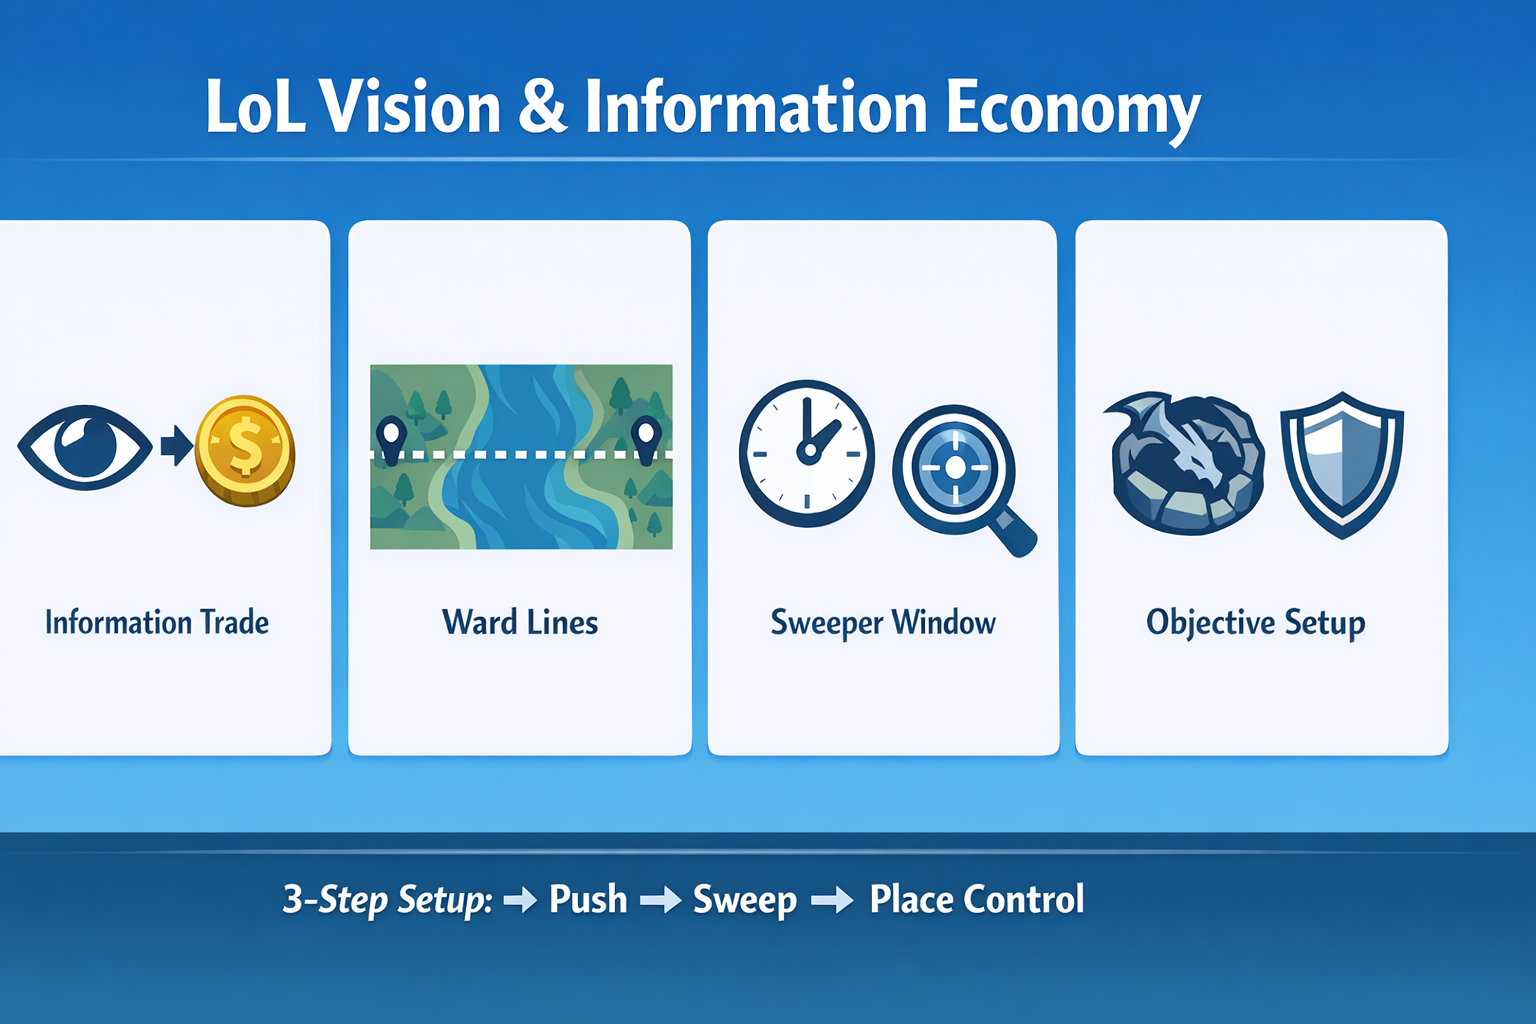
- Entrances: jungle choke points that reveal rotations early.
- Intersections: places where paths meet (decision points).
- Flanks: behind/side approach angles that decide teamfights.
- Objective “doors”: routes into dragon/baron areas.
If you remember nothing else: ward paths, not bushes. Your goal is to see the enemy before they arrive, not exactly when they’re already in your face.
4) Sweeper Timings: Windows, Not Buttons
Low and mid elo often treat Sweeper like a panic button: “I’m walking into river, let me press it.” High elo treats Sweeper like a timed window that enables a sequence: move → deny → threaten → objective/pick → reset.
4.1 The “Sweeper Window” concept
The real value of Sweeper is not the wards you kill. It’s the uncertainty you create. When the enemy doesn’t know if you’re on an objective, in a brush, or rotating, they must either:
- face-check (risk),
- use abilities to check (cost),
- send multiple people (tempo loss),
- or give up area (objective loss).
4.2 When to activate Sweeper (timeless triggers)
- Before you enter a contested area, not after you’re already seen.
- When you have priority (wave pushed or numbers advantage).
- When you can follow up (team nearby to punish face-checking).
- When an objective is the next play (dragon/baron/herald/tower siege setup).
4.3 Bad Sweeper uses that waste the economy
- Using Sweeper while alone with no backup (you find wards, then what?).
- Using Sweeper too early, then having it down during the actual objective.
- Using Sweeper to clear a ward you could ignore (not every ward matters).
- Using Sweeper without pushing waves first (you deny vision but enemy arrives first anyway).
4.4 The “two sweepers” rule
For major objectives, one Sweeper is often not enough—especially if the enemy invested Control Wards. A timeless team heuristic: try to have two Sweepers available for the objective side of the map. This doesn’t mean everyone swaps trinkets; it means you plan who sweeps first and who holds the second window.
4.5 Sweeping as a team fight setup, not a chore
Clearing vision is a threat. If the enemy sees you sweep and then place a Control Ward that stays alive, they should immediately assume: “They are preparing something.” That forces mistakes—late rotations, bad face-checks, or rushed engages. That’s the win condition.
5) Objective Setups: Push → Sweep → Place
The most timeless macro pattern in LoL is the objective setup sequence: Push waves to create tempo → Sweep to deny information → Place wards/Control Wards to lock the area → Hold the space and punish face-checks → Start the objective when it’s safe or when the enemy is forced to react.
5.1 Step 1: Push waves (buy tempo)
If your wave state is losing, vision control becomes expensive. You’re warding while the enemy is free to move first. Even one extra pushed wave can be the difference between “free setup” and “we walked into fog and died.”
- Best case: mid pushed + adjacent side pushed (top for Baron side, bot for dragon side).
- Minimum: mid pushed so you can move into river first.
5.2 Step 2: Sweep (create uncertainty)
Sweep in a way that clears the routes enemies use to approach, not random bushes. Think in terms of “doors” into the objective: entrances, intersections, and flanks.
5.3 Step 3: Place Control Wards (anchor)
Control Wards are best when they: (1) deny enemy common vision, (2) are defendable by your team’s current positioning, and (3) help you hold a line. An anchor Control Ward plus a couple of Stealth Wards often beats five scattered wards.
5.4 Step 4: Hold space (this is where games are won)
Many teams do the first three steps and then drift away. Holding space is the whole point. When you hold space, the enemy must choose:
- walk into fog (pick opportunity),
- give up the objective (resource loss),
- or force a bad fight (you decide the angle).
5.5 Step 5: Start at the right moment
Starting the objective is not always correct the second it spawns. Often the best play is to threaten it, force enemy movement, and take a pick or win a zone fight first. Your vision denial makes that possible.
5.6 A practical “timeless timer” for setups
Exact spawn timers vary by season, but the setup logic stays stable: start preparing before it’s on the screen. A reliable solo queue rhythm is:
- Earlier: get your reset (buy Control Wards) and sync with your team’s recall.
- Then: push mid, move first, sweep entrances, place anchors.
- Finally: hold fog and punish face-checks.
If you want to climb faster through better fundamentals and decision-making, you can also look at structured improvement paths like coaching/boosting services. For example, Boosteria’s pricing hub is here: https://boosteria.org/elo-boost/prices. Treat it as an option if you want help applying these concepts consistently in real matches.
6) Role-by-Role Vision Responsibilities
Vision is a team economy. Everyone pays into it, and everyone benefits. Here’s the timeless breakdown by role, focusing on what actually wins games rather than what people assume “should” happen.
6.1 Support: the vision investor and area manager
- Primary job: maintain the team’s ward line and objective anchors.
- Key skill: choosing Control Ward locations you can defend with your team.
- Macro habit: reset before objectives with at least one Control Ward (often two if gold allows).
- Fight habit: think “flank denial” first (ward flanks), then “front vision.”
Support wins games by making enemy movement expensive. If the enemy has to send two people to clear your vision, you already created tempo—even if the ward dies.
6.2 Jungle: the information chain creator
- Primary job: connect information to action: tracking + ganks + invades + objective starts.
- Key skill: using Sweeper with a purpose (gank path, invade path, objective window).
- Macro habit: when you show on one side, ask “what information did I give—and what do I get back?”
Great junglers don’t just path for camps. They path for information: which side is warded, where the enemy can’t see, and which lane can move first to defend an invade.
6.3 Mid: the tempo engine
- Primary job: push mid and move first—this funds your team’s vision control.
- Key skill: placing wards that protect both sides (river intersections) and deny roams.
- Macro habit: whenever you recall, ask “where will the next fight be?” and ward that side.
In LoL, mid lane priority is often worth more than one extra ward because it changes who enters river first. Your best vision contribution is often a clean wave and an early move.
6.4 ADC: vision discipline and survivability
- Primary job: don’t die to fog. Your life is a resource.
- Key skill: switching to Farsight when face-checking becomes too dangerous.
- Macro habit: place wards from safe angles during rotations; don’t “ward alone.”
ADC vision isn’t about deep warding. It’s about ensuring your team never loses the fight before it starts because you got picked.
6.5 Top: side-lane triangles and teleport pressure
- Primary job: create pressure safely with a ward triangle and smart wave timing.
- Key skill: using wards to spot collapses early enough to disengage or trade.
- Macro habit: if you are splitting, your wards must buy time—if they don’t, you’re gambling.
Top laners often decide vision economy indirectly: by drawing attention. If your wards let you escape a 2–3 person collapse, your team gains tempo elsewhere.
7) Tracking Junglers with Information Chains
You don’t need constant vision of the enemy jungler to “track” them. You need an information chain: small clues that combine into a reliable prediction.
7.1 The information chain (timeless)
- Start: where did they begin? (laner late to lane, leash patterns)
- Next: which lanes have priority (who can move to river first)?
- Then: where did they show on vision (ward, scuttle fight, gank)?
- Finally: what objectives are available (gank vs farm vs invade incentives)?
7.2 Wards that build tracking, not just safety
Safety wards tell you “they are here.” Tracking wards tell you “they are moving to be here.” Timeless examples:
- Entrance wards: show which side of jungle they entered.
- Intersection wards: show branching choices toward lanes/objectives.
- Raptor/wolf area wards: (or equivalent jungle crossroads) suggest clear direction and timing.
7.3 Prediction is often enough
If you know the enemy jungler is likely on your side and you don’t have vision, you still gained information: you learned what you can’t do safely. That’s part of the economy. Sometimes the correct “vision play” is simply backing off and forcing them to waste time.
7.4 The anti-gank rule that never gets old
If your ward only spots the jungler when they are already in gank range, it’s not an anti-gank ward—it’s a death replay. Place wards where you gain reaction time (earlier information), not confirmation.
8) Defensive Vision & Playing from Behind
When you’re behind, the enemy has more map access and more freedom to clear wards. Your goal changes: you’re not trying to “control everything.” You’re trying to protect farming routes and reduce pick risk so you can reach a comeback window.
8.1 The defensive vision priorities
- Your jungle entrances (so you don’t get collapsed on while collecting waves/camps)
- Flanks near mid (so your carries can catch waves without instant death)
- Objective approach routes (so you can decide whether to contest or trade)
8.2 Why blue trinket becomes valuable
Farsight (blue) is a comeback tool because it allows information gathering without paying the “face-check tax.” When the enemy has fog control, face-checking is how games end. Blue trinket lets you evaluate: “Are they on it? Is it a bait? Where are the flanks?”
8.3 Trading vision for time
When behind, sometimes your ward’s purpose is not to survive forever. It’s to survive long enough to:
- catch two more waves,
- let your team reset together,
- or spot a rotation so you can trade an objective instead of flipping a fight.
If your ward buys you 30 seconds of safe farming and prevents a death, it likely paid for itself—even if it dies.
8.4 The “don’t donate Control Wards” rule
When behind, random Control Wards in contested river bushes often become free gold for the enemy. Place Control Wards on defendable terrain: near your towers, in your jungle where you have bodies, or as part of a group move.
9) Most Common Vision Mistakes (and Fixes)
Mistake 1: Warding without wave priority
If your wave is crashing into your tower and you walk into river to ward, you’re spending time and HP for information while the enemy spends nothing. Fix: push first, or ward defensively from safe angles.
Mistake 2: “Support will ward” mindset
Vision is shared. If only one player buys Control Wards, your team’s information budget is low. Fix: every role should contribute, especially before major objectives.
Mistake 3: Control Wards placed where you can’t defend
A Control Ward is an anchor. If you can’t stand near it, it’s not an anchor—it’s a donation. Fix: place Control Wards along your team’s current line, not your team’s dream line.
Mistake 4: Sweeper used randomly
Sweeper is a window for a play. Random use means it’s down when it matters. Fix: tie sweeper usage to a sequence: roam, gank, invade, objective setup.
Mistake 5: Wards placed after the enemy already moved
Late wards are often cosmetic. Fix: ward earlier on predictable timings: after your recall, after you push mid, before you rotate to an objective side.
Mistake 6: Ignoring flank vision in teamfights
Many fights are decided by flanks, not front-to-back vision. Fix: prioritize one ward that denies the flank route. If you can’t stop the flank with vision, you often can’t fight.
Mistake 7: Clearing every ward because you saw it
Not all wards matter. Clearing a ward that doesn’t affect the next play wastes time and may reveal your movement. Fix: ask “Does this ward stop our next action?” If no, consider leaving it.
10) Practical Drills & Checklists
You improve vision faster by training habits than by memorizing spots. Use these drills for 10–15 games and your map control will jump noticeably.
Drill A: The “Recall With Purpose” drill
- Every recall: buy a Control Ward if you can afford it without griefing your core items.
- Before you leave base: decide where the next fight is likely (dragon side? baron side? mid siege?).
- Place your Control Ward on the way to that play, not randomly in lane.
Drill B: The “One Ward That Matters” drill
In each mid-game rotation, place one ward whose goal is to spot a specific threat: jungler path, support roam, or flank angle. After the game, ask: “Did that ward change a decision?” If not, change where you place it next game.
Drill C: The “Push → Sweep → Place” callout
- Before every objective: ping the wave you need pushed.
- Then ping your Sweeper and move with at least one teammate.
- Then place an anchor Control Ward and two supporting wards.
- Then stop moving aimlessly—hold fog and punish face-checks.
Drill D: The “Triangle” split push rule
If you’re sidelaning, you must have: (1) a river ward, (2) a jungle-entrance ward, (3) and a deep rotation ward (or a teammate covering it). If you can’t build the triangle, don’t extend past safe lines.
Drill E: The “Sweep on Timer” habit
Don’t sweep because you’re bored. Sweep when: you are about to gank, invade, or set up an objective. Track your own Sweeper usage after games—most players discover they waste it on low-impact clears.
11) Quick Reference: Ward Routes and Setup Timers
11.1 The three best times to place impactful wards
- After recall: you’re full HP, you have wards, and your path is predictable.
- After pushing mid: you can move first; your ward line becomes cheaper.
- When the enemy shows on the opposite side: safest moment to place deeper wards.
11.2 Simple ward route logic
When moving toward an objective side:
- Ward an entrance (early warning).
- Ward an intersection (decision point).
- Ward a flank (fight-deciding path).
11.3 Objective setup checklist (copy/paste into your brain)
- Reset: buy Control Wards, arrive together.
- Push: mid first, then adjacent side if possible.
- Sweep: clear approach routes, not random bushes.
- Anchor: place defendable Control Ward.
- Support: add Stealth Wards for flanks and intersections.
- Hold: don’t drift—punish face-checks.
- Start: objective when enemy is forced into a bad choice.
11.4 What to do if your team won’t help
Solo queue reality: sometimes people won’t group to sweep. You can still apply vision economy:
- Ward defensively so you can farm safely and avoid picks.
- Use Farsight if face-checking is too dangerous.
- Place Control Wards where you can defend them, even if it’s less “ideal.”
- Ping objectives earlier and use your own movement to signal the play.
Vision is about reducing uncertainty. Even if your team is messy, your wards can still prevent the one death that flips the game.
12) Final Notes
The best way to think about vision in LoL is not “where do I place wards,” but: what decision am I trying to make easier? If the ward helps you decide when to push, when to rotate, when to start an objective, or when to back off, it’s valuable. If it doesn’t, it’s just decoration.
Master these timeless patterns—ward lines, sweeper windows, and push → sweep → place setups—and you’ll notice something important: games feel less random. You’ll take fewer bad fights, get more free objectives, and punish more mistakes without needing perfect mechanics every match.
Save this guide, share it with your duo, and focus on one habit at a time. Vision economy rewards consistency more than flashiness. Over time, you’ll become the player who makes the map “smaller” for the enemy and “bigger” for your team—and that is how real climbing happens.