Marvel Rivals Map Awareness Guide: Rotations & Callouts
Marvel Rivals Map Awareness Guide 2026: Objective Rotations and Callout Fundamentals
In Marvel Rivals, “mechanics” win moments, but map awareness wins matches. If you consistently arrive first to the next objective, take fights on your terms, and share clean information, you will climb even when your aim is average. This guide focuses on timeless decision-making: how to read the map, rotate on objectives, and communicate with crisp callouts that your team can act on immediately—regardless of balance patches, hero updates, or seasonal map pool changes.
You’ll learn a repeatable framework for scanning information, predicting where fights will happen, and turning that prediction into early positioning, better ult usage, and cleaner team fights. You’ll also get practical drills, role-based responsibilities, and scripts you can use in solo queue or coordinated stacks.
If you want faster progress with a structured plan, you can also review your games with a pro or use a structured climb service here: Boosteria Marvel Rivals Boosting Prices.
Table of Contents
1) What Map Awareness Really Means in Marvel Rivals
Map awareness is not “staring at the minimap.” It is the skill of building a live mental model of the match—where threats are, where teammates can help, and where the next fight will occur—then acting early enough to matter.
In practice, strong Marvel Rivals map awareness looks like this:
- You predict fights (you rotate before the fight starts, not after you hear it).
- You control space (you take high-value areas that shape the objective fight).
- You trade efficiently (you show up in numbers and avoid isolated duels).
- You communicate with precision (short callouts that trigger immediate actions).
- You reduce random deaths by tracking flanks, spawn pressure, and off-angles.
Because Marvel Rivals is a team-based hero shooter with distinct roles and explosive kits, awareness matters even more than in slower tactical games. A single missed flank or late rotation can snowball into a lost objective, a staggered recontest, and a full momentum swing.
Timeless principle: the earlier you know, the earlier you move. Early movement means better positions, better angles, and better outcomes—even if the enemy’s mechanics are slightly stronger.
2) The Information Hierarchy: What to Track First
Most players overload themselves with details: every sound, every animation, every ping. High-level players filter information through a hierarchy. Use this order to stabilize your decision-making under pressure.
Priority A: Objective State
- Where is the objective right now?
- When is the next objective phase or checkpoint window?
- Is your team in position to start the fight, or only to react?
Objective state is the “clock” of the game. When you feel lost, re-anchor to the objective. The objective tells you where the fight should happen; awareness tells you how to arrive with advantage.
Priority B: Team Numbers and Spawn Pressure
- Who is alive? Who is returning?
- Are you up players (advantage) or down players (danger)?
- Did your team just win a fight—can you push space—or did you lose and need to reset?
Numbers decide whether you can contest, whether you should stall, and whether you should back up to avoid stagger deaths. If you don’t know numbers, you will take fights that look “possible” but are mathematically doomed.
Priority C: Threat Lanes and Flank Timers
- Which routes can the enemy use to hit your backline?
- Which high grounds or off-angles are currently unoccupied?
- How long since you saw the enemy flanker or diver?
You do not need perfect information. You need enough information to narrow the enemy’s options. If you haven’t seen a flanker in 10 seconds, assume the flank is in progress and adjust positions.
Priority D: Ult/Ability Swing Potential (Simplified)
- Does your team have a “fight win” ultimate ready?
- Does the enemy likely have one?
- Are you about to fight in a narrow space where big AoE is lethal?
Keep this simple. You are not writing a spreadsheet mid-match. You are asking: “Is this fight likely to explode? If yes, do we want to take it here?”
Priority E: Micro Details
Sounds, exact hero positions, tiny cooldown tells—these are valuable, but only after you’ve anchored on objective, numbers, and threat lanes.
3) Objective Rotations 101: Arrive Early, Fight Smart
Rotations are the foundation of winning objectives. The goal is not to “rotate.” The goal is to rotate with intent so your team starts the next fight with an advantage:
- Better angles
- Better high ground
- Cleaner sightlines for your supports
- Safer access to cover
- Flank control
The rotation decision: three questions
- Where will the next fight be forced? (objective location and its key approach routes)
- Which space must we control first? (high ground, choke, or central lane that shapes the fight)
- How do we get there safely? (route choice based on enemy threat lanes)
If you do not answer these, you will rotate “because the objective moved,” but you will arrive late, enter through the worst choke, and burn cooldowns just to survive. That is not rotation; that is damage control.
Rotation is a team concept—but you can still lead it
Even in solo queue, you can trigger rotation by saying one short sentence early:
- “Rotate early—take top first.”
- “Give space, reset, then recontest together.”
- “Watch right flank; rotate left lane.”
The earlier you say it, the more likely your team follows. Late calls sound like blame. Early calls sound like leadership.
4) Rotation Timing: The 20–10–5 Rule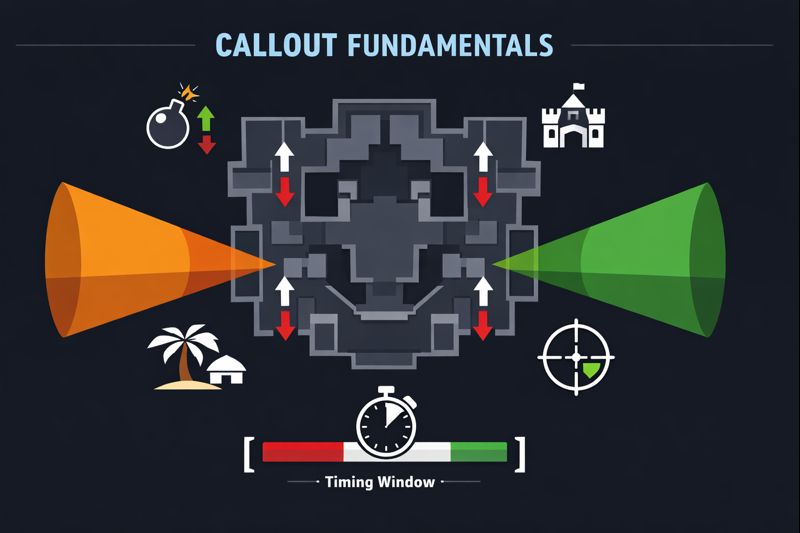
Most late rotations come from a lack of timing cues. Use the 20–10–5 rule as a universal structure. Adjust the seconds to your mode and map scale, but keep the logic.
At ~20 seconds: Information check
- Where are we positioned relative to the next objective?
- Who is alive and grouped?
- Where is the enemy’s likely fastest route?
This is when you decide if you can hold forward space or if you should back out to rotate safely.
At ~10 seconds: Movement commitment
- Stop side quests (unnecessary duels, long chases).
- Group and choose a route.
- Assign one person to watch the most dangerous flank.
The most common mistake is continuing to “poke” while the rotation window closes. Poke damage is worthless if you arrive late and die entering.
At ~5 seconds: Setup posture
- Take cover and hold angles.
- Pre-aim likely entries.
- Save mobility to respond to the first enemy move.
When the objective activates, your team should already be “in shape.” If your team is still sprinting, you are donating first pick.
5) Lane/Route Control: How Teams Actually Move
In objective shooters, teams don’t just “go to point.” They move through lanes and routes that decide who gets shot first. Build your awareness around three route categories:
1) Main route (fastest, most obvious)
Main is direct and predictable. It is also the most punished. Use it when you have a clear advantage or when your comp needs direct pressure.
2) Power route (high ground or strong cover path)
This route gives your team superior angles, safer healing, and better disengage options. Your default plan should be: win the power route first, then pressure objective.
3) Flex route (flank/off-angle)
Flex routes win fights when used with timing. They lose fights when used as solo adventures. The rule is simple: flank to create a crossfire, not to prove bravery.
A universal rotation plan
- Send the frontline to establish the power route.
- Keep supports in safe cover with line-of-sight to frontline.
- Send one damage/flanker to a flex angle only after the team is stable.
- Collapse on the first pick or force cooldowns, then take objective.
When your team rotates like this, you don’t need perfect aim to win. You create fights where the enemy must walk into crossfires and burn escape tools before they can contest.
6) Callout Fundamentals: Clear, Short, Actionable
Callouts are not commentary. Callouts are instructions and alerts that produce action. The best callout has three qualities:
- Short (one breath)
- Specific (location + threat)
- Actionable (what to do next)
The callout formula: Location → Threat → Action
Examples (generic, map-agnostic):
- “Right high—flanker—turn.”
- “Backline low—collapse now.”
- “Main choke—two—hold angle.”
- “Left tunnel—support—peel.”
- “Point open—step in—cap.”
If you only say “over there” or “on me,” you force teammates to spend time searching instead of acting. That delay is often the difference between a clean pick and a lost fight.
Never stack callouts
When everything is happening, players often fire five callouts in a row. That creates noise. Use this discipline:
- Call the highest impact threat first (the flanker behind your supports).
- Then call the fight objective (who to focus, where to rotate).
- Stop talking once the team is executing.
Good comms are often quiet. Your goal is to create decisive moments, not constant audio.
7) Build a Universal Callout System for Any Map
Map names and official callouts can change, and not every player knows them. The solution is a universal callout language built from components that always exist:
Component A: Direction
- Left / Right
- Main / Mid
- Back / Front
Component B: Height
- High / Low
- Top / Bottom
- Drop / Up
Component C: Landmark
- Bridge, stairs, arch, statue, truck, doorway, pillar, balcony
Component D: Distance
- Close / Mid / Far
- On point / Off point
Put it together
“Right high balcony, far” is understandable even if someone has never heard the map’s official callout list. If you play regularly with a team, you can later refine into map-specific names, but this universal system will carry you immediately in solo queue.
Use “zones,” not pixels
Call the zone where the fight is decided, not the exact corner someone is hugging. Your teammate needs to aim at the zone and take an angle, not hunt a single pixel. Zone callouts produce faster reactions.
Standardize your team’s key zones in 5 minutes
Before ranked sessions, do one quick run-through:
- Name the objective area (Point / Cart / Core).
- Name two main approaches (Main, Side).
- Name one power route (Top / High).
- Name one common flank (Tunnel / Back).
You’ve now created a working language for an entire evening of games.
8) Role-Based Awareness: Who Tracks What
Map awareness improves faster when each role has a job. Even if you don’t use official role labels, the functions are consistent across team shooters.
Frontline / Tank-style heroes
- Track objective space: where can your team stand safely?
- Track main threat lane: where does the enemy frontline enter?
- Call rotation starts: “Back out, rotate top, then recontest.”
Frontline awareness is about space ownership. You are the team’s anchor: if you choose the wrong space, everyone suffers.
Damage / Duelist-style heroes
- Track off-angles: where can you create a crossfire without dying alone?
- Track enemy supports: where are the sustain sources and who is peelable?
- Call focus windows: “Support exposed—push now.”
Damage awareness is about timing. You don’t need a long flank; you need a flank that hits exactly when your frontline makes contact.
Support / Strategist-style heroes
- Track flank lanes: assume someone wants to delete you.
- Track regroup state: who is staggered and needs to reset?
- Call danger early: “Right flank soon—play closer.”
Support awareness is about survivability and information. If you live, your team can take longer fights and win attrition wars.
One player should own “macro calls”
In every team, someone naturally becomes the macro voice. If nobody does, you get six players making six plans. A simple rule for ranked stacks: the person with the calmest comms calls rotations; everyone else calls threats and focus targets.
9) Objective Archetypes and How Rotations Change
Even if maps rotate in and out, objective modes usually fall into a few archetypes. Your rotation strategy should change based on what the objective demands.
Archetype 1: King-of-the-Hill / Zone Control (single point fights)
These modes are about first position and layered control. The best teams arrive early, take power route, and force the enemy to enter through predictable lanes.
- Rotate early to claim high ground and cover.
- Hold “doorways” and chokes with angles, not bodies.
- Save mobility to dodge the first engage and re-stabilize.
Archetype 2: Escort / Moving objective
Moving objectives reward teams that control the next section of map before the objective reaches it.
- Win the space ahead of the objective (power route first).
- Assign one player to watch the most dangerous backline route.
- After a won fight, push forward to set the next fight location.
Archetype 3: Multi-phase / Multi-point objectives
When the objective changes location in phases, late rotations create stagger deaths and bad fights. Your goal is to leave early enough that you are set before the next phase begins.
- At the end of a phase, immediately identify the next power route.
- Stop chasing kills into dead space; instead, secure exits and rotate.
- Call “reset” when a fight is lost to prevent trickle contests.
Why this stays timeless
Heroes, maps, and exact rule sets can evolve, but objectives always force teams into predictable conflicts around space, time, and numbers. If you master these archetypes, you will adapt quickly to any new map or seasonal changes.
10) Turning Awareness into Teamfight Setup
Awareness is only valuable if it changes your choices. Here’s how to convert information into a consistent teamfight plan.
Step 1: Decide your win condition for the next fight
Choose one:
- Pick win: isolate and delete one target before full engage.
- Angle win: create crossfire that forces enemy cooldowns.
- Ultimate win: take fight in a space where your big tools are decisive.
- Time win: stall until teammates return, then recontest together.
Step 2: Choose the fight space that matches the win condition
- Pick win likes corners, cover, and short sightlines where focus fire is easy.
- Angle win likes multi-lane spaces and high ground.
- Ultimate win likes chokes and forced entries (if you have the tools).
- Time win likes safe cover and defensive postures.
Step 3: Call the first 5 seconds
The opening seconds decide the fight. Use a short plan:
- “Hold top, watch right flank, focus first entry.”
- “We play corner—burn their dive—then push.”
- “Don’t fight yet—regroup—then go together.”
Once the fight starts, stop narrating and only call high-impact changes (a flanker behind, a target one shot, a reset call).
11) The Most Common Map Awareness Mistakes (and Fixes)
Mistake 1: Rotating after the fight already started
Symptom: you always arrive to a lost fight, then die trying to “help.”
Fix: commit to the 20–10–5 rule. If you are still poking at 10 seconds, you are late.
Mistake 2: Chasing kills into dead space
Symptom: you win a fight but lose the next objective because you chased too far.
Fix: after a won fight, ask: “What space sets the next fight?” Push that space, not random kills.
Mistake 3: Treating flanks as solo missions
Symptom: you flank, get one clip, die, and your team loses 5v6.
Fix: flank for timing: off-angle only after your frontline is stable and ready to pressure.
Mistake 4: Over-communicating
Symptom: your comms become noise; teammates stop listening.
Fix: only call: (1) flank threats, (2) focus targets, (3) rotation timing, (4) reset calls.
Mistake 5: Stagger feeding
Symptom: your team “contests” one by one and never takes a clean 6v6.
Fix: call “reset” early and retreat together. Losing 10 seconds is better than losing the entire next objective phase.
12) Drills: Train Awareness Like a Skill
Aim improves with repetition; awareness improves with structured scanning and decision reps. Use these drills for 10–15 minutes before ranked.
Drill A: The 3-second scan habit
Every 3 seconds, do a quick check:
- Objective state
- Teammate positions (who can help you?)
- One threat lane (where could you be surprised?)
This becomes automatic. The goal is not to stare—it’s to prevent tunnel vision.
Drill B: Route naming (solo custom or warmup)
- Walk the map and identify: main route, power route, flex route.
- For each route, identify one “danger corner” and one “safe cover.”
- Practice saying the callouts aloud: “Left high,” “Main choke,” “Back stairs.”
This reduces hesitation in real games. If you can’t name a space, you can’t call it quickly.
Drill C: First-to-objective challenge
Set a goal for your next 5 games: be the first or second person to arrive to the next objective setup. You will immediately notice how many fights you previously took while late.
Drill D: The “no hero play” rule
For one session, ban yourself from solo flanks when your team is not ready. Your goal is to win through positioning and timing. This teaches discipline and increases your consistency.
Drill E: Reset discipline
Any time your team loses two players early, your job is to survive and regroup. Practice disengage routes and “reset calls” until it becomes natural.
13) VOD Review Checklist for Map Awareness
You improve awareness fastest by reviewing the moments where awareness failed: late rotations, missed flanks, bad fights. You don’t need long VOD reviews. Ten minutes is enough if you have a checklist.
Review only these three categories
- Rotation timing: Were you early enough to take power route?
- Death quality: Did you die to a predictable flank or while late entering?
- Information use: Did you have enough info but still made a poor choice?
Questions to ask on every death
- What was the objective state when I died?
- Was I isolated (no teammate within quick support range)?
- Did I know where the main enemy threats were?
- What would a safer route or position have been?
Tag three timestamps only
Pick the three biggest errors and write one sentence for each. Example:
- “Late rotate—entered main choke—died first.”
- “Didn’t track flanker—support died—fight lost.”
- “Chased kill—lost setup—gave free objective.”
Those three sentences become your focus for the next session.
14) Solo Queue Communication: Minimal Words, Max Impact
In solo queue, you cannot rely on perfect teamwork. Your goal is to create minimum viable coordination—enough to stop chaos.
Use these four call types
- Early rotation: “Rotate early—take top.”
- Flank threat: “Right high—flanker—peel.”
- Focus target: “Backline low—collapse.”
- Reset: “Down two—reset—group.”
One sentence rule
If your call needs two sentences, it’s probably too late. Your teammates are fighting. Short calls land; long calls get ignored.
Ping + voice (or ping alone)
If your team isn’t using voice, pings can still carry awareness. Ping the route you want, not just the enemy. A route ping is a plan; an enemy ping is just anxiety.
15) Premade Stack Play: Assign Jobs, Reduce Noise
If you play with a duo or stack, you can create a major advantage just by assigning awareness jobs.
Simple job assignment
- One macro voice: calls rotations and resets.
- One threat voice: calls flanks and off-angles.
- Others: call focus targets only when they are truly killable.
This prevents six people calling six different things. You get clarity and faster execution.
Pre-fight checklist (5 seconds)
- “We have high?”
- “Who watches flank?”
- “What’s the first target?”
That’s it. Anything more is over-planning.
16) Settings and Habits That Support Awareness
Awareness is partly skill, partly environment. If your UI and habits fight you, you’ll miss critical cues.
Support awareness with clarity
- Readable minimap: ensure you can glance and understand instantly.
- Audio priorities: footsteps/ability cues should be clear enough to detect flanks.
- Reduced visual clutter: excessive effects can hide threat lanes and entry routes.
Habit: “fight near cover”
Cover is awareness insurance. When you fight near cover, you can safely look at the minimap without dying instantly. When you fight in open space, you become a full-time aim bot with zero time to scan.
Habit: “die with information, not confusion”
If you die surprised, you learned nothing. If you die after identifying the threat lane and calling it, your team can still win the fight and you improved your awareness loop.
17) Mini Glossary: Key Terms Used in This Guide
- Power route: the path that offers superior angles (often high ground or strong cover).
- Flex route: an off-angle path used to create crossfire pressure.
- Crossfire: two angles that force enemies to expose themselves to one side when dodging the other.
- Stagger: dying late after a lost fight, causing delayed regroup and repeated disadvantage fights.
- Reset: disengaging to regroup and take the next fight together.
- Threat lane: a route the enemy can use to access your backline or key space.
18) FAQ
How often should I look at the minimap?
Use a rhythm: every few seconds during downtime, and after any major event (a pick, an ult, a disengage). The goal is frequent glances, not long stares.
What if my teammates don’t listen to callouts?
Then your callouts are still valuable for your decisions. Also, keep calls shorter and earlier. Players ignore late, emotional, or unclear comms. They often follow calm, early plans.
Should I learn official callouts or use generic ones?
Use generic callouts (direction + height + landmark) immediately. If you play a map often, you can adopt official callouts later. Generic callouts work with everyone.
How do I stop dying to flankers?
Track “time since last seen,” position nearer to cover, and keep one teammate or angle watching the most dangerous route during objective setups. Flanks are predictable when you treat them as a timer.
What’s the fastest way to improve rotations?
Pick one focus for a week: “arrive early to the next objective.” You will naturally learn routes, timings, and safer paths because the goal forces consistent repetition.
19) Wrap-Up and Next Steps
Marvel Rivals map awareness is a multiplier. It makes your mechanics easier, your team fights cleaner, and your ranked experience more consistent. If you remember only one idea, make it this: arrive early, take power space, communicate simply. That formula stays relevant across patches, seasons, and meta shifts because it is built on fundamentals: time, space, and numbers.
To apply this immediately, use a 3-step plan for your next session:
- Practice the 3-second scan habit for one full match.
- Use the 20–10–5 rule for every objective transition.
- Limit comms to four call types: early rotation, flank threat, focus target, reset.
If you want a structured improvement path with pro guidance or a streamlined climb plan, you can review options here: Marvel Rivals Boosting & Coaching Pricing.
Trusted Resources (optional reading)
- Marvel Rivals Official Website
- Marvel.com – Marvel Rivals
- Marvel Rivals on Steam
- Maps & Modes Guide (Mobalytics)
- Marvel Rivals Guides (Polygon)