How to Play Mid Round in CS2: Tactics and Decision Making
How to Play Mid Round in CS2 2026: Tactics and Decision Making
Mid round is where most CS2 matches are really won. Aim matters. Utility matters. Set pieces matter. But the part of the round that separates consistent players from streaky players is decision making after the opening moves. Once the first grenades are thrown, once the first duel happens, and once the map starts to change shape, the round stops being a script and becomes a problem to solve. That is mid round.
If your team often starts well and then throws advantages, hesitates after getting control, rotates too late, overcommits to bad fights, or hits a site with no real reason except “someone called it,” this guide is for you. The goal here is not to teach one gimmick smoke or one patch-specific trick. The goal is to build a timeless understanding of how to think in CS2 so your decisions improve across maps, team levels, and future updates.
In simple terms, mid round is the phase after the initial setup and before the final commitment. On T side, it is the moment where you decide whether to keep pressure, re-clear space, end on one site, fake, split, punish a rotation, or reset. On CT side, it is the moment where you decide whether to hold, re-aggress, gamble, save utility, call for support, or set up a retake. HLTV’s round-phase glossary gives a useful overview of how Counter-Strike separates early round, mid round, and late round, while the official Counter-Strike 2 website and the official CS2 update page are worth checking if you want to stay current on the game itself. For map references and current map pages, Liquipedia’s CS2 maps portal is also a useful evergreen resource. If you want to pair strategy study with faster practical improvement, you can also check CS2 boosting prices.
This guide will cover what mid round really is, how to read the round, how T side and CT side should think differently, what information matters most, how utility changes decisions, when to speed up or slow down, how to convert advantages, how to play from behind, and how to practice all of it so it becomes automatic instead of theoretical.
Table of Contents
- What Mid Round Means in CS2
- Why Mid Round Wins More Rounds Than Raw Aim
- The Core Principles of Good Mid-Round Play
- T Side Mid-Round Framework
- CT Side Mid-Round Framework
- How to Read Information Correctly
- Map Control and Space Management
- Utility Logic and Mid-Round Timing
- How to Play in Advantage, Even, and Disadvantage States
- Role-by-Role Mid-Round Responsibilities
- The Most Common Mid-Round Mistakes in CS2
- How to Practice Mid-Round Decision Making
- FAQ
- Conclusion
What Mid Round Means in CS2
Many players use the term “mid round” loosely, but you improve faster when you define it clearly. Early round is your opening structure: defaults, fast control attempts, anti-push setups, and initial utility exchanges. Late round is the commitment or resolution: the site hit, the retake, the clutch, or the save. Mid round is everything in between. It begins when the first wave of the round has already happened and both teams need to react to the new information.
That information can be obvious or subtle. Sometimes it is obvious: one CT died on A, one smoke was used at B, the AWPer rotated, and the T side has a man advantage. Sometimes it is subtle: the B anchor has not shown presence for thirty seconds, a player heard one step top mid then silence, the CTs used two incendiaries early and now probably have less stall utility late, or the T side lurker has pushed into a lane that makes a rotation vulnerable.
Good players think of mid round as a question: “What changed, and what should that change make us do?” Bad players treat it as a waiting room before the execute. That difference is huge.
In practical play, mid round usually contains four repeating elements:
- Information gathering
- Position adjustment
- Resource evaluation
- Final setup for a high-value action
Every strong mid round does some version of those four things. You gather information. You move players accordingly. You check what weapons, utility, health, and time both teams likely have. Then you choose the action with the best expected value.
Why Mid Round Wins More Rounds Than Raw Aim
Mechanical skill is the easiest part of CS2 to see, so many players overvalue it. But at a team level, the biggest round swings usually come from decisions, not flicks. A clean mid-round call can turn a shaky buy into a round win. A bad mid-round decision can waste the perfect entry. Players at every level know the feeling: your team gets the opener, feels good, then walks into stacked defenders or dry-peeks one by one until the advantage disappears.
Mid round matters because it determines whether the opening events of a round create real value. An opening kill is only good if the team understands what it unlocks. A smoke that draws rotation is only useful if the team acts on the rotation. A lurk only matters if the main group times the pressure correctly. A CT anchor burning two mollies only matters if the T side recognizes the weaker late-round stall potential.
Here is a simple truth that applies to almost every map: the team that understands what the round now looks like has an enormous edge over the team that is only reacting emotionally. Mid-round mastery turns chaos into a system. It gives you a reason for your pace, a reason for your grouping, and a reason for your utility order.
It also makes your game more stable. On some days your aim is sharp. On other days it is not. Decision making raises your floor. If you understand timing, spacing, rotations, trade potential, and utility economy, you can still win ugly rounds. That is what makes strong players climb and strong teams stay consistent over long sets.
The Core Principles of Good Mid-Round Play
Before we get into T side and CT side separately, it helps to understand the universal principles behind strong mid-round play. These principles stay useful no matter how maps rotate or specific lineups change.
1. Play the round that exists, not the round you planned
Your opening plan is only a starting point. If the enemy changes the conditions, your plan must change too. Too many rounds are lost because players fall in love with a call they made fifteen seconds earlier. Mid round rewards flexibility. If you planned to end B but got a free pick on the A rotator and now own connector or short control, the round has changed. Play the changed round.
2. Every decision should answer a purpose
Why are you re-clearing this area? Why are you using this smoke now? Why are you walking instead of exploding? Why are you sending the lurker late instead of early? Good mid-round play is purposeful. Even if the call fails, it should fail for a logical reason, not because nobody knew why they were doing it.
3. Information is only useful if interpreted correctly
Hearing one smoke, one footstep, or one flash does not automatically tell you the answer. Strong players build probabilities, not fantasies. “We heard one B smoke” is not the same as “B is weak.” “Nobody fought mid” is not the same as “mid is free forever.” Information has to be weighed with timing, context, previous habits, and what the opponents still have available.
4. Mid round is about value, not activity
Some players feel they must constantly move or fight to be doing something. That is not true. Sometimes the best mid-round action is a pause that freezes defenders in place. Sometimes it is a silent reposition. Sometimes it is simply waiting for a second smoke to fade before asking a question of the defense. Activity without value often feeds the enemy.
5. Utility should create decisions, not just visuals
A grenade should do something meaningful. It should deny vision, force movement, burn a spot, isolate a duel, secure a cross, sell a fake, delay a push, or protect a plant. Randomly throwing utility because “we have it” is one of the fastest ways to make your own mid round weaker. Utility creates timing windows. If you waste it, your options shrink.
6. Time is a resource
Time pressure changes everything. With plenty of time, you can fake, re-clear, and condition defenders. With little time, the round collapses into forced decisions. Strong mid-round players constantly track the clock because time tells you which options are still live. A smart call at 1:10 can be a terrible call at 0:28.
T Side Mid-Round Framework
T side mid round is about turning early information and pressure into a site take with favorable conditions. You are not defending fixed territory. You are choosing where and when to create the most pressure. That means your mid-round job is usually one of five things:
- Convert an opening advantage
- Punish a CT rotation or re-aggression
- Exploit utility depletion
- Manipulate defender positions
- Create a cleaner final execute than the early round allowed
Start with a strong default
Great mid rounds usually begin with a good default. A default is not standing still. It is a structure that gives you safe information, anti-push coverage, and enough map presence to make multiple endings possible. The point of a default is not to execute immediately. The point is to stop the CT side from knowing too much for free.
A good default generally does three things. It covers extremity pushes. It contests at least one important zone. And it preserves the possibility of ending on either site. When your default is weak, your mid round becomes guesswork. When your default is strong, your mid round becomes a decision tree.
Ask what the opener changed
If you get the opening kill, do not just celebrate. Ask what changed. Did you kill an anchor? Did you kill a rotator? Did you kill the AWPer? Did the defenders spend utility in the area where the death happened? Did someone have to rotate to plug the gap? The correct follow-up depends on the role and location of the dead player.
Killing an isolated site anchor often increases the value of a faster hit before rotations can stabilize. Killing a mid player may increase the value of a split. Forcing the AWPer off one angle may make a re-peek elsewhere more likely. Mid round is about understanding consequences, not just counting corpses.
Use the “pressure somewhere, threat elsewhere” model
One of the most reliable T side concepts is applying real pressure in one area while keeping a live threat in another. This can look like a lurker controlling a rotation path while the main pack applies utility at a bombsite. It can look like heavy mid presence while an extremity player holds for the greed push. It can look like showing one smoke at B but ending in an A split after the connector player hears rotation noise.
The mistake many teams make is they pressure one area and completely abandon all tension elsewhere. When that happens, CTs can rotate cleanly. Good mid-round T sides make the defense uncomfortable because multiple problems remain possible.
Know when to reset
Resetting is underrated. Not every pressure sequence should turn into an instant commit. If your first move gets countered but not punished, you may still be ahead if you made CTs spend utility or show positions. A reset means pulling back just enough to make the defense question whether the pressure was real, then hitting the weaker side of the map or re-hitting the same side with better conditions.
The best resets are controlled. They do not look like panic. They preserve spacing, keep the bomb safe, and maintain lurk value. A bad reset leaves isolated players trapped and turns a structured round into five separate 1v1s.
Understand the four best T-side mid-round win conditions
When deciding what to do, it helps to think in terms of win conditions rather than raw site preference. Most strong T-side mid rounds end through one of these:
- Numbers edge conversion: You are up a player, so you choose the line that keeps trades clean and avoids giving defenders isolated duels.
- Rotation punishment: You create movement on the CT side and hit where the rotation weakened the defense.
- Utility exhaustion punishment: You wait until anchors or key stoppers have less to work with, then end fast enough that dry rifles must hold alone.
- Positional collapse: Your lurker or mid player has reached a powerful lane, allowing a split or pinch that breaks the defense shape.
If your call does not connect to one of those ideas, it is often worth asking whether it is really the best option.
Be honest about the bomb
The bomb shapes mid round more than many players admit. Where the bomb is located determines how fast you can punish a rotation, how safely you can fake, and how realistic a last-second pivot really is. Calling a fast collapse onto the far side of the map while the bomb is stranded in an exposed lane is not a smart mid-round call. It is wishful thinking.
Strong T side teams do not only ask “Where should we end?” They ask “Where can we end with the bomb arriving safely and on time?”
CT Side Mid-Round Framework
CT side mid round has a different purpose. You are defending incomplete information against an attacking team that can choose the point of contact. Your job is not to know everything. Your job is to deny free space, keep the defense structurally sound, and make sure the final T-side commitment runs into a bad environment.
That means CT-side mid-round play usually revolves around five questions:
- How much information do we really have?
- How much utility do we still have to stop or retake?
- Can we hold our current positions without overrotating?
- Do we need a re-clear or a controlled info play?
- If the hit comes now, are we set up to fight or retake?
Do not confuse silence with safety
One of the most common CT mistakes is treating no contact as no threat. T sides want you to feel comfortable. When one side of the map goes quiet, that can mean they left. It can also mean they are waiting for you to over-rotate, repeek alone, or stop respecting a timing. Good CT mid-round players stay disciplined under silence. They do not give up crucial zones for free because nothing happened for ten seconds.
Hold shape first, then take info
Your first CT-side responsibility is to keep a defensible structure. Only after that should you consider active information plays. Re-clears and pushes are powerful, but they need a reason and proper support. If two defenders simultaneously leave stable positions to “check” something, the T side often gets exactly what it wanted: a hole to exploit.
Good re-clears happen when they either recover important information, reclaim an angle that was lost too cheaply, or synchronize with support so the risk is controlled. Bad re-clears happen because a player got bored.
Save utility for the part of the round that matters
CT-side mid round often gets lost before the site hit because players overspend early. If your site has no smoke, no molly, and no flash left for the final thirty seconds, the T side can convert even without perfect utility. Strong CT players think ahead: “If they hit late, how many layers of delay can we still create?” Sometimes the best mid-round decision is not an aggressive peek. It is simply refusing to burn your last stall grenade too early.
Rotate on evidence, not fear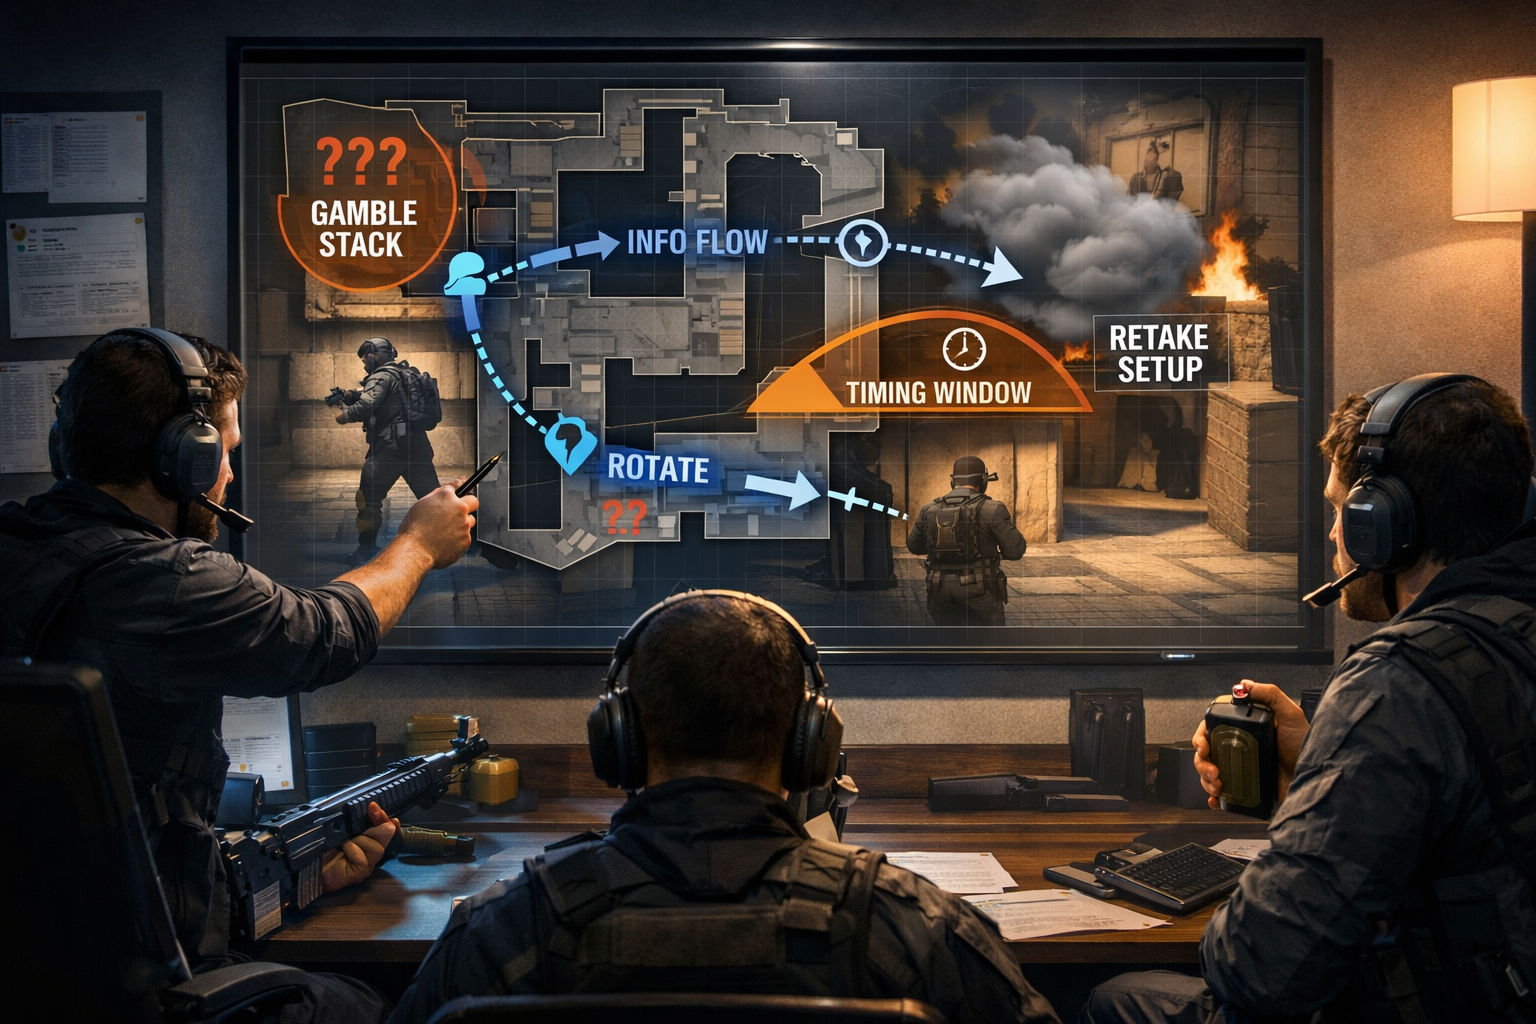
Overrotation is one of the biggest gifts you can give the T side. Good attackers are always trying to make CTs rotate one player too many or one second too soon. Your rotation decisions should be based on solid evidence: confirmed bodies, bomb information, multiple utility cues, teammate line of sight, or a pattern you are intentionally reading. Rotating because “it feels like A” is how you get faked into disaster.
At the same time, underrotation is also a mistake. The skill is in reading threshold. At what point is the evidence strong enough that staying is worse than helping? Great CT mid-round play lives inside that judgment.
Build retakes before you need them
Sometimes the correct mid-round CT decision is accepting that an immediate hard hold is low percentage and preparing a stronger retake setup instead. This is especially true when your utility, player spacing, and crossfire options make a last-second denial weak. Good CT teams think about the retake while the mid round is still unfolding. They preserve kits, flashes, post-plant entry points, and player health where possible.
Trying to hero-hold every site hit is not disciplined. Sometimes the best defense is to let the attack overextend into a structured retake.
How to Read Information Correctly
Information is the heart of mid-round decision making, but not all information is equal. Strong players prioritize information in layers.
Tier 1: Confirmed information
This includes visible players, confirmed kills, bomb sighting, exact utility origin, and teammate line-of-sight contact. This is your most reliable information and should heavily influence decisions.
Tier 2: Highly suggestive information
This includes sound cues, repeated utility patterns, delayed spacing, weapon identification, and timing tells. This information is useful but requires context. Hearing one smoke land might mean setup utility, fake utility, or cover for a reposition. It matters, but it should not be treated as absolute truth.
Tier 3: Inferred information
This includes absence of contact, probability based on prior rounds, expected role behavior, and rotation logic. Inference is necessary in CS2, but it is also where many mid rounds go wrong. The more inferred your read is, the more cautious your commitment should be.
The simplest way to improve here is to speak more precisely in team comms. Instead of “they are B,” say “I heard two sets B apps, no eyes on bomb.” Instead of “A is clear,” say “No one fought A main for ten seconds, I still need re-clear.” Better language creates better calls because it reduces false certainty.
Track what the enemy has probably spent
Utility tracking is a hidden superpower in mid round. If a B anchor already used a smoke and molotov early, late-round B pressure becomes more attractive. If the CT mid player burned a flash and fell off, a re-take of that lane may be weaker. If the T side used too much utility just to get top mid, maybe the final execute will lack depth. Great decision making includes an estimate of what the other side can still do.
Pattern recognition matters, but do not become predictable yourself
Over several rounds, teams reveal habits. Maybe one side always boosts after losing opening mid control. Maybe an anchor always counter-mollies instantly. Maybe a lurker loves late flank timings after slow defaults. Reading those patterns is powerful. But once you start exploiting them, good teams will adapt. Mid round is a battle of adaptation on both sides.
Map Control and Space Management
Map control is not the same as standing in an area. Real map control means you can safely use that area to support future decisions. If you have “control” of middle but cannot cross, split, lurk, or hold a push from it, then your control is shallow. Mid round is often the art of turning shallow control into actionable control.
There are three kinds of useful space
- Pressure space: space that forces the other team to respect immediate danger
- Transition space: space that lets your team move between areas safely
- Punish space: space that lets you catch rotations, flanks, or greed peeks
For T side, the best mid rounds often secure at least two of those. For CT side, the best mid rounds deny at least one of them. That is why some areas on the map are more valuable than others. They are not just land. They are leverage.
Re-clearing is part of ownership
Control decays. Just because you cleared an area twenty seconds ago does not mean it remains yours forever. Strong teams understand when control must be refreshed. If the T side gave up mid pressure for too long, a CT may have slipped back into a dangerous angle. If the CTs never re-clear a lane that was smoked off early, a lurker may have already walked into a round-winning pocket.
This is why disciplined re-clears are such a big part of good mid-round play. They are not paranoia. They are maintenance.
Do not overtake useless space
Space is only worth taking if it improves the round. Many players overextend into areas that look aggressive but do not actually help the final outcome. If the risk of taking a lane is high and the reward does not improve your execute, your trade structure, or your read, it may be wasted effort. Strong mid-round play is selective. It asks which space matters most right now.
Utility Logic and Mid-Round Timing
Utility is the language of mid round. It shapes timing, blocks information, creates pressure, and forces movement. But utility is strongest when chained to intent.
Use utility to ask questions
A good mid-round smoke or flash often asks a question. Will the CTs respect this? Will they counter? Will they rotate? Will they re-clear after it fades? A simple top-mid smoke, an apps molly, or a deep site smoke can all reveal how the defense wants to respond. Good teams are not only using grenades for execution; they are using grenades to get answers.
Layer your utility with player timing
The biggest utility mistake in mid round is poor synchronization. A smoke lands, but nobody is ready to capitalize. A flash pops when the entry is not close enough. A molly clears a strong angle, but the team delays so long that the defender can return. Utility buys windows. If your players do not move with those windows, the grenade did not really create value.
Save one piece for the reaction
Whenever possible, avoid spending every grenade for the first action. The strongest mid rounds often keep one smoke, molly, or flash for the reaction after contact. Maybe the first smoke gets you into the site lane, but the second smoke isolates the rotator. Maybe the first flash takes top mid, but the second flash saves the split when the CT repeeks. Mid round is messy. If you spend everything on phase one, you have nothing for phase two.
Respect counter-utility timings
On both sides, you should think about what utility the enemy wants to use in response to your move. If you know the B anchor likes to counter-molly as soon as pressure appears, you can bait it and pause. If you know the T side likes to resmoke a choke after forcing a defensive smoke, you can plan a flash push on the edge timing. Great mid-round play includes understanding not just your own utility, but the enemy’s preferred reactions.
How to Play in Advantage, Even, and Disadvantage States
The score within the round changes the correct mid-round style. A 5v4 is not played the same way as a 4v4, and neither is played like a 3v4.
Playing with a man advantage
If your team is up a player, your main goal is usually to avoid giving the enemy isolated comeback chances. This means improving trade structure, favoring cleaner commitments, and making sure your spacing is good enough that one defensive swing does not reset the round. On T side, that often means grouping enough to convert. On CT side, that often means not overpeeking into solo fights for unnecessary information.
The biggest mistake with a man advantage is greed. Players think the extra body means they should hunt. Usually it means the opposite: reduce variance and force the other side to solve the harder problem.
Playing in an even situation
At 5v5 or 4v4, value decisions matter most. This is where map control, utility count, timing, and position become the deciding factors. Because neither team has a numbers edge, the better mid-round read often determines the outcome. This is the state where your fundamentals should be strongest.
Playing from a man disadvantage
If you are down a player, the worst thing you can do is pretend nothing changed. You need extra value somewhere. That value can come from surprise pace, a stronger stack, a high-upside re-aggression, a fake that draws a bad rotate, or a fast split before the defense can stabilize. The exact answer depends on what resources remain, but one principle is constant: you usually need to create asymmetry. Standard play from a disadvantage often loses slowly.
That does not mean force hero plays every round. It means understanding that when you are behind, you need a way to change the expected outcome. Smarter risk, not random risk.
Role-by-Role Mid-Round Responsibilities
Mid round is easier when every player understands their job. Even in pugs, role clarity improves calls dramatically.
IGL or primary caller
The caller’s job is not to micromanage every crosshair. It is to read the round, choose the highest-value direction, and align players around a shared purpose. The best callers are decisive without becoming stubborn. They update their call when new information arrives. They also keep comms clean by asking the right questions: Where is the bomb? What utility do we still have? Who controls the flank? Did anyone see the rotator?
Entry player
In mid round, the entry player should understand whether the next contact is meant to create info or force the commit. A disciplined entry does not dry-run into a crossfire before the team is ready. Good entries communicate readiness, need for flashes, and how much pressure they can apply without overcommitting.
Support player
Support players are often the glue of good mid rounds. They track utility, throw the grenade that unlocks the next move, hold for the push while the pack shifts, and often keep the team from collapsing into chaos. Strong supports think one action ahead. If the first fight happens here, what grenade or angle will matter next?
Lurker
The lurker should not be AFK on the other side of the map waiting for magic. Good lurking is synchronized pressure. The lurker’s job is to threaten space, punish rotation, catch a greedy flank, or become the backstab only when the main group’s timing makes it meaningful. Late lurks are strongest when the main pack can actually capitalize on the attention split they create.
AWPer
The AWPer’s mid-round job varies heavily by side and map, but one principle stands out: the AWP should create leverage, not vanity. Holding a crucial transition lane, denying a re-peek, punishing a desperate rotate, or anchoring a dangerous cross can be round-winning. Repositioning intelligently after the opening phase is often more valuable than hunting one more isolated duel.
The Most Common Mid-Round Mistakes in CS2
1. Mistaking one piece of info for the whole round
Hearing one player or seeing one grenade does not tell you the full setup. Many bad calls come from overreacting to tiny clues. Information should guide decisions, not hijack them.
2. Using utility with no follow-up
A smoke that nobody uses, a flash with no swing, and a molly with no pressure are all ways to make your own round thinner. Utility must connect to action.
3. Rotating the bomb too early
Premature bomb movement is a classic T-side problem. Once the bomb rotates, your options narrow and the enemy can read more from less. Keep the bomb flexible until the round truly demands commitment.
4. Overrotating on CT side
Giving up a stable defense because of weak evidence is one of the cleanest ways to lose a round. Make attackers prove more before you abandon key positions.
5. Fighting alone after gaining advantage
When up numbers, solo peeks are often ego plays disguised as confidence. You do not need to prove anything. You need to convert the round.
6. Letting the clock control you too early
Some teams panic at 0:55 as if the round is over. In CS2, that is often still enough time for a reset, a fake, or a re-clear if your structure is intact. Clock pressure is real, but many players exaggerate it and force low-value plays.
7. Waiting too long to act
The opposite mistake is also common. Teams gather info, gain control, and then hesitate until only one rushed execute remains. Mid round is about converting information into action before your options die.
8. Poor spacing during transitions
Rotations, regroups, and re-clears are where spacing often breaks. If your pack is strung out, the enemy can fight isolated segments instead of your full strength. Strong mid rounds protect the team during movement, not just during contact.
How to Practice Mid-Round Decision Making
Decision making improves faster when you train it deliberately instead of hoping experience alone fixes it. Here are the best ways to build better mid-round instincts.
Review rounds by decision, not by final death
After a match, do not only review the moment the round ended. Review the moment the round could still have gone differently. Ask:
- What did we know?
- What did we assume?
- What resources did both teams have?
- What were our real options?
- Which option had the best risk-to-reward ratio?
This shifts your review from blame to process.
Create simple round templates
Instead of memorizing endless tactics, build templates. For example:
- If we get the opener on one site anchor, speed up before the second rotator stabilizes.
- If we force double utility from one bombsite and retain map control elsewhere, pause and test the other side.
- If we are CT and lose one player early with low info, prioritize shape and retake utility over random aggression.
Templates make your mid round faster without making it robotic.
Use demo study correctly
When watching better players or teams, do not only watch the frag movie moments. Watch the quiet parts. Watch how they hold defaults. Watch when they re-clear. Watch how long they pause after using utility. Watch when they call off pressure instead of forcing it. The highest-value lessons in CS2 are often hidden between the highlights.
If you want a vocabulary refresher for common Counter-Strike concepts while studying pro play, HLTV’s terminology and round-phase explainer is a helpful supporting read.
Run comms drills
Mid round gets worse when comms are vague. Practice short, precise information calls in your games:
- “One seen B, bomb not seen.”
- “I used smoke and molly, site weaker late.”
- “Mid was clear twenty seconds ago, needs re-clear.”
- “I can flash you into contact in three.”
The cleaner your language, the cleaner your decisions.
Track three variables every round
If you want one practical improvement method, force yourself to track these three variables every round:
- Numbers
- Utility
- Time
Most good mid-round calls are justified by those three things plus one positional fact. Train your awareness there and your decisions will improve rapidly.
Build a mid-round checklist
| Question | Why It Matters |
|---|---|
| What changed in the round? | Prevents autopilot and forces updated reads |
| Where is the bomb? | Determines which endings are actually realistic |
| What utility remains? | Shows whether you should speed up, slow down, or reset |
| Which area is weakest right now? | Helps identify the best pressure point |
| What is our safest trade structure? | Improves conversion and reduces comeback risk |
| What is the enemy hoping we do? | Helps avoid obvious traps and overreactions |
Timeless Mid-Round Examples You Can Apply on Any Map
T-side example: early control, no payoff yet
Your team wins initial middle control, but CTs do not overreact. Instead of forcing an immediate split, hold one player in a punish lane, re-establish extremity pressure, and look for the moment when the defense must either respect the split threat or expose one site to a lighter hold. The point is not “we took middle, so we must split now.” The point is “we took middle, so the defense has one more problem to solve.”
T-side example: site anchor spends too much utility
You pressure one extremity, draw out a smoke and molly, and back off safely. Later in the round, revisit that area with enough speed that the anchor cannot stall long enough for perfect support. This is one of the most timeless T-side mid-round patterns in CS: make the site weaker first, then hit while it is still weaker.
CT-side example: no contact on one side for too long
Do not fully leave. Instead, keep the anchor stable, shift one flexible player to a faster support lane, and consider a re-clear in a nearby zone only if your teammates can cover the consequences. This preserves defense shape while still improving information.
CT-side example: attackers gain one zone but stall afterward
If the T side takes space and then goes quiet, ask whether they are preparing a split, a fake, or a late punish on a re-clear. Often the best answer is patience plus a small support adjustment, not a solo peek. Let the attackers spend the next piece before you give them more information.
FAQ
What is the most important skill for mid round in CS2?
The most important skill is reading changing conditions without panicking. That includes interpreting information correctly, tracking utility and time, and choosing the next action for a reason rather than from habit.
How do I get better at T-side mid round in CS2?
Start with better defaults, learn to identify what each opening duel changes, and stop committing just because you made first contact. Good T-side mid rounds come from pressure, resets, utility discipline, and understanding how to convert map control into a real advantage.
How do I get better at CT-side mid round in CS2?
Improve your discipline. Do not overrotate on weak evidence. Save utility for the hit or retake. Re-clear only with purpose. Build a habit of asking whether your current positions still form a defendable shape.
Should mid round always be slow?
No. Good mid round is not always slow; it is adaptive. Sometimes the best decision is to explode before the enemy can rotate. Sometimes the best decision is to pause and let the defense become uncomfortable. Pace should be chosen based on value, not on style preference.
How much does utility matter in mid round?
Utility matters massively because it controls timing, information, movement, and spacing. But utility only works when it is linked to player movement and decision making. Grenades by themselves do not win rounds.
Can you improve mid-round decision making in solo queue?
Yes. Even in solo queue, you can improve by making cleaner calls, tracking numbers and utility, avoiding autopilot, and reviewing your own choices. You may not control teammates fully, but you can still become far more reliable in how you read rounds.
Conclusion
If early round is the setup and late round is the finish, mid round is the intelligence of the round. It is where CS2 becomes more than mechanics. It is where information becomes pressure, pressure becomes movement, and movement becomes a winning situation.
To play mid round well in CS2, focus on timeless fundamentals. Build defaults that preserve options. Track what changed after the first contact. Think in terms of information, utility, time, and space. Convert advantages with discipline. Create asymmetry when behind. Use utility to force decisions. Do not rotate on fear. Do not commit without purpose. And most of all, learn to play the round that exists now instead of the round you imagined ten seconds ago.
That is the real difference between average and strong Counter-Strike. Not just aim. Not just set plays. Better judgment in the part of the round where the script ends.
If you keep improving that judgment, your T-side hits will feel cleaner, your CT-side holds will feel calmer, and your win rate will become less dependent on having a perfect mechanical day. That is why mid round matters so much in CS2, and why learning it is one of the best long-term investments any player can make.