LoL Global Ultimates Full List – All Global & Long-Range Ultimates
There are only a few champions in LoL whose ultimates can impact fights from
anywhere on the map. Some shoot their abilities across the Rift, some
heal or shield allies globally, and others teleport straight into a fight from fog of war.
In this extended guide (refreshed for 2026 but written to stay timeless),
we’ll break down every champion with a global or near-global ultimate,
explain how to use them, how to play against them, and how they shape macro play in ranked games.
If you want to learn these champions faster or climb while playing global-ult champs,
it can be very useful to practice with higher-level teammates. That’s exactly what
you get with Boosteria:
flexible solo boost, duo boost and coaching from high-elo players across multiple roles.
For official descriptions and the very latest balance numbers, you can always double-check on
the official LoL site,
explore champion stories on LoL Universe,
or dive into detailed community breakdowns on the
LoL Fandom wiki.
WHAT COUNTS AS A “GLOBAL ULTIMATE” IN LoL?
Before we go champion by champion, it’s helpful to define what we mean by “global”.
Strictly speaking, only a few ultimates can be used from literally any point on
the map and still connect. But for practical gameplay and macro concepts, players usually
put ultimates into three buckets:
-
True global damage skillshots / beams –
abilities that travel through the entire map in a line or affect all champions at once
(for example, Karthus R, Ashe R, Jinx R,
Ezreal R, Senna R). -
True global defensive / utility ultimates –
map-wide heals or damage fields, such as Soraka R and
Gangplank R. -
Semi-global mobility / long-range ultimates –
teleports and huge leaps or artillery spells that don’t cover every inch of the map,
but still reach across multiple lanes (for example, Twisted Fate R,
Shen R, Nocturne R, Pantheon R,
Ziggs R, Lux R, Jhin R, Kled R,
Taliyah R, Tahm Kench R, Rek’Sai R).
In solo queue, these abilities let you influence fights you can’t even see yet:
sniping low-HP enemies, instantly joining skirmishes, or turning losing 2v2s into
winning 3v2s. That’s why global ultimates are staples of coordinated play and remain
popular picks in elo climbing services such as
LoL elo boosting.
The exact numbers (damage, cooldown, range) can change from patch to patch,
especially going into new seasons like 2026. Instead of focusing on raw stats,
this guide focuses on use cases, patterns and macro concepts
that stay useful even if Riot tweaks values later. A detailed legacy stat table
is kept in the Legacy section at the end for reference.
TRUE GLOBAL DAMAGE & SNIPER ULTIMATES
These ultimates can either be fired from anywhere and travel across the whole map,
or they automatically hit every enemy champion at once. They are the purest form
of “global threat” in LoL.

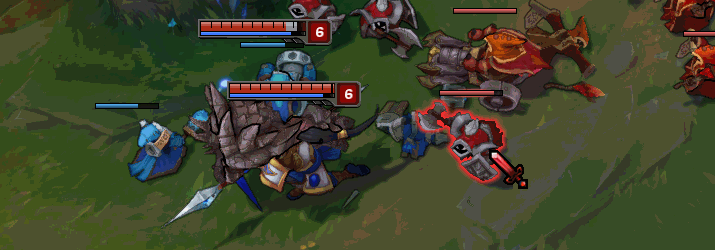
ASHE’S

ENCHANTED CRYSTAL ARROW
Ashe fires a giant icy arrow in a straight line. If it hits an enemy champion,
it deals magic damage and stuns them, with the stun duration increasing with distance.
Enemies around the impact take reduced damage and are slowed.
Why it’s iconic: Ashe’s R is arguably the most famous global skillshot in LoL.
It’s both a pick tool and a teamfight engage. A well-placed arrow
can win a game even if Ashe herself is nowhere near the fight. In coordinated play,
experienced players ping the arrow and count down before it lands so their teammates
can instantly follow up.
Below platinum, many Ashe players use their ultimate reactively:
they fire it after a fight has already started, or use it just to peel for themselves.
That’s safe, but it doesn’t unlock the full power of the spell. To really abuse
Enchanted Crystal Arrow:
- Look for enemies walking alone through mid or jungle, and fire from fog of war.
- Arrow a low-HP target recalling under inner or inhibitor turret to finish them.
- Chain it with allied CC: for example, Ashe R into Leona E+Q, or Ashe R into
Amumu R for a guaranteed wombo combo. - Use it to start objectives – catch the enemy jungler while your team takes Baron or Dragon.
Because the cooldown is not insanely long at later ranks, you should treat Ashe R
as a
rather than a once-per-game panic button. If you’re serious about climbing as Ashe,
consider duoing with an engage support or jungler via
Boosteria duoboost
so you can practice set plays consistently.

DRAVEN’S

WHIRLING DEATH
Draven hurls two spinning axes that travel across the map, damaging all enemies hit.
At the edge of the map, on reactivation, or when they collide with a champion,
the axes reverse direction and return to Draven, dealing damage again.
Damage is reduced per target hit and then resets when the axes turn around.
Gameplay profile: Whirling Death is a global execute that also contributes solid
AoE damage in teamfights. The spell is strongest when:
- You use it to finish off fleeing targets with low HP.
- You line it through multiple enemies so both outgoing and returning axes hit.
- You combine it with armor penetration items and crit for massive physical damage.
It’s tricky to consistently land both hits in messy fights. In macro terms, Draven R is:
- A global finisher after mid-lane skirmishes, even while Draven is farming bot.
- A wave-clear tool to thin out a massive minion wave from afar.
- An occasional follow-up on CC from allies like Ashe, Lux or Morgana.
The key decision: Do you throw R for damage in a teamfight, or hold it as
a cross-map execution tool? In solo queue, where people recall with 200 HP all the time,
using it as a finisher often wins more games than trying to min-max teamfight damage.

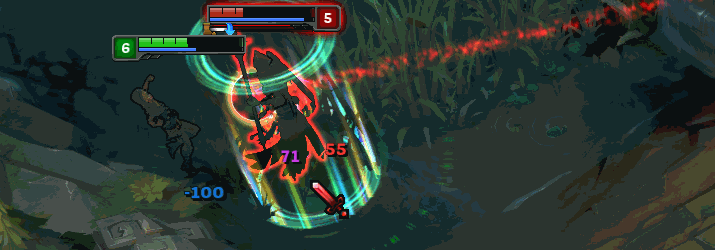
EZREAL’S

TRUESHOT BARRAGE
After a short cast time, Ezreal fires a wide beam that crosses the entire map,
damaging all enemies hit. The damage is reduced for each target it passes through,
making positioning and timing important.
Why Trueshot Barrage is so flexible:
- Wave control: Clear stacked side waves when you can’t safely move there.
- Objective fights: Hit multiple enemies clumped on Dragon or Baron.
- Lane pressure: Snipe the enemy bot lane if they recall low HP under turret.
- CS & XP efficiency: Stay mid and farm two lanes at once with careful timing.
Because Trueshot Barrage deals magic damage but scales with both AD and AP,
it’s particularly painful in early skirmishes where enemies have almost no magic resistance.
In solo queue, one of the fastest ways to improve your Ezreal is to practise
predictive ult angles: firing where the enemy will be in 1–2 seconds,
not where they stand now.
The classic trick: when a fight starts in top river, immediately shove mid, then fire R
a bit behind the enemy team so they walk into it as they retreat. This lets you
contribute to fights even when you can’t leave your lane.

JINX’S

SUPER MEGA DEATH ROCKET!
Jinx fires a rocket that explodes on the first enemy champion hit, dealing damage
based on base values and a percentage of the target’s missing health. Surrounding
enemies take slightly less damage.
Key idea: this ultimate is a global execute, not just a poke tool.
It deals more damage to targets who are already low, which synergises perfectly with
Jinx’s passive – if she gets a reset and a movement speed burst, she can chase
the rest of the enemy team down.
Practical Jinx R tips:
- Look at fights on the minimap – if you see an enemy fleeing with a sliver of health,
fire instantly. - When aiming cross-map, imagine where the enemy has to run (toward tower, or toward
jungle). Fire slightly in front of that path. - In lane, you can combo with support CC (e.g., Jinx R following a Thresh hook).
- Remember that rockets can be used defensively to discourage dives or finish off a jungler
contesting Dragon.
The cooldown gets very low at rank 3, so in late game teamfights you should use R
aggressively. Even if you miss, it will be back up for the next fight soon.

KARTHUS’S

REQUIEM
After a channel, Karthus deals magic damage to all enemy champions on the map.
If Karthus is already dead and in his passive form, Requiem still goes off.
Requiem is one of the most hated and loved ultimates in the game. It turns every
skirmish into a global coin flip: even if Karthus is farming mid,
he can press R and instantly influence both side lanes.
Common high-impact uses:
- Finishing off multiple low-HP enemies after a teamfight.
- Sniping carries who survive with a sliver of health and think they’re safe.
- Forcing the enemy team to invest in magic resist or stopwatches.
In solo queue, Karthus mains get the most value by:
- Tracking enemy summoners – if no one has Stopwatch/Zhonya’s, you can confidently
ult in the middle of fights. - Using Requiem while dead, after you’ve already dumped your damage, to maximise total DPS.
- Pressing R during objective fights – Dragon or Baron, when enemies are clumped
and can’t easily dodge or step away.
Karthus is weak early and requires good Q accuracy and positioning, which makes him
harder to pick up for new players. If you want to add him to your champion pool,
duoing with a jungler who understands how to protect Karthus (or even using
coaching)
can dramatically speed up the learning curve.

SENNA’S

DAWNING SHADOW
Senna fires a global beam that shields allies it passes through and damages enemies
in a wide area at the centre.
Dawning Shadow is a hybrid global – it’s both defensive and offensive:
- Shield allies in a distant fight to keep them alive for one more rotation of spells.
- Finish low-HP enemies caught in the centre of the beam.
- Provide vision in a line, briefly revealing parts of the map the beam passes through.
As a Senna player, you should constantly look at the minimap and be ready to ult
even when you’re recalling or walking from base. The spell comes online early and
can swing 2v2s and 3v3s that happen far away from bot lane.
GLOBAL HEALING & FIELD CONTROL ULTIMATES

SORAKA’S

WISH
Soraka calls upon the stars to heal all allied champions on the map, cleansing
Grievous Wounds first and healing more if they’re low on health.
Wish is the mirror image of Karthus R. Instead of global damage,
you get global healing and anti-burst. It can:
- Turn a lost 2v2 into a winning one by surprising enemies with extra HP.
- Save a splitpushing top laner from a dive while you’re sitting in bot lane.
- Keep your jungler alive during risky invades.
Smart Soraka players watch health bars rather than their own lane only:
- Pre-cast Wish when an ally is about to get hit by a big combo (for example,
before a Zed R or Syndra R goes off). - Hold Wish in early game if a fight is clearly doomed – sometimes it’s better to save
cooldown for the next skirmish instead of healing a lost cause. - Respect the cooldown – Wish is long, so if you use it just to heal a small amount of poke,
you may regret it when a real all-in starts 20 seconds later.

GANGPLANK’S

CANNON BARRAGE
Gangplank calls down a barrage of cannonballs on a target area anywhere on the map,
damaging and slowing enemies over time and granting vision of the zone.
Cannon Barrage is global zone control. Even if it doesn’t kill anyone,
it can:
- Disrupt enemy engages or disengages by slowing their frontline.
- Control choke points around Dragon or Baron entrances.
- Force enemies off turrets or stop a minion wave from crashing.
Gangplank can safely farm with Parrrley while still contributing to fights
on the opposite side of the map. This makes him a natural splitpusher and side lane
menace in coordinated compositions.
Some usage ideas:
- Cast Cannon Barrage behind fleeing enemies so the slow is unavoidable.
- Layer it with allied CC (for example, Jarvan IV’s Cataclysm) to guarantee multiple hits.
- Drop it on stacked caster minions and melees when you need emergency waveclear.
Because Cannon Barrage also gives gold/Serpent bonus interactions in some builds,
high-elo Gangplank players time it not just for damage, but for barrel and passive setup.
SEMI-GLOBAL TELEPORTS & MAP PRESENCE ULTIMATES
These ultimates don’t quite hit everywhere, but their range is huge – often more
than enough to cover any realistic skirmish you care about. They define how splitpush
and cross-map play works in LoL.

SHEN’S

STAND UNITED
Shen shields an allied champion anywhere on the map and, after a short channel,
teleports to their location.
Stand United is the classic global bodyguard spell. Shen can:
- Split push in a side lane while keeping his team safe with R.
- Turn a 2v2 in bot lane into a 3v2 by suddenly arriving with taunt and shield.
- Save a carry from hard engage and immediately counter-engage.
Smart Shen tips:
- Don’t wait for allies to be almost dead – cast R early to absorb meaningful damage.
- Communicate with your jungler: if they want to invade or dive bot, be ready to R in.
- Remember that you leave your lane empty; keep an eye on wave state before ulting away.
Because Shen’s power is so tied to macro decisions, he’s a great pick to learn
map awareness. In high-elo play (and on services such as
Boosteria),
Shen is often used to teach players how to evaluate fights they can’t physically see
yet, only via minimap and pings.

TWISTED FATE’S

DESTINY + GATE
Twisted Fate reveals all enemy champions on the map for a duration. While the spell is active,
he can channel Gate to teleport to a large range around him.
Destiny is both vision and teleport:
- Reveal stealthed champions and hidden pockets of the map before a fight.
- Teleport behind bot lane during their push for easy ganks.
- Join cross-map skirmishes around Herald or Dragon while still farming mid.
TF thrives in coordinated setups:
- Have your jungler hover near a lane; once they show, you press R and join.
- Use Gold Card + Gate to guarantee CC on high-priority targets.
- Pair with champions like Shen, Nocturne, or Galio to create double dive threats.
Even though TF’s raw damage is not absurd compared to some modern burst mages,
his map presence keeps him relevant whenever macro matters.
In elo boosting and pro play, TF is the poster child of “win the game by playing the map,
not by winning lane 1v1”.

NOCTURNE’S

PARANOIA
Nocturne darkens the vision of all enemy champions, removing shared vision and
drastically reducing their sight radius. While Paranoia is active, he can recast
to dash to a single enemy within a large range, dealing damage.
Paranoia is a semi-global engage + denial tool:
- Enemies lose info on where you and your teammates are.
- Backline carries get terrified because they can’t see if Nocturne will jump them.
- Vision-based plays (e.g., Azir shuffles, Janna peels) become much harder to execute.
Nocturne’s ideal use case:
- Farm to level 6 quickly, then chain ganks with R whenever a lane pushes too far.
- Coordinate with mid laners who have follow-up CC or burst.
- Take objectives after using R to force summoners from carries.

PANTHEON’S

GRAND SKYFALL (ARTERY STRIKE VARIANT)
Pantheon channels briefly, then leaps into the air and crashes down at a target
location inside a huge range, dealing damage in an area and slowing enemies.
Pantheon’s R is a classic dive and cross-map gank button:
- Teleport from mid to bot or from base to a side fight.
- Land behind enemies to cut off their escape path.
- Use it to join a splitpushing ally for a surprise 2v2.
The main tradeoff is the cast time – enemies see the circle and have a moment
to walk away. Good Pantheon players:
- R into fog of war or over walls so enemies see it too late.
- Combine R with other CC (e.g., Leona, Nautilus, Jarvan IV) to lock people in place.
- Use it defensively to escape impossible situations by leaping out of danger.
You can also use Pantheon R as a lane swap tool – push a wave,
recall, then instantly appear on the other side of the map with your ultimate,
forcing enemies to guess where you’ll show up next.

REK’SAI’S

VOID RUSH
Rek’Sai’s kit revolves around creating tunnels. Her R allows her to quickly travel
to one of her tunnel entrances after a short channel, becoming untargetable
during the dash.
Void Rush is technically not “global”, but with enough tunnels set around the map
you can effectively appear almost anywhere. It turns Rek’Sai into a
hyper-mobile jungler with:
- Fast resets and returns to farm or fights.
- Unexpected counter-ganks via tunnels set behind lanes.
- Powerful objective control – you can tunnel from Dragon to Baron side quickly.
Good Rek’Sai players treat tunnel placement like a second vision system,
constantly updating routes and making sure there’s always a path from base to
active parts of the map.
TAHM KENCH – ABYSSAL VOYAGE
Tahm Kench channels briefly, then dives into the ground with an ally in his belly
(or alone), reappearing after a short delay at a distant target location.
Abyssal Voyage is a semi-global transport tool:
- Bring your jungler or mid laner into bot lane for a surprise tower dive.
- Roam quickly with your ADC to contests objectives or side waves.
- Escape bad fights by quickly repositioning over walls or out of vision.
Because the channel can be interrupted, Tahm players must choose good angles and timing.
The spell rewards macro-oriented supports who love roaming and enabling their carries.
JHIN – CURTAIN CALL
Jhin sets up and channels, then fires four super-long-range shots in a cone.
The first three slow and deal damage; the fourth shot critically strikes for
massive damage.
Curtain Call combines artillery damage with soft crowd control:
- Slow fleeing enemies so your team can catch up.
- Finish off low-HP targets anywhere in a huge cone.
- Zone the enemy team off choke points while your team takes objectives.
It’s not technically global, but the range covers most realistic fights in mid–late game.
It rewards calm aim and patience: don’t panic fire all four shots at once;
track movements, wait for dodges, and line the fourth shot on the highest-value target.
TALIYAH – WEAVER’S WALL
After a channel, Taliyah summons a long wall of rock that travels in a direction.
She can choose to ride the wall, surf along it, and then jump off at any point.
Weaver’s Wall is a map-shaping tool:
- Split the enemy team in half during a choke-point fight.
- Block off retreat paths or escape routes.
- Join fights quickly by riding the wall across terrain.
High-skill Taliyah players use the wall not just for mobility but for
fight design – forcing enemies to choose bad positions or risk
being isolated and picked off.
KLED – CHAAAAAAAARGE!!!
Kled and Skaarl charge toward a distant location, gaining increasing movement speed
and a growing shield. Allies in the path gain a speed boost, and Kled rams into
the first enemy champion hit, dealing damage based on their maximum health.
This ultimate is a long-range engage siren:
- Start fights from very far away, catching enemies who misposition.
- Speed up allies to follow the engage and lock targets down.
- Shock enemies who forgot that Kled can appear from off-screen.
It’s perfect for hard-engage compositions. Use it to punish teams with poor
disengage or immobile carries – nobody expects the Kled (until it’s too late).
LONG-RANGE ARTILLERY ULTIMATES (ALMOST GLOBAL)
A final group of champions don’t have true global range, but their ultimates reach
multi-screen distances – enough to impact fights in nearby lanes
or across large parts of the map.

LUX’S

FINAL SPARK
Lux channels briefly and fires a long-range beam of light that damages all enemies
in its path and procs her passive on them.
Final Spark is one of the most satisfying abilities in the game:
- Snipes: kill low-HP enemies flashing away from a fight.
- Waveclear: instantly delete stacked waves mid or in a side lane.
- Objective fights: hit multiple enemies clumped in the pit.
Lux is frequently picked during
LoL elo boost,
because her combination of CC (Q snare), shielding (W) and long-range burst (E+R)
makes her a great solo queue carry from mid or support.

ZIGGS’

MEGA INFERNO BOMB
Ziggs hurls a massive bomb a huge distance that explodes in a wide area, dealing
heavy damage (and extra damage to minions) with a stronger inner zone.
This is the classic “delete the backline from off-screen” spell:
- Throw it onto grouped enemies in a teamfight.
- Use it to defend towers by clearing waves at long range.
- Drop it on Dragon or Baron to soften the enemy team before they commit.
The further it travels, the longer the delay, so you have to lead your targets
and predict their movement several seconds in advance.
HOW GLOBAL ULTIMATES CHANGE MACRO & RANKED CLIMB
When one or more global/semi-global ultimates are in the game, macro priorities shift.
Whoever uses their global tools more efficiently tends to control the pace of the match.
1. SPLIT PUSHING WITH GLOBAL BACKUP
Champions like Shen, Twisted Fate, Gangplank,
Taliyah, or Kled enable a classic strategy:
one or two side-laners push deep while globals give them backup.
- 1-3-1 setups: TF in mid, Shen top, a strong ADC+support in bot.
If the enemy overcommits to catching a side-laner, globals bring reinforcements. - Side pressure around Baron: send a global champion bot with Teleport or R available.
If the enemy sends more than one person to answer, your team instantly starts Baron.
Global ultimates let your team play more lanes safely, which is
crucial for climbing in mid–high elo where wave management decides games as much
as pure mechanics.
2. OBJECTIVE CONTROL & FOGLIGHT FIGHTS
Dragon and Baron fights are where globals truly shine:
- Cannon Barrage and Mega Inferno Bomb punish teams
tightly grouped in the pit. - Final Spark and Trueshot Barrage can steal objectives
or chunk enemies before they start. - Paranoia shuts down enemy vision, making it harder to contest.
- Wish and Dawning Shadow keep your team healthy
through poke and chip damage.
In games where both sides have globals, Dragon setups often become a mind game of
who’s willing to commit cooldowns first. Burning your ultimate just to poke
might backfire if a real fight starts 20 seconds later and you don’t have it.
3. SOLO QUEUE PATTERNS: FARM & WATCH MINIMAP
Many players struggle with global ultimates simply because they never look away
from their own lane. To use them properly:
- After every wave, glance at side lanes for gank or snipe opportunities.
- Listen for audio cues and watch health bars in the top-right scoreboard.
- Learn common recall timings – many kills happen on enemies backing
under tower after a trade.
If you want to accelerate this learning, playing a duo with someone experienced
– for example via Boosteria duo queue –
lets them ping you when it’s a perfect time to press R, helping you build those instincts.
PLAYING AGAINST GLOBAL ULTIMATES
Counterplay is just as important as abusing globals yourself. Here are timeless rules
that still apply in 2026 and will likely stay relevant for many seasons.
- Track cooldowns: when Karthus, Shen, TF or Nocturne use R,
type or ping the cooldown. Play aggressively while it’s down. - Respect fog of war: if the enemy has semi-global R (TF, Nocturne,
Pantheon, Kled), don’t push deep without vision. - Buy appropriate items: Zhonya’s, Banshee’s Veil, Edge of Night and
stopwatch effects are great vs Requiem, Trueshot Barrage and other burst ultimates. - Position for minimised impact: don’t stack in tight corners vs Ziggs,
Gangplank, or Lux; avoid straight lines vs Jhin and Senna.
Remember: a global ultimate is only scary when combined with bad habits
– overextending, greed recalls, face-checking without vision. Clean up those habits
and globals turn from game-ending threats into manageable tools you can play around.
GLOBAL ULTIMATES IN OTHER GAMES (OVERWATCH EXAMPLE)
The concept of “global impact” isn’t unique to LoL. Other team titles – including
Overwatch – also experiment with map-wide ultimates, long-range snipes and
off-screen engages. The difference is that in Overwatch, the battlefield is smaller
and more compact, so even “local” abilities can feel global.
If you enjoy the idea of:
- Saving teammates from far away,
- Dropping massive AoE damage on clustered enemies,
- Or turning fights instantly with a single well-timed button press,
you’ll probably like heroes with fight-warping ultimates there as well. And if you
want to push your Overwatch rank in a similar way you climb in LoL, you can look at
Overwatch boosting prices
on Boosteria to see how high-elo teammates can help you understand teamfight tempo
and ultimate economy.
Understanding global and semi-global pressure in one title often makes you better
at reading maps and predicting fights in another – knowledge transfers surprisingly well.
LEGACY STAT TABLES & OLD PATCH DETAILS (PRE-2024)
This section collects older numeric values for the ultimates listed above.
Because Riot regularly adjusts damage, cooldowns and ranges, treat these numbers as
historical reference only. For live data in 2026 and beyond, always
check in-client tooltips or official patch notes on the
LoL site.
ASHE – ENCHANTED CRYSTAL ARROW (LEGACY VALUES)
- Magic damage: 200 / 400 / 600 (+ 100% AP)
- Splash damage: 100 / 200 / 300 (+ 50% AP)
- Cooldown: 100 / 90 / 80 seconds
DRAVEN – WHIRLING DEATH (LEGACY VALUES)
- Physical damage (one hit): 175 / 275 / 375 (+ 110% bonus AD)
- Maximum physical damage (two hits): 350 / 550 / 750 (+ 220% bonus AD)
- Minimum physical damage (one hit): 70 / 110 / 150 (+ 44% bonus AD)
- Minimum physical damage (two hits): 140 / 220 / 300 (+ 88% bonus AD)
- Cooldown: 120 / 100 / 80 seconds
EZREAL – TRUESHOT BARRAGE (LEGACY VALUES)
- Magic damage: 350 / 500 / 650 (+ 100% bonus AD) (+ 90% AP)
- Minimum magic damage: 105 / 150 / 195 (+ 30% bonus AD) (+ 27% AP)
- Cooldown: 120 seconds
GANGPLANK – CANNON BARRAGE (LEGACY VALUES)
- Magic damage per second: 35 / 60 / 85 (+ 10% AP)
- Max magic damage: 420 / 720 / 1020 (+ 120% AP)
- Cooldown: 180 / 160 / 140 seconds
JINX – SUPER MEGA DEATH ROCKET! (LEGACY VALUES)
- Minimum physical damage: 25 / 35 / 45 (+ 15% bonus AD) + (25 / 30 / 35% of enemies’ missing health)
- Minimum secondary damage: 20 / 28 / 36 (+ 12% bonus AD) + (20 / 24 / 28% of enemies’ missing health)
- Cooldown: 90 / 75 / 60 seconds
KARTHUS – REQUIEM (LEGACY VALUES)
- Magic damage: 250 / 400 / 550 (+ 60% AP)
- Cooldown: 200 / 180 / 160 seconds
REK’SAI – VOID RUSH (LEGACY VALUES)
- Physical damage: 100 / 250 / 400 (+ 185% bonus AD) + 20 / 25 / 30% of target’s missing health
- Cooldown: 100 / 80 / 60 seconds
SHEN – STAND UNITED (LEGACY VALUES)
- Shield: 175 / 350 / 525 (+ 130% AP)
- Cooldown: 180 / 150 / 120 seconds
SORAKA – WISH (LEGACY VALUES)
- Heal: 150 / 250 / 350 (+ 55% AP)
- Increased heal (below 40% HP): 225 / 375 / 525 (+ 82.5% AP)
- Cooldown: 160 / 145 / 130 seconds
LUX – FINAL SPARK (LEGACY VALUES)
- Range: ~3340 units
- Magic damage: 300 / 400 / 500 (+ 75% AP)
- Cooldown: 80 / 65 / 50 seconds
NOCTURNE – PARANOIA (LEGACY VALUES)
- Dash range: 2500 / 3250 / 4000
- Physical damage: 150 / 250 / 350 (+ 120% bonus AD)
- Cooldown: 150 / 125 / 100 seconds
PANTHEON – GRAND SKYFALL (LEGACY VALUES)
- Range: 5500
- Magic damage: 400 / 700 / 1000 (+ 100% AP)
- Minimum magic damage: 200 / 350 / 500 (+ 50% AP)
- Cooldown: 150 / 135 / 120 seconds
TAHM KENCH – ABYSSAL VOYAGE (LEGACY VALUES)
- Range: 4500 / 5500 / 6500
- Cooldown: 120 / 110 / 100 seconds
JHIN – CURTAIN CALL (LEGACY VALUES)
- Range: 3500
- Angle: 75°
- Cooldown: 120 / 105 / 90 seconds
- Non-final shot damage: 50 / 115 / 180 (+ 20% bonus AD)
- Fourth shot damage: 100 / 250 / 400 (+ 50% bonus AD) – always crits
TALIYAH – WEAVER’S WALL (LEGACY VALUES)
- Range: 3000 / 4500 / 6000
- Duration: 6 / 7 / 8 seconds
- Cooldown: 180 / 150 / 120 seconds
KLED – CHAAAAAAAARGE!!! (LEGACY VALUES)
- Range: 3500 / 4000 / 4500
- Maximum shield: 200 / 300 / 400 (+ 300% bonus AD)
- Damage: 12 / 15 / 18% of target’s max health (+ 12% per 100 bonus AD)
- Cooldown: 160 / 140 / 120 seconds
RELATED GUIDES & USEFUL LINKS
You may be interested in the following content we provide:


